Tags are simple yet powerful for categorizing and filtering your email campaigns and accounts. They are essentially keywords or labels that help you easily identify specific emails. Here's a guide on how to create and use tags effectively.
You can create tags in two ways:
Log in to your account.
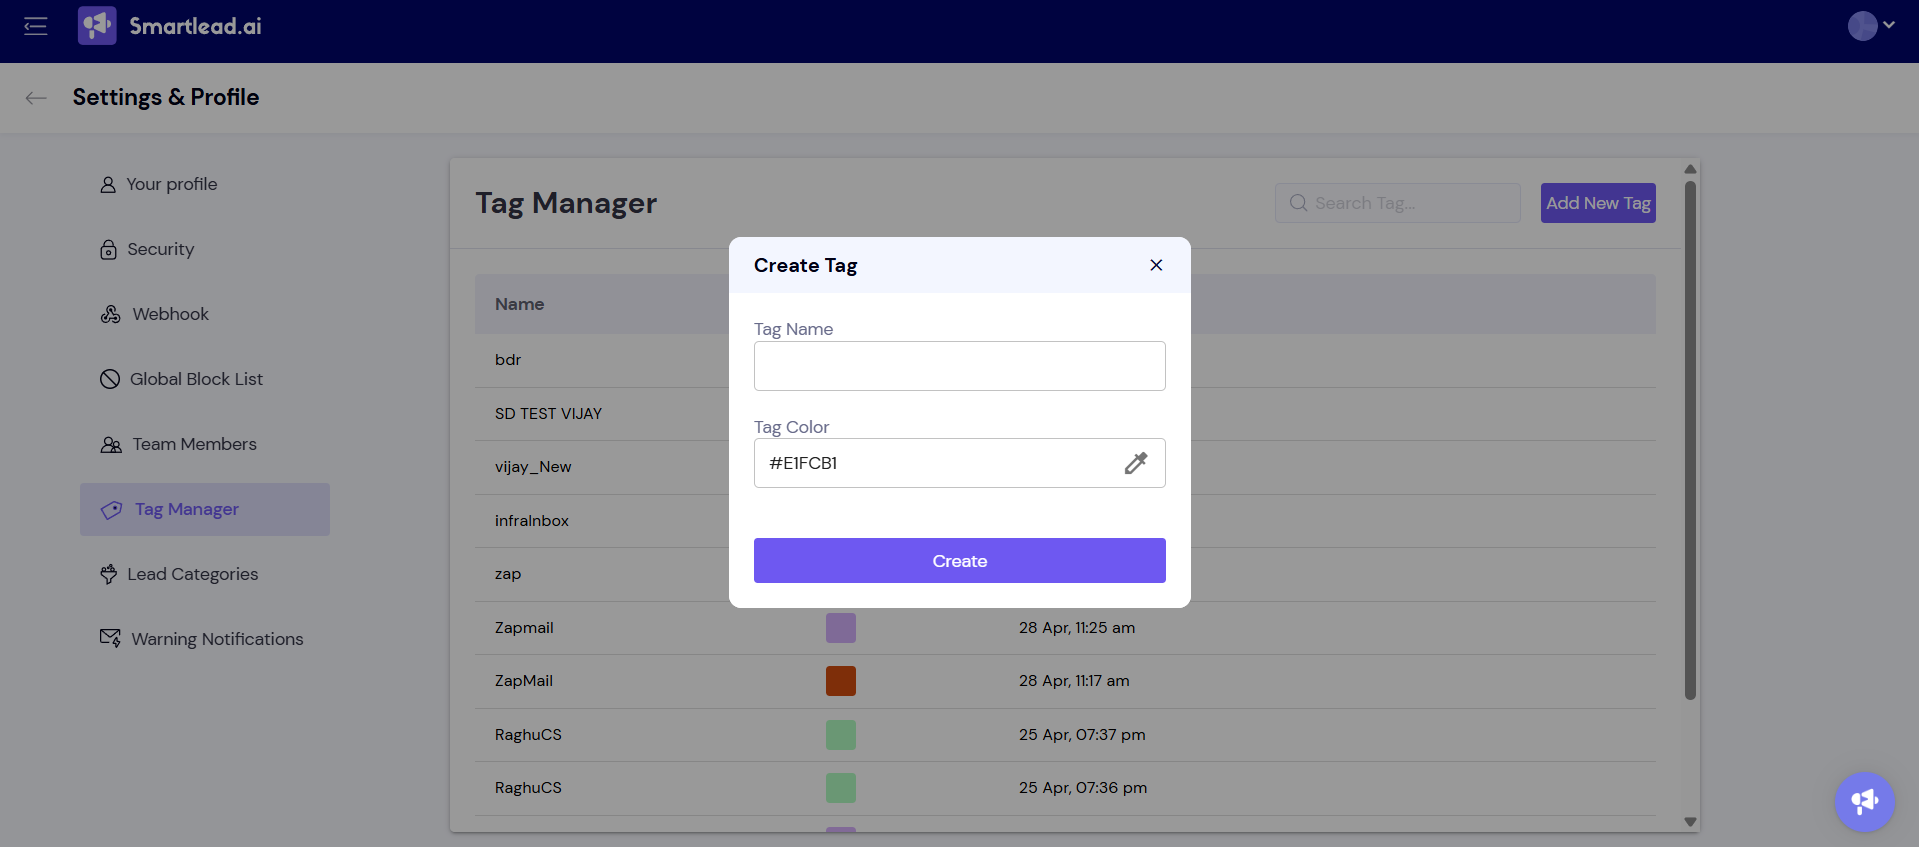
Navigate to Settings > Tag Manager.
Click on "Add New Tag."
You can choose the tag name and tag color as per your preference.
Click on "Create."
Refer to the screenshot:
Note: You can edit or delete the tags as per your preference. Just hover over the tag you want to edit and you can see edit and delete button right next to it.
You can also add tags directly to your email campaigns and accounts. Here's how to do that.
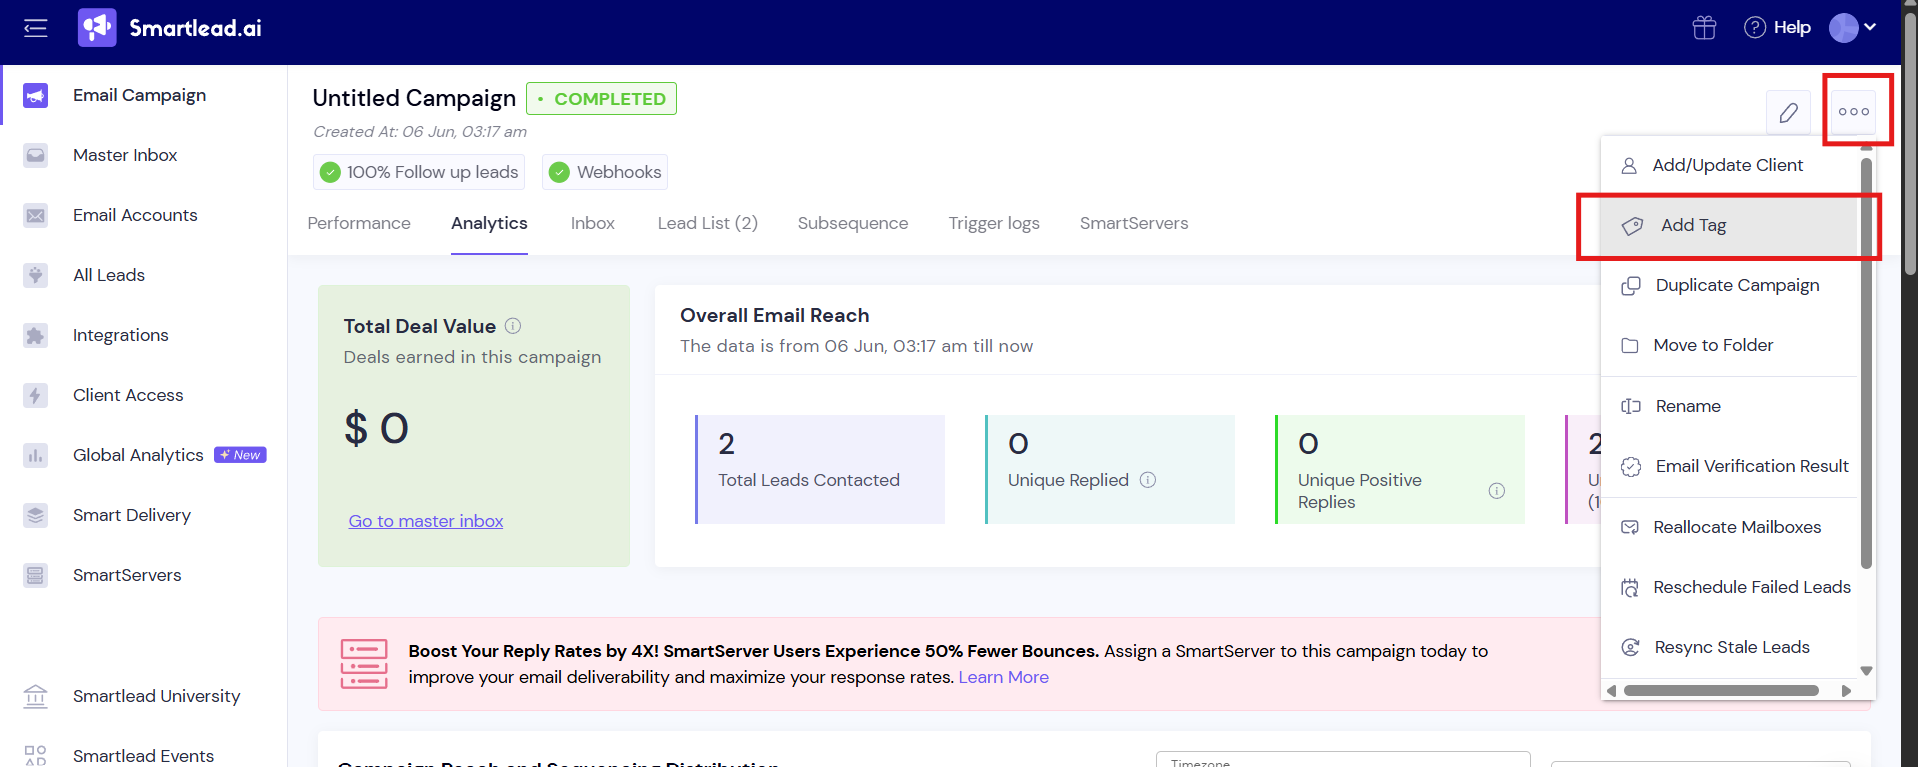
From your main dashboard, go to the "Email Campaign" tab.
Choose the campaign that you want to add a tag to.
Click on the three dots which are present at the extreme right of the email campaign.
Click on "Add Tag."
Type in the Tag Name and click on "Add New Tag."
Click on "Save."
Refer to the screenshot:
Navigate to the "Email Accounts" tab.
Scroll to the extreme right of the email account where you want to add a tag.
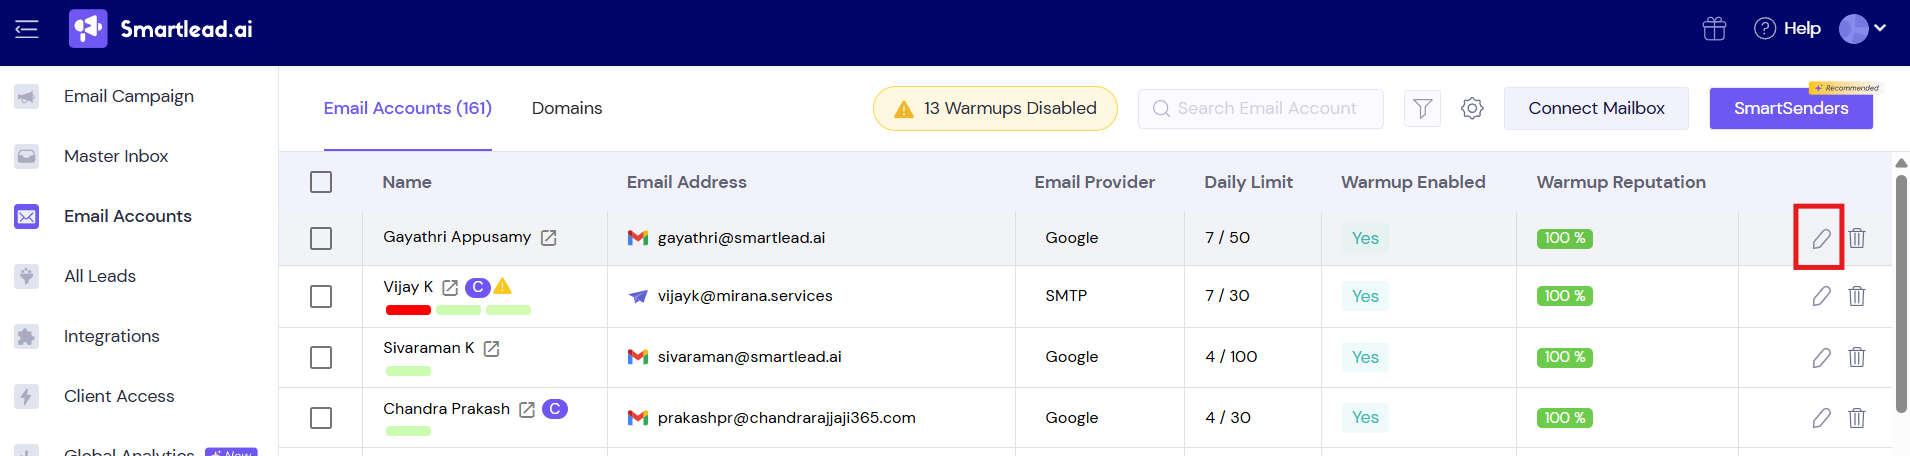
Click on "Edit," then go to "Management."
Type in the tag name in the "Add Tag" section.
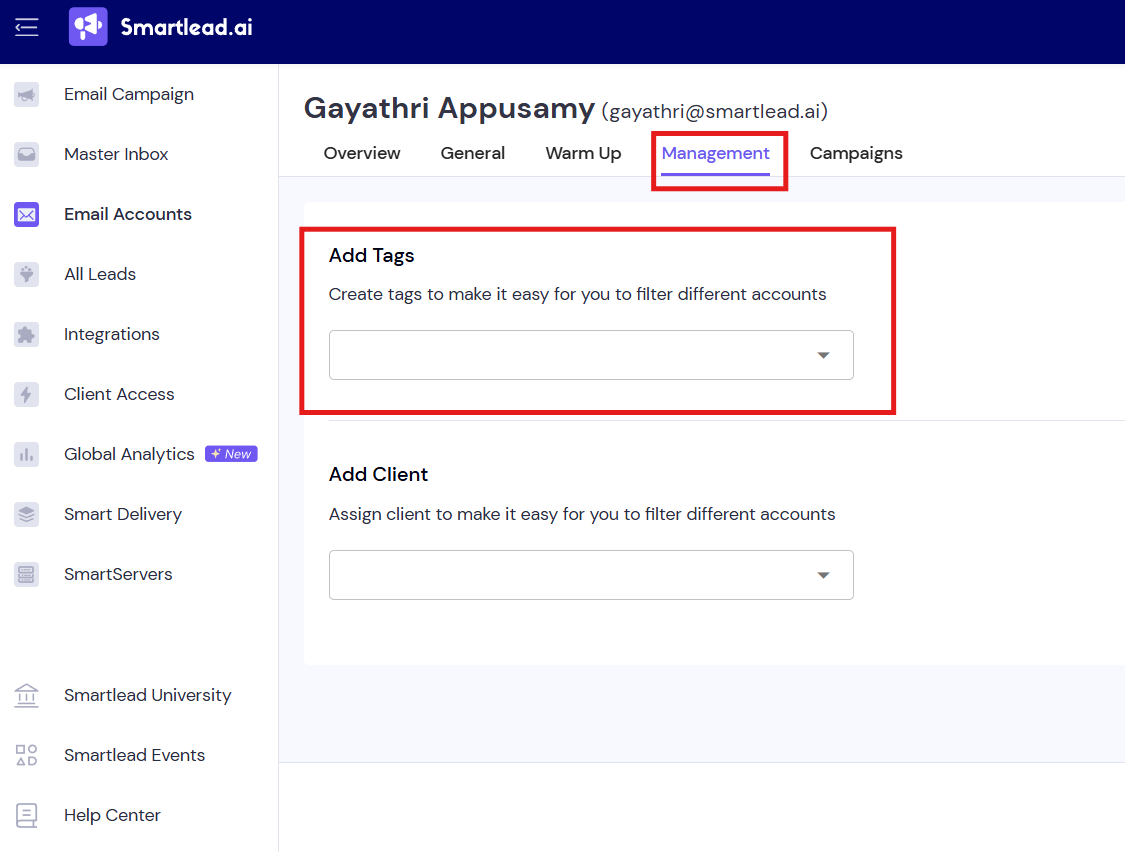
Click on "Save" on the bottom right corner of the screen.
Tip: By utilizing tags, you can better organize your email campaigns and accounts.
