Views is an easier way to manage your Master Inbox effectively where you can Apply and Save filters to efficiently organize and manage your inbox.
With Views, you can set up multiple filters, including predefined ones, to tailor your inbox to your specific needs.
Log into your Smartlead account and select “Master Inbox” from the main menu.
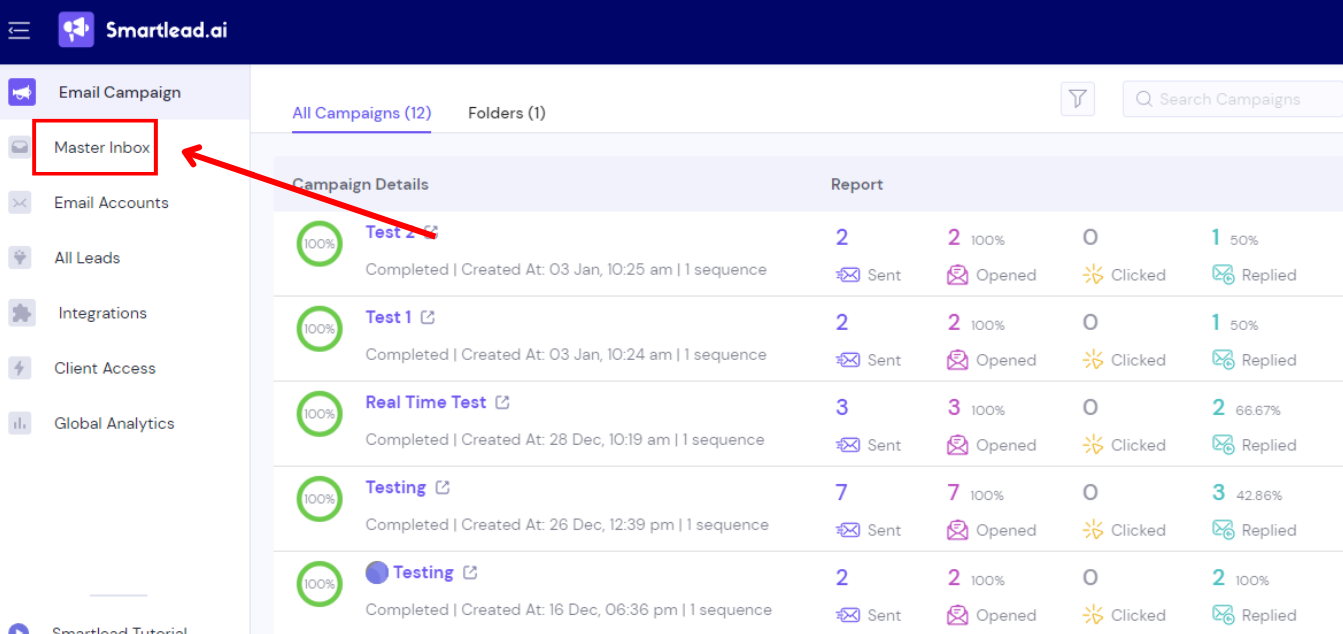
In the Master Inbox, locate the VIEW option below "Archived" on the left panel.

The “VIEW” button at the bottom of the menu in the master inbox will help you manage the master inbox very effectively. Using the “VIEW” button, you can apply a combination of filters and save them for future usage.
Click the “VIEW” button at the bottom of the left menu in your Master Inbox to start managing your emails more effectively.
Apply a combination of filters and save them for quick access in the future.
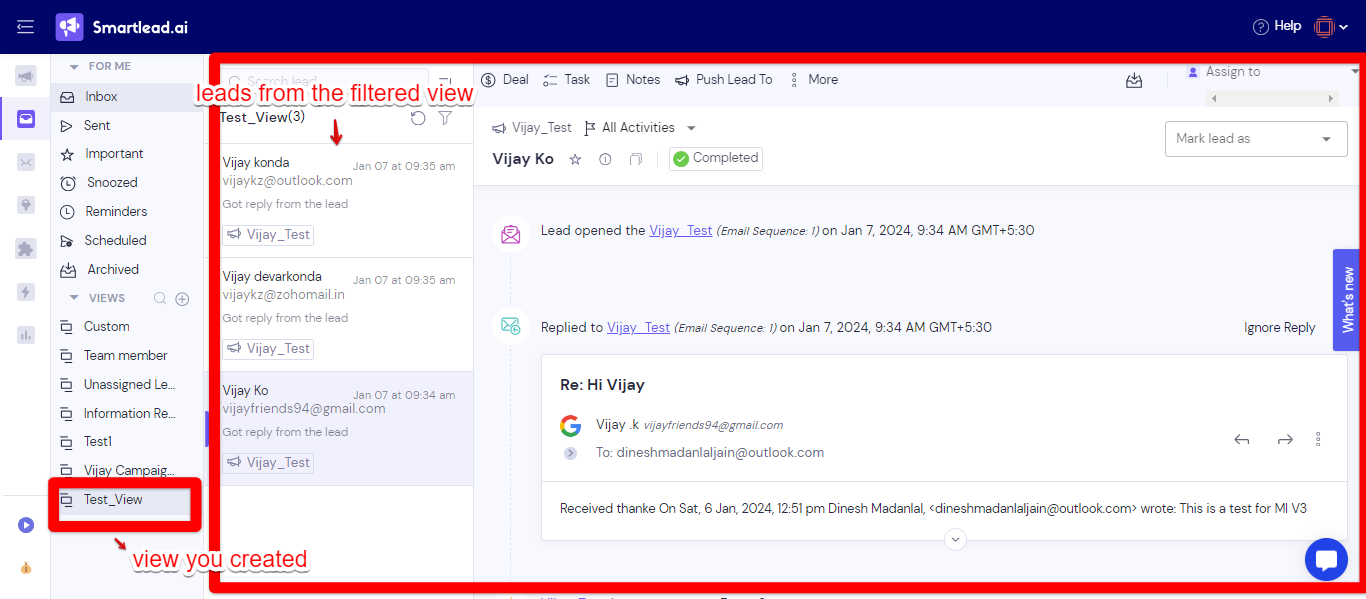
In the example screenshot, you'll see saved views with different filters like Custom, Team member, and Unassigned leads you can create similar filters and utilize the views feature to manage your Inbox effectively.

These filters are particularly useful for sorting leads by categories or specific email campaigns. For example, to track replies from a certain client's campaign, use the VIEW option to create and save a filter. Later, you can easily access these replies under the saved view.
In the accompanying screenshot, selecting the “unassigned leads” filter under VIEW showcases the filtered results in the middle section, marked by a red rectangle.

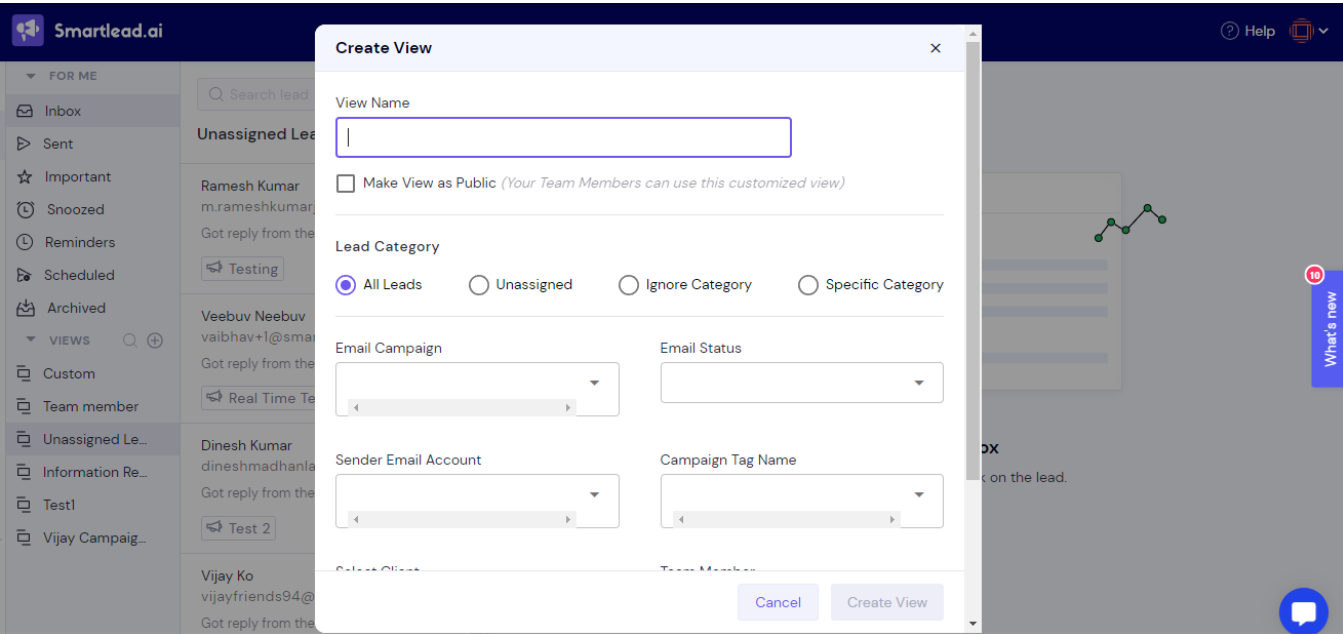
Click the "+" sign near the VIEW option to begin.

A pop-up will appear, offering various filter options, including Lead Category, Email Campaign, Email Status, Sender Email Account, Campaign Tag Name, Select Client, Team Member, and Reply Date Range.
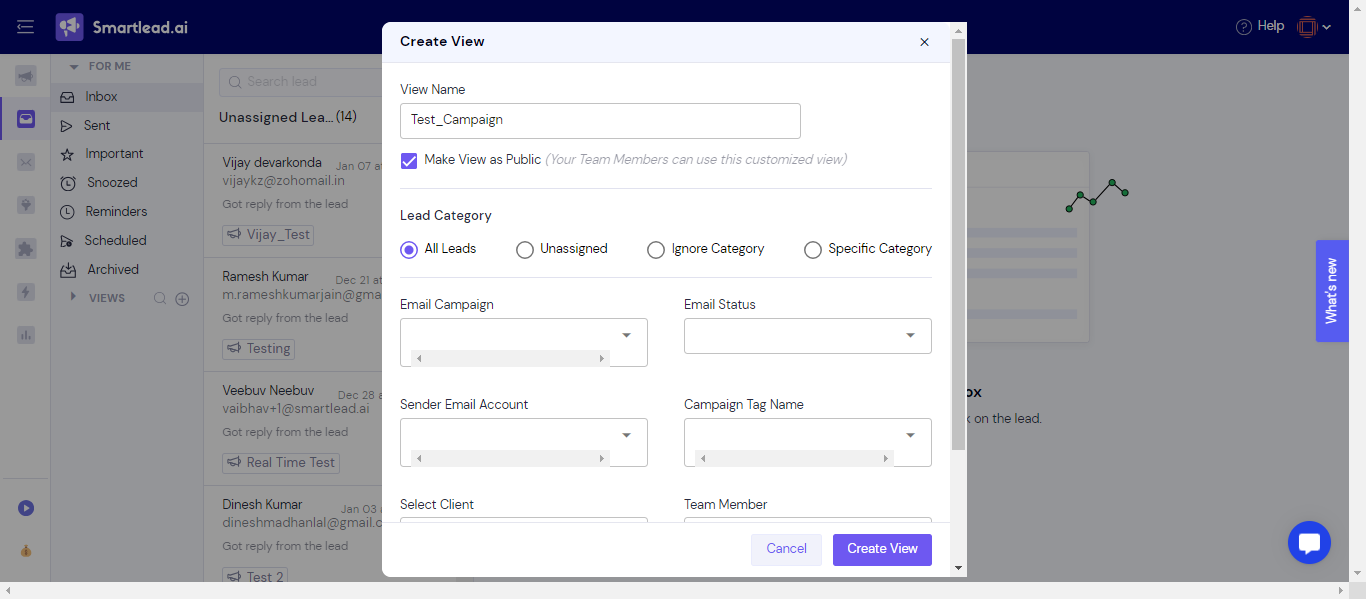
Choose your desired filters and name your view for easy identification and recall, like Custom, Team member, or Unassigned leads.
You can refine your filter further by selecting specific lead categories, email statuses, client names, team members, or even reply date ranges.
Optionally, tick “Make View as Public” if you wish to share the view with your team.
You can refine your filter further by selecting specific lead categories, email statuses, client names, team members, or even reply date ranges.
After configuring your filter, click “create view” to finalize.
The final view will look something like the screenshot below:
Note: The number of views you can create varies by plan - up to 3 views for Base and Popular plans and unlimited views for the Pro plan.
