The sidebar in Master Inbox provides a familiar interface, including categories like Inbox, Sent, Important, Snoozed, Reminders, Scheduled, and Archived. This layout enhances navigation and organization within your inbox.
To explore the sidebar, log in to the Smartlead app with your credentials.
Select “Master Inbox” from the primary menu on the left side of your screen.
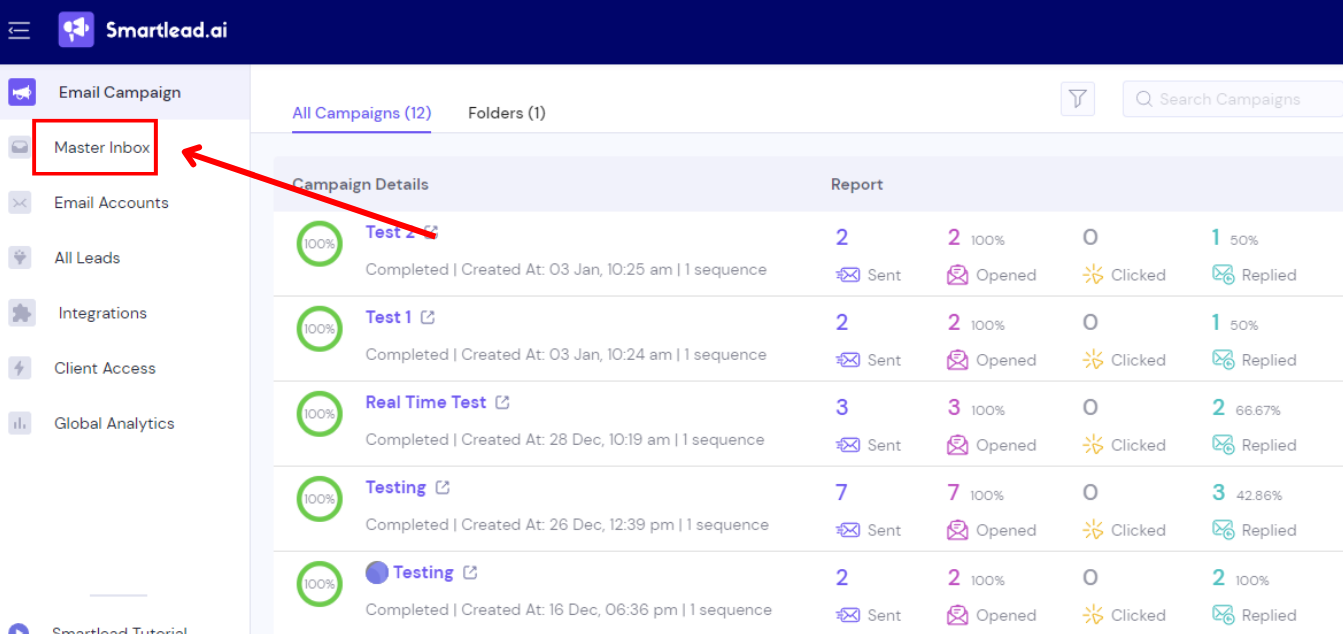
Upon clicking “Master Inbox,” you'll be directed to the default Inbox tab.
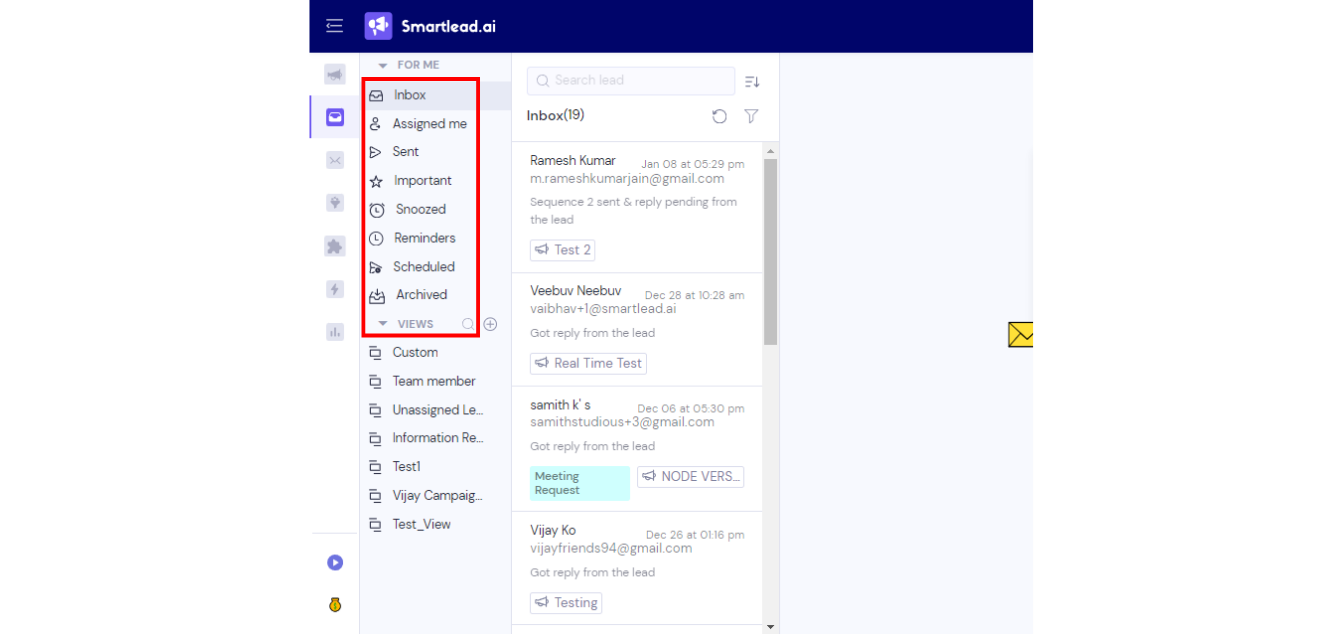
The sidebar or the left panel consists of the menu of the master inbox:
Inbox
Assigned me
Sent
Important
Snoozed
Reminders
Scheduled
Archived
You click on any of the tabs on the sidebar and see the fetched leads in the middle section of the page, as shown below.
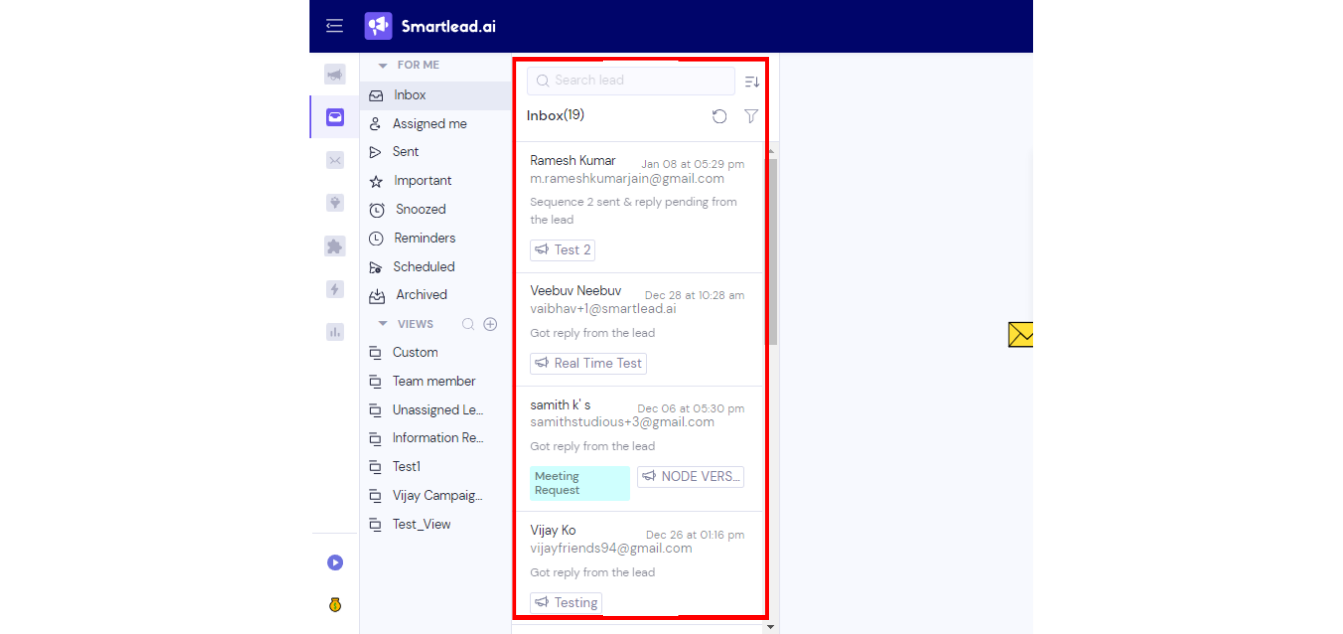
The “Inbox” tab on the sidebar will fetch all the leads that have replied to sent campaigns. If you want to fetch all the new lead replies, refresh the page to retrigger the Smartlead algorithm to fetch new real-time replies.
The “Assigned me” tab will display all the lead actions and activities that were assigned to you in the middle section.
The “Sent” tab will fetch all the leads you have sent emails to from campaigns.
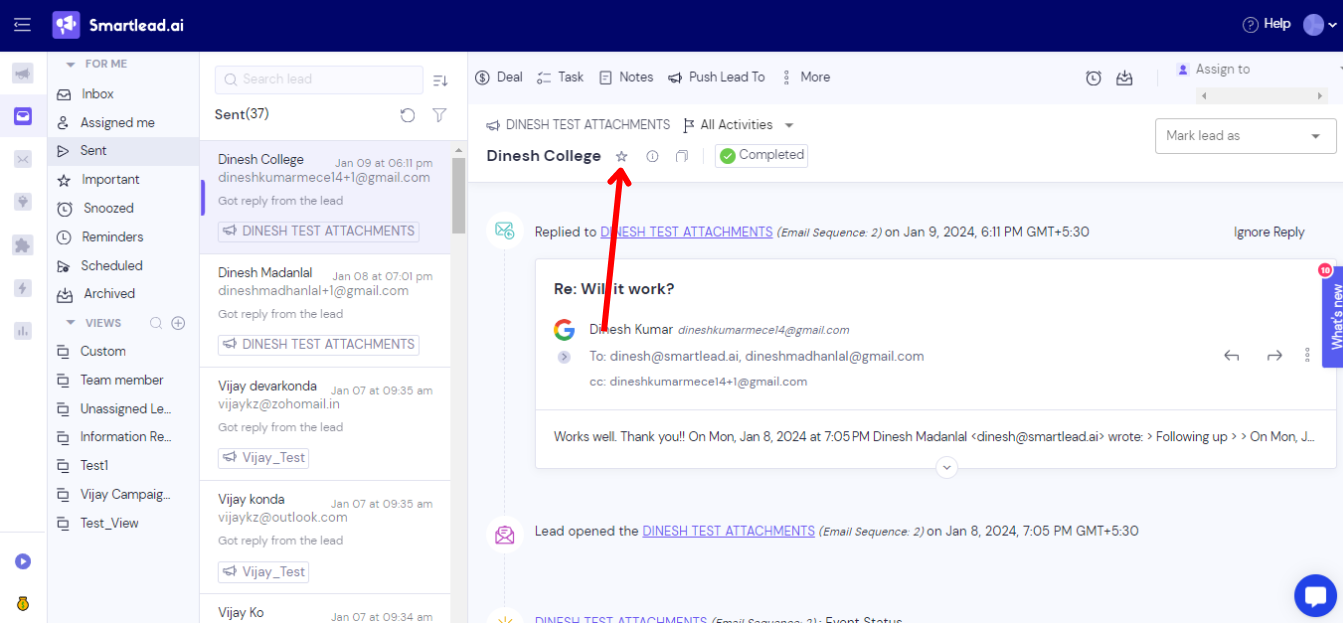
To mark a lead important, go to any lead. Click on the star symbol next to the lead’s name, as shown in the image below.
The “Snoozed” tab will fetch all the leads that you snoozed. If you snooze a lead, you will stop receiving notifications on receiving any replies from them. The newly received reply won’t show up in your inbox. But when the snoozed time is up, the new replies will automatically show up in the inbox.
To snooze a lead, open the conversation with the lead. Next, click on the “alarm clock” symbol on the top left of the page, as shown below.

This action will automatically bring a pop-up box to your screen like the one shown below.

You have several timing options to snooze the lead. If the options don’t align with your time preference, you can also set a custom date & time.
Next, click on the “Snooze Lead” button at the bottom right of the pop-up box.
This is how you can snooze a lead. You can use this feature to postpone responding to a lead when you’re busy. The automatic un-snooze might delay a max of 5 to 10 minutes.
The “Reminder” tab will fetch all the emails that you have set reminder. Please note that you can set reminders only when you’re answering email replies. You can’t set reminders on a lead.
To set a reminder, click on the left arrow under an email reply.
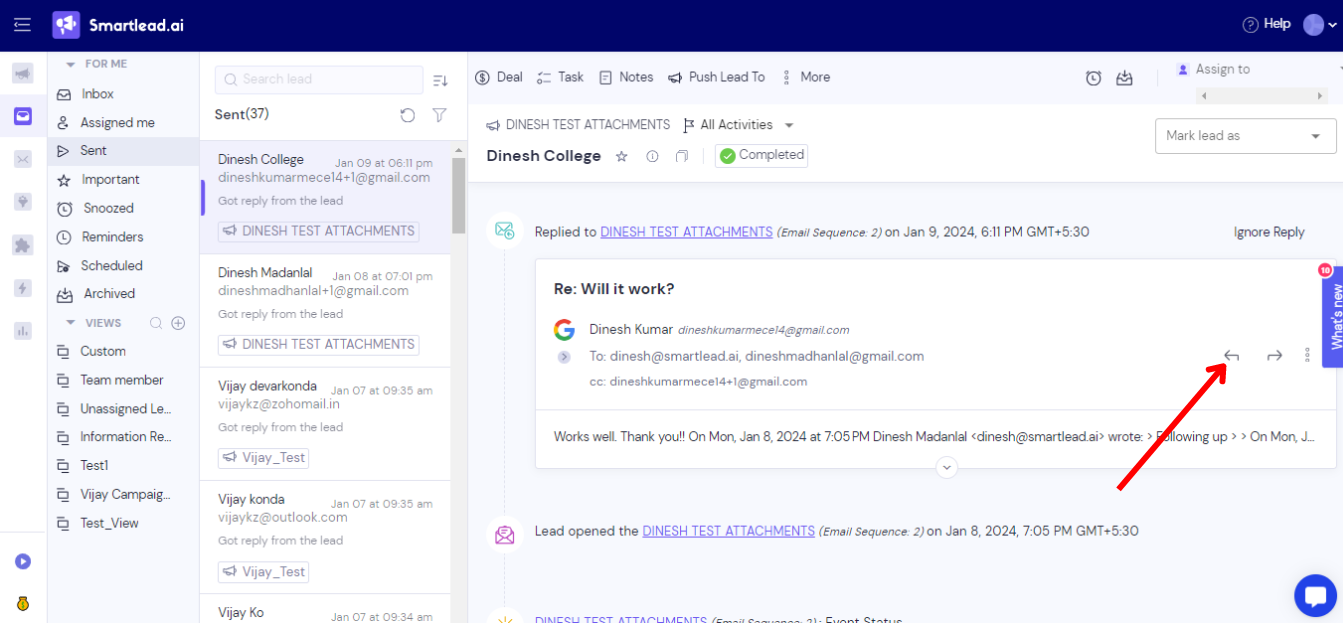
On clicking the arrow, there will be a dialog box on your screen. Write the email body in the dialog box.
Once you’re done, go to the “Set Reminder” button down on the dialog box.
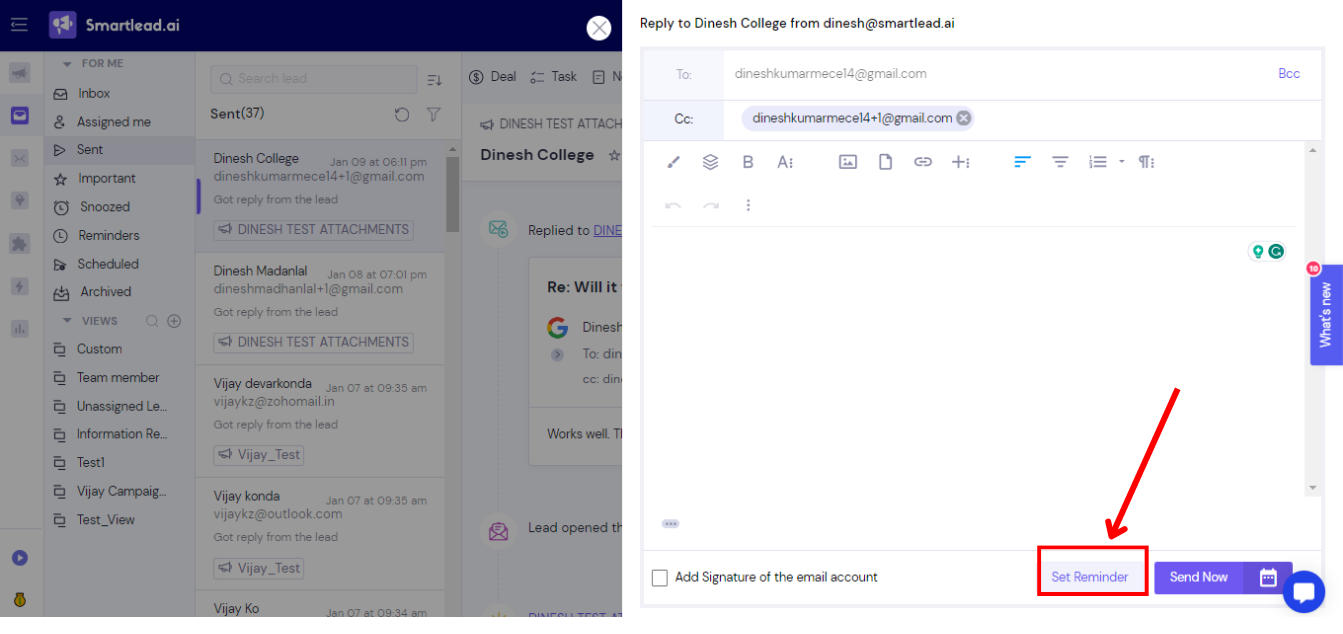
On clicking on the “Set Reminder” button, a pop-up box will appear on your screen, as shown below.

There are several “Remind Me After” timing options. You can also set a custom date and time if the default options don’t align with your preference.
In the “Reminder Note” box, you can add a little description for yourself.
Next, click on the “Create Reminder” button at the bottom left of the pop-up box. That’s it. This is how you can create reminders, and it will show up when you click on the “Reminder” tab on the sidebar of the master inbox.
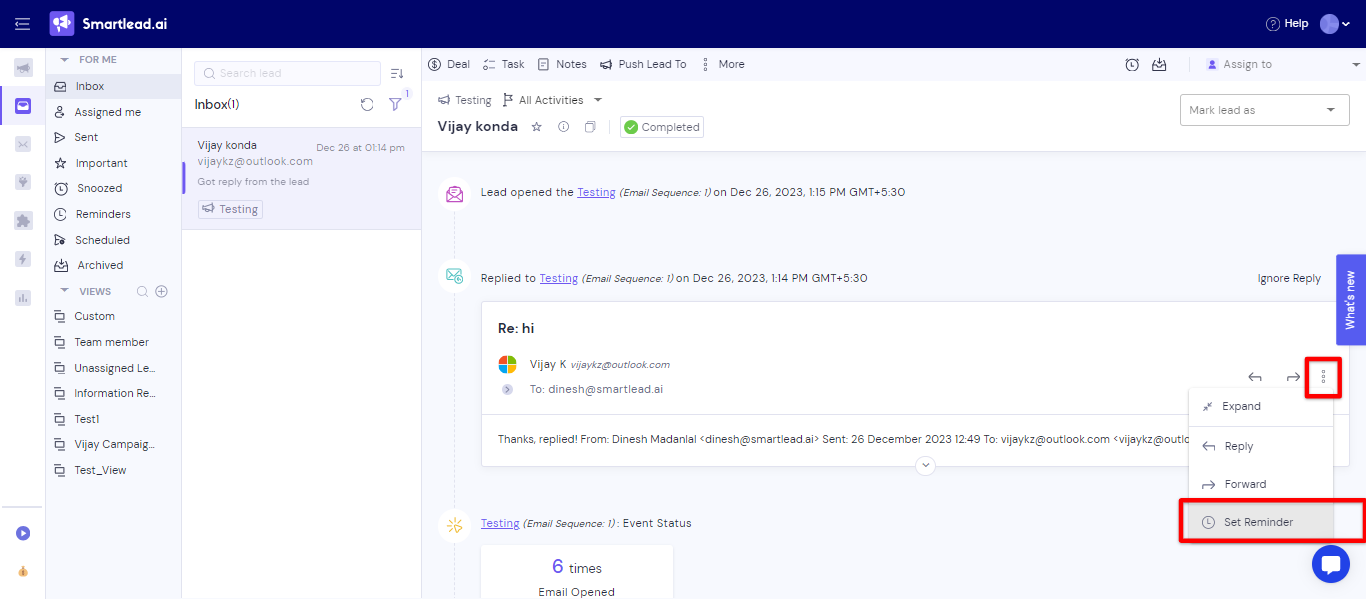
For an easier way, you can also set a reminder by just selecting the lead and clicking on the three dots in the lead's reply as shown in the screenshot below.
The “Scheduled” tab will fetch all the emails that you’ve scheduled to be sent at a particular time.
To schedule an email, click on the left arrow under an email reply.
On clicking the arrow, there will be a dialog box on your screen. Write the email body in the dialog box.
Once you’re done, go to the “calendar symbol” button at the down right corner of the dialog box.
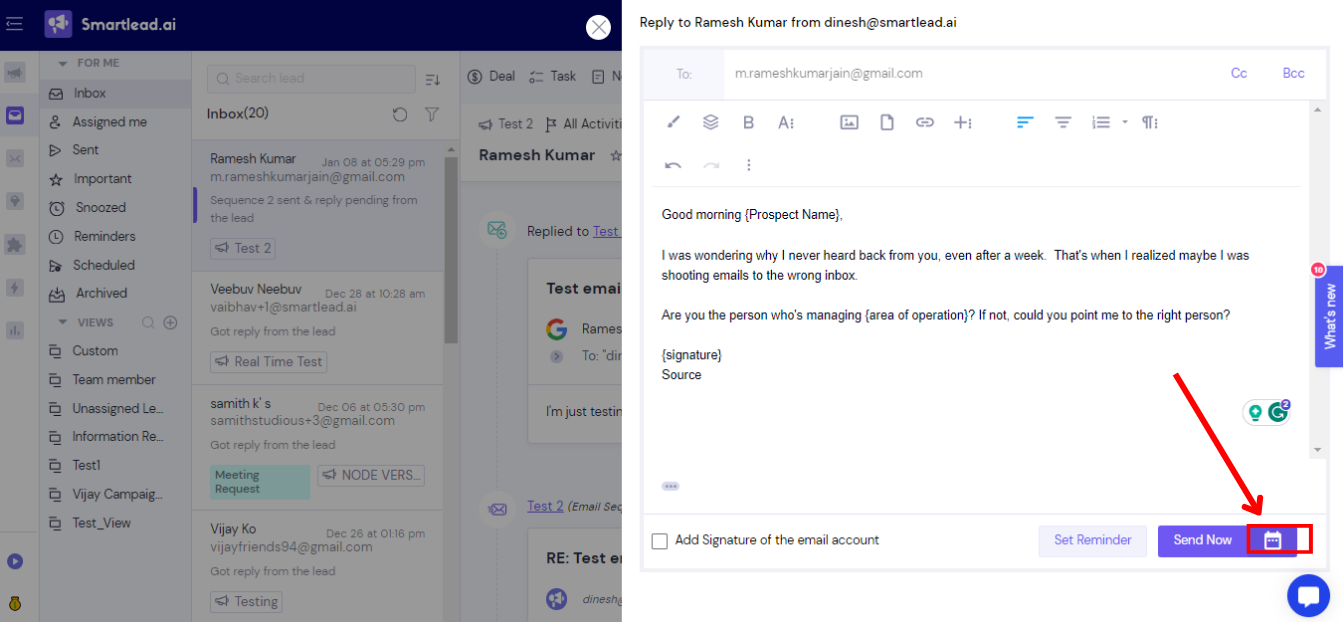
On clicking on the calendar symbol button, a pop-up box will appear on your screen, as shown below.
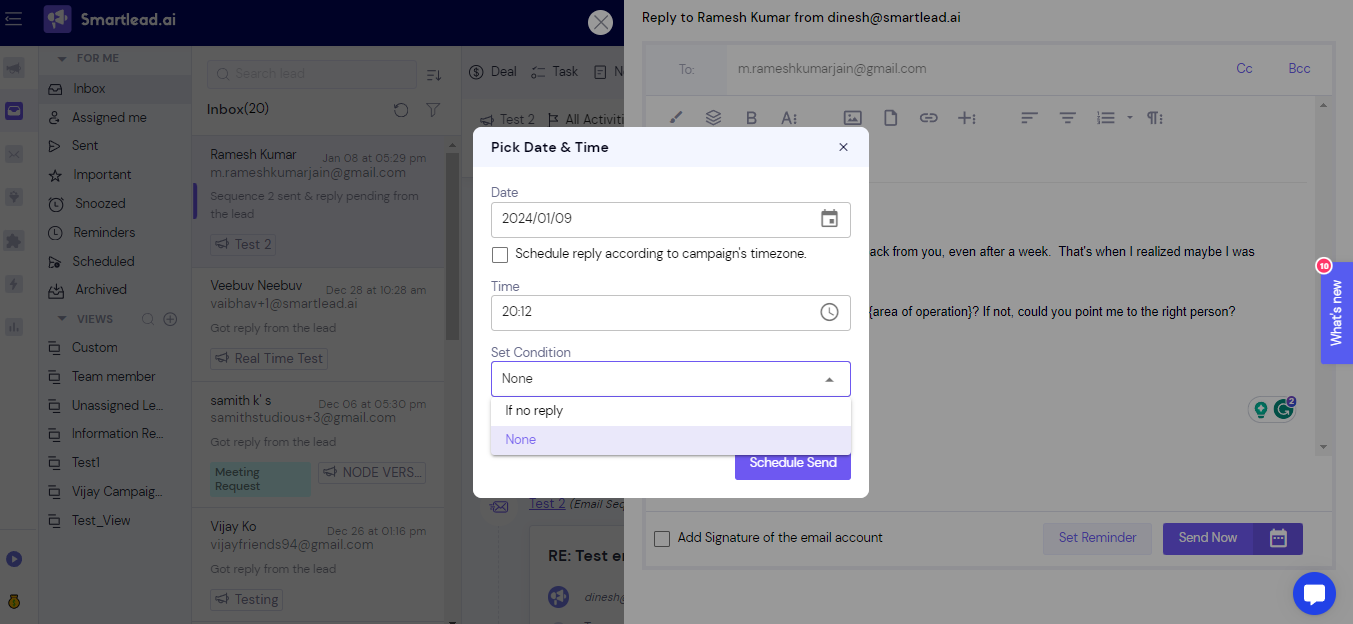
It will have options for setting a sending Date and Time.
Tick the box “Schedule send according to campaign's timezone” for better engagement.
You can also set conditions for when to send the email. If you choose “if no reply,” the email will be sent if there’s no reply. In case you choose “None,” the email will be sent at the scheduled time and date.
To archive a lead, open the conversation with the lead. Next, click on the symbol pointed at in the below image.
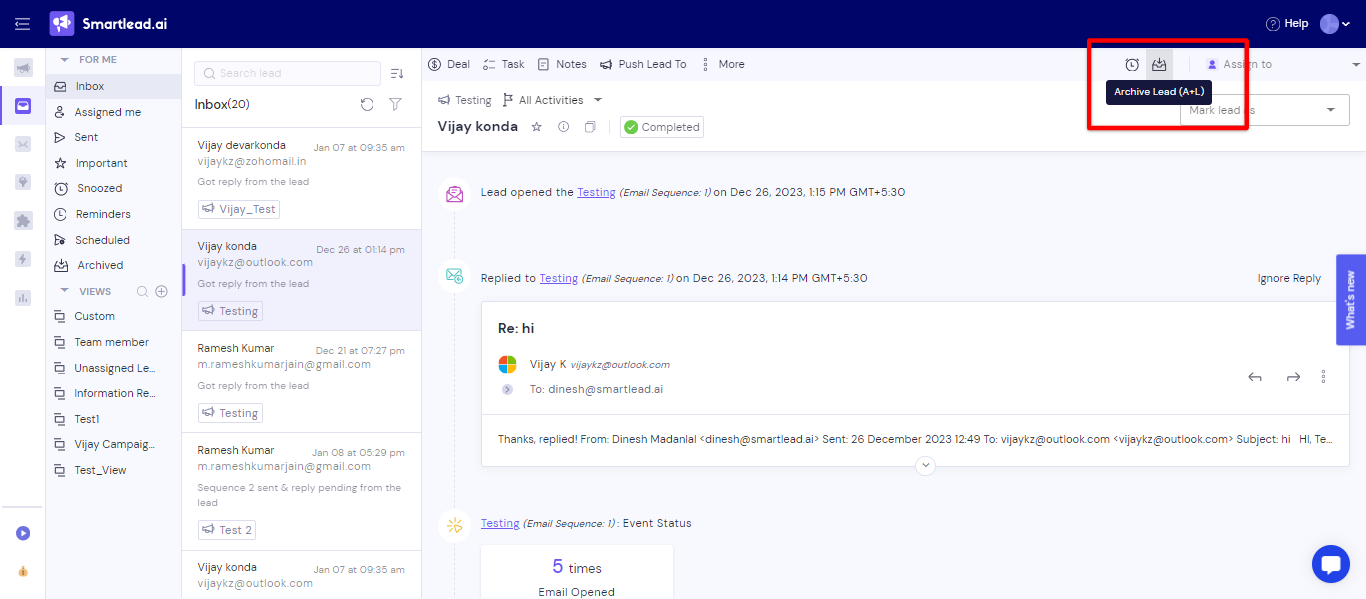
There will be a pop-up box on your screen asking for confirmation. Click on “Archive”, and you’re done. You’ve successfully archived the lead.
On clicking on the “Archived” tab on the sidebar, all the leads will be fetched that you’ve archived so far.
This is all about the sidebar of the new master inbox in Smartlead. In case of any confusion or doubt, feel free to reach out to our customer support team.
