Use this guide to connect a Gmail or Google Workspace mailbox using Smartlead’s Infrastructure.
This setup uses Smartlead’s pre-verified Google OAuth app - no Google Cloud project setup is required.
Before connecting your Google Workspace mailbox, ensure the following:
You have Google Workspace Super Admin access (or admin rights to approve third-party app access and scopes).
Pop-ups are allowed in your browser (the Google OAuth consent screen opens in a pop-up window).
If your organization restricts third-party apps, confirm that Smartlead’s app is whitelisted or allowed before proceeding.
For Google Workspace, admin approval is required in most organizations due to security policies.
Log in to your Smartlead dashboard.
Go to Email Accounts from the left-hand navigation menu.
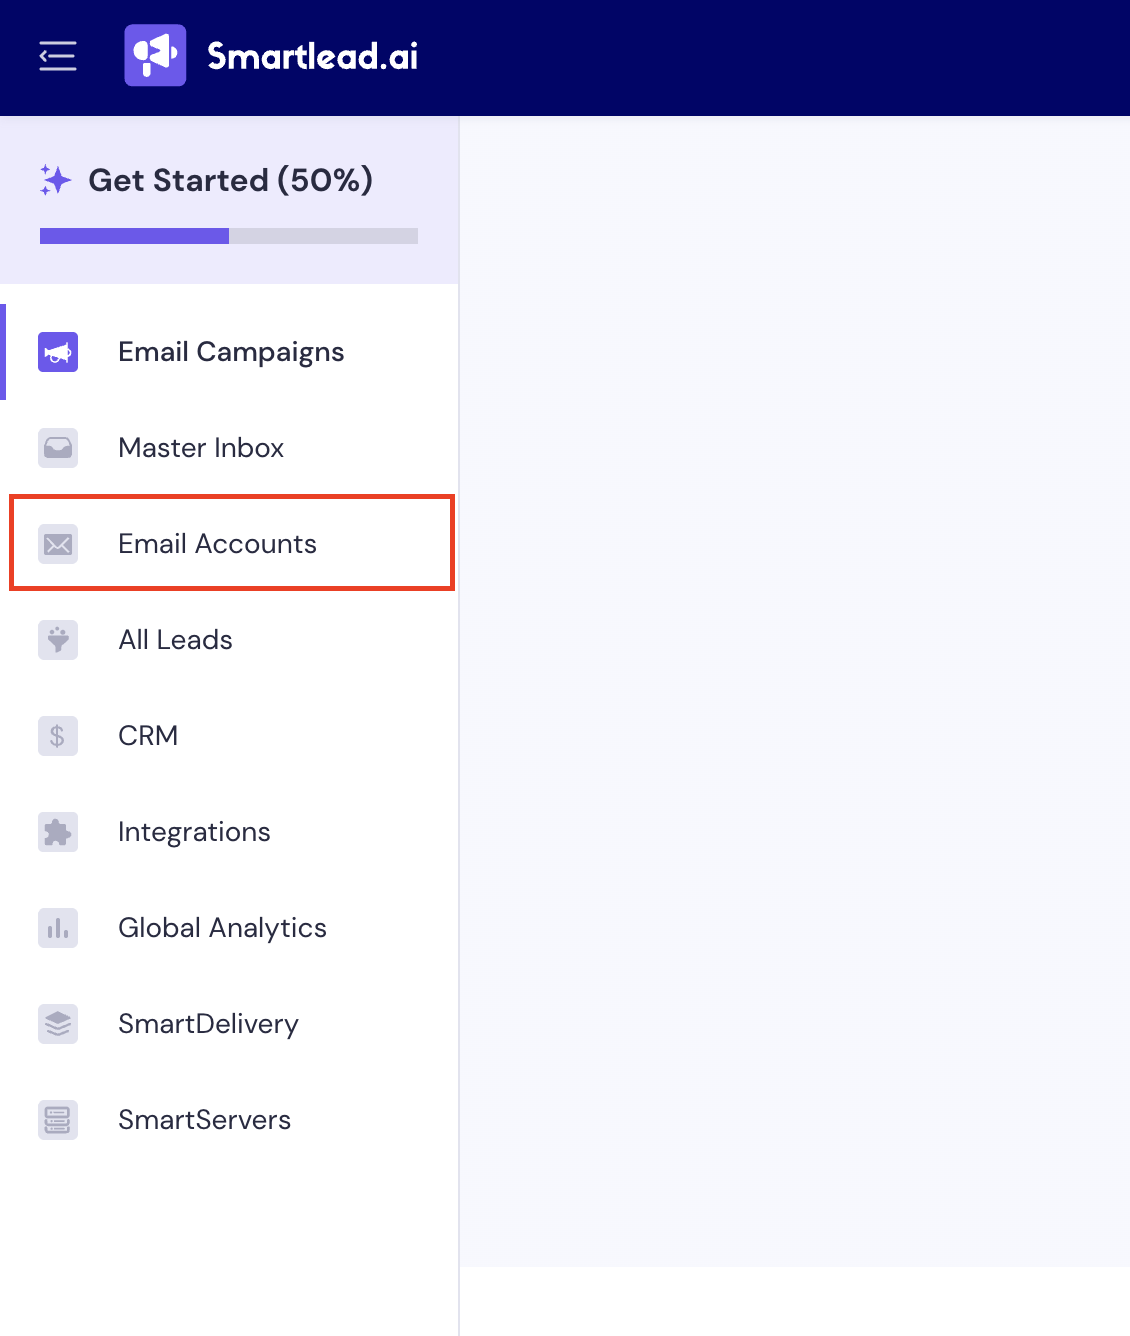
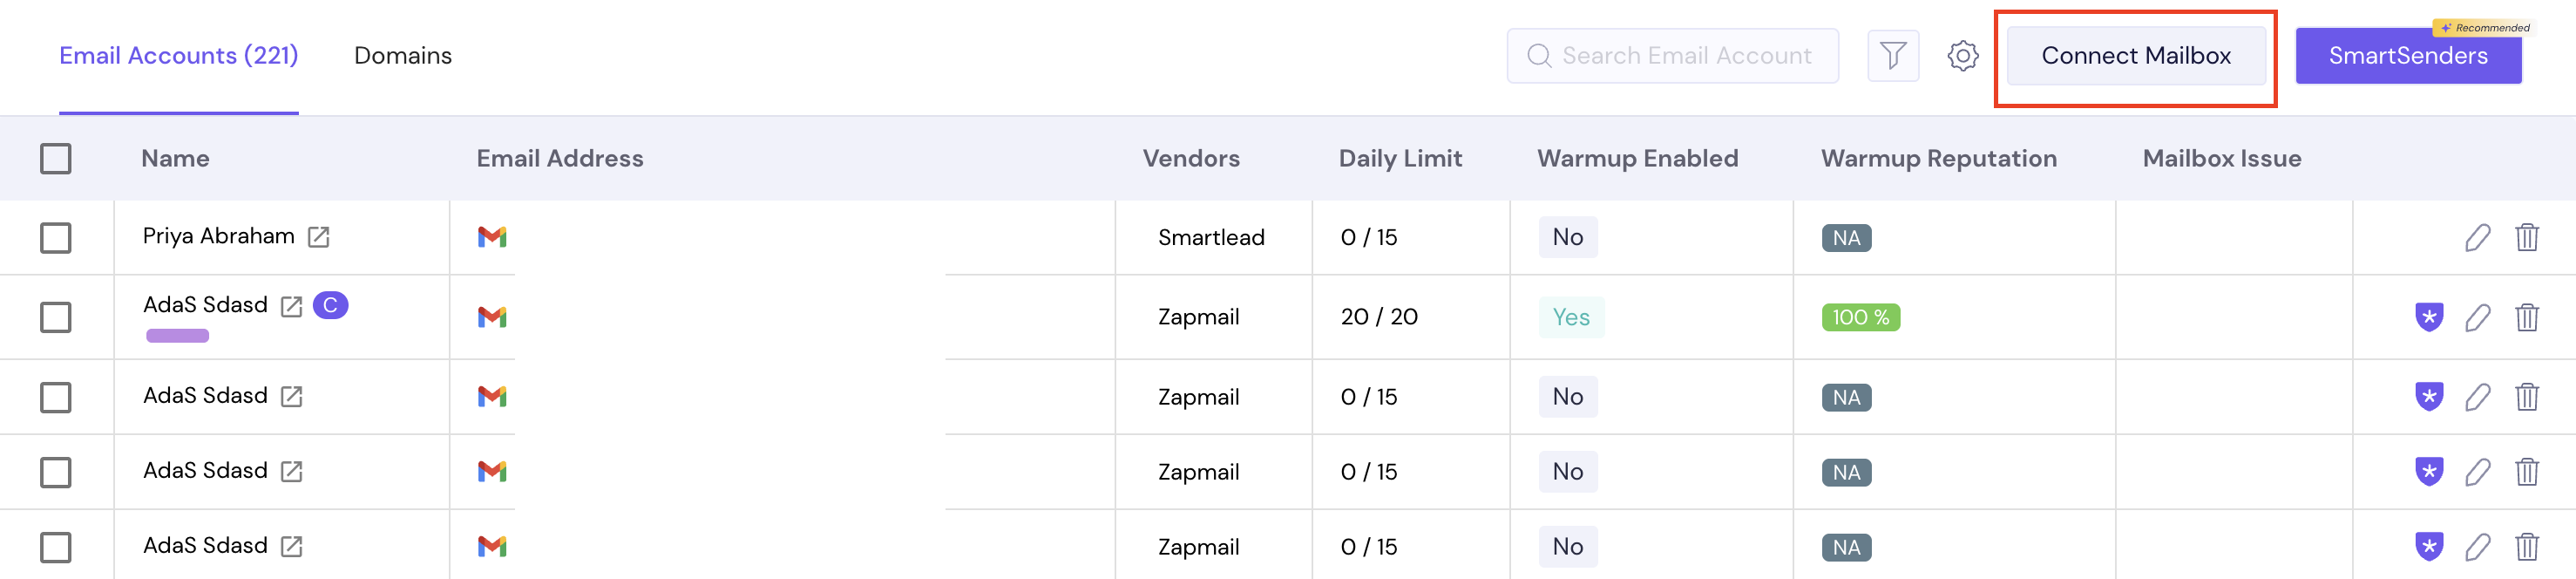
Click Connect Mailbox.
You will see two connection options:
Private Infrastructure (you set up your own OAuth credentials)
Smartlead Infrastructure (uses Smartlead’s managed OAuth setup)
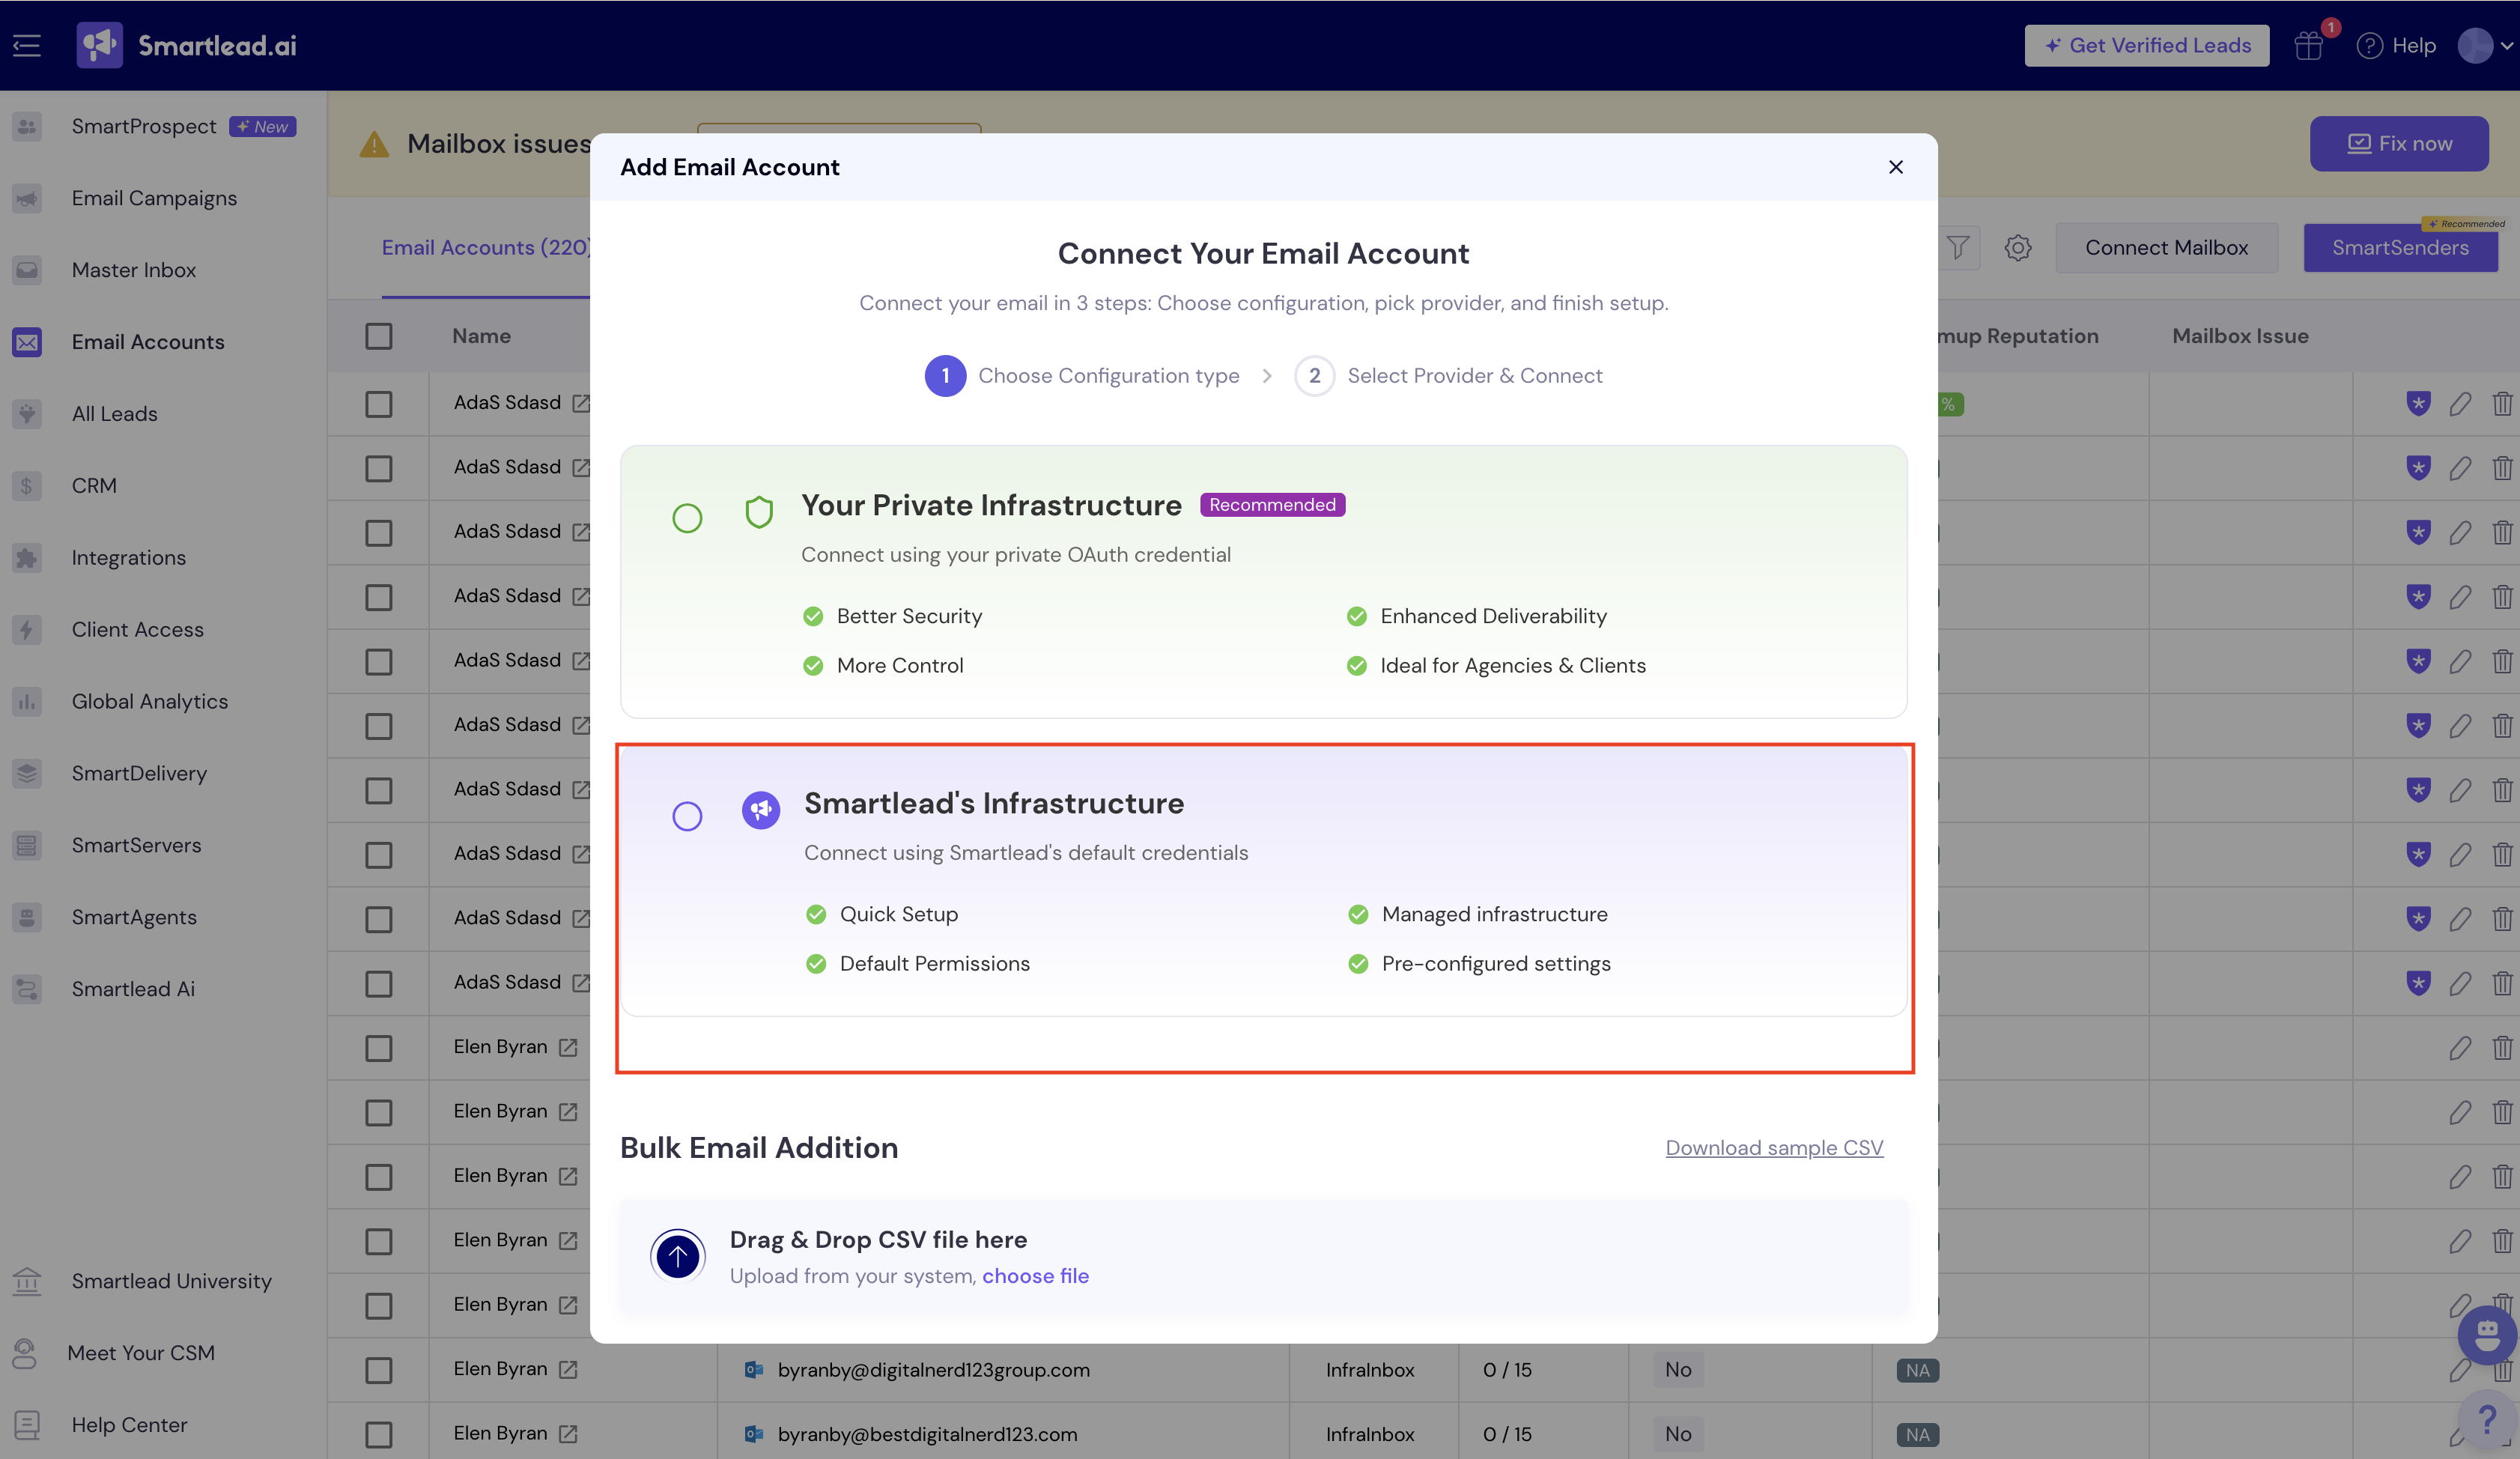
Select Smartlead Infrastructure to connect using Smartlead’s default credentials. This option is ideal for a quick setup with minimal configuration.
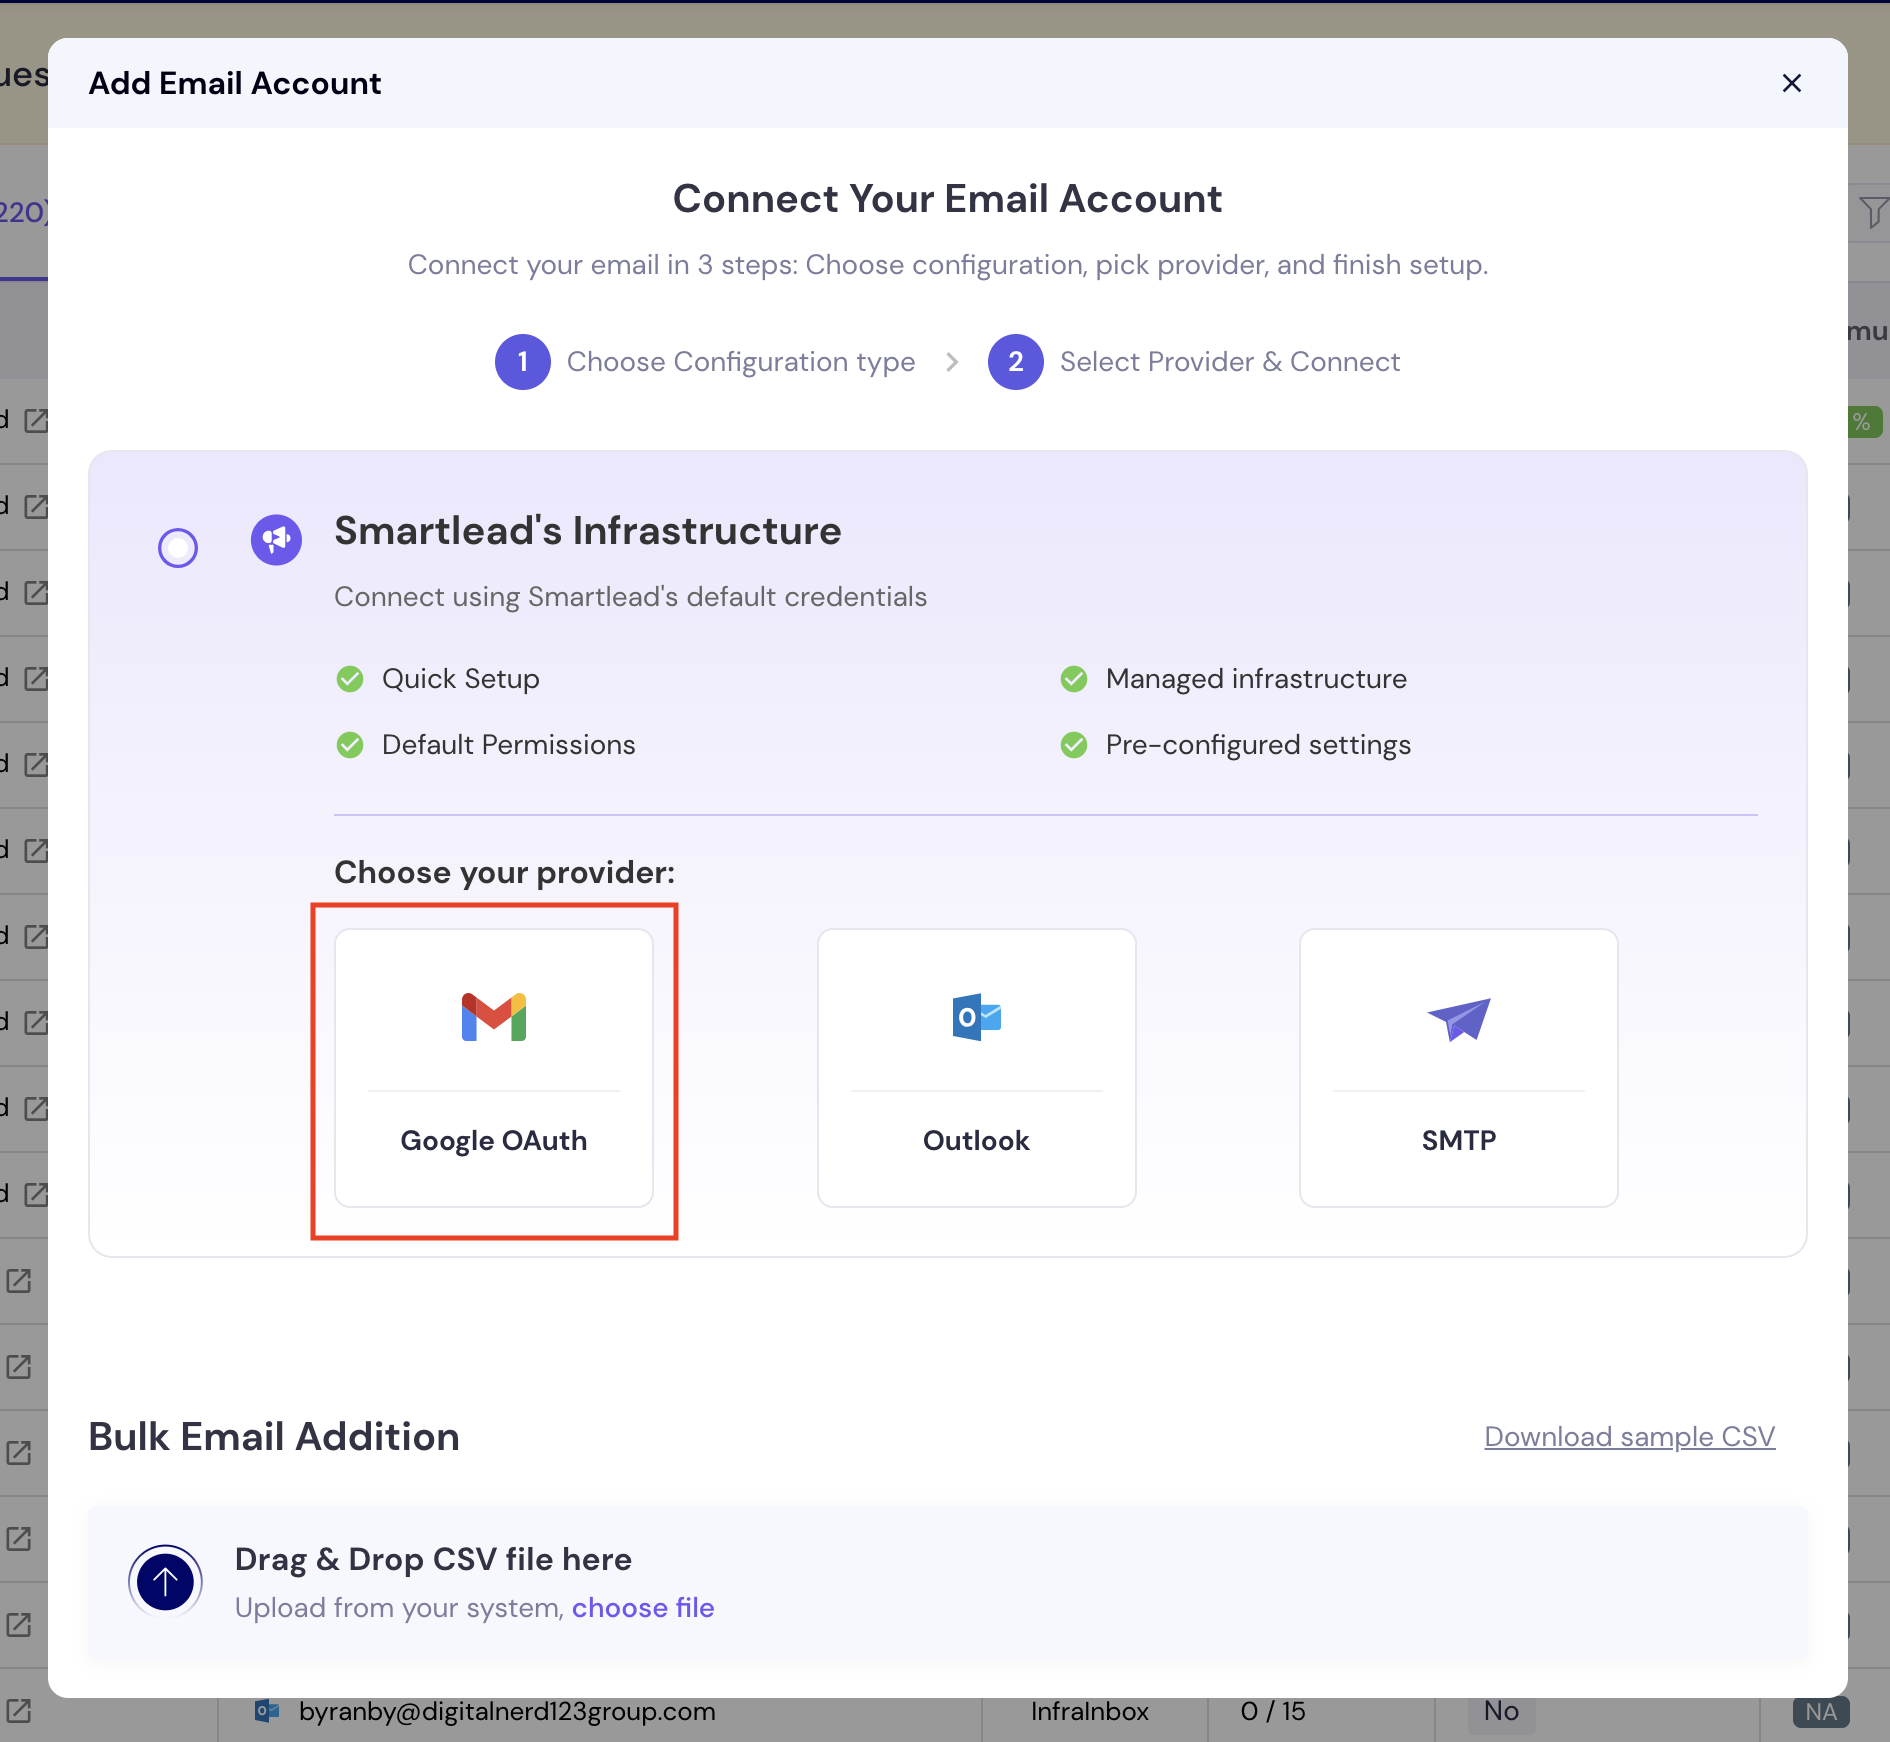
Select Google OAuth if you are connecting to a Google Workspace mailbox.
A pop-up will appear showing the Client ID used by Smartlead. Copy this Client ID - you will need to paste it into your Google Admin Console to whitelist Smartlead as a trusted app.
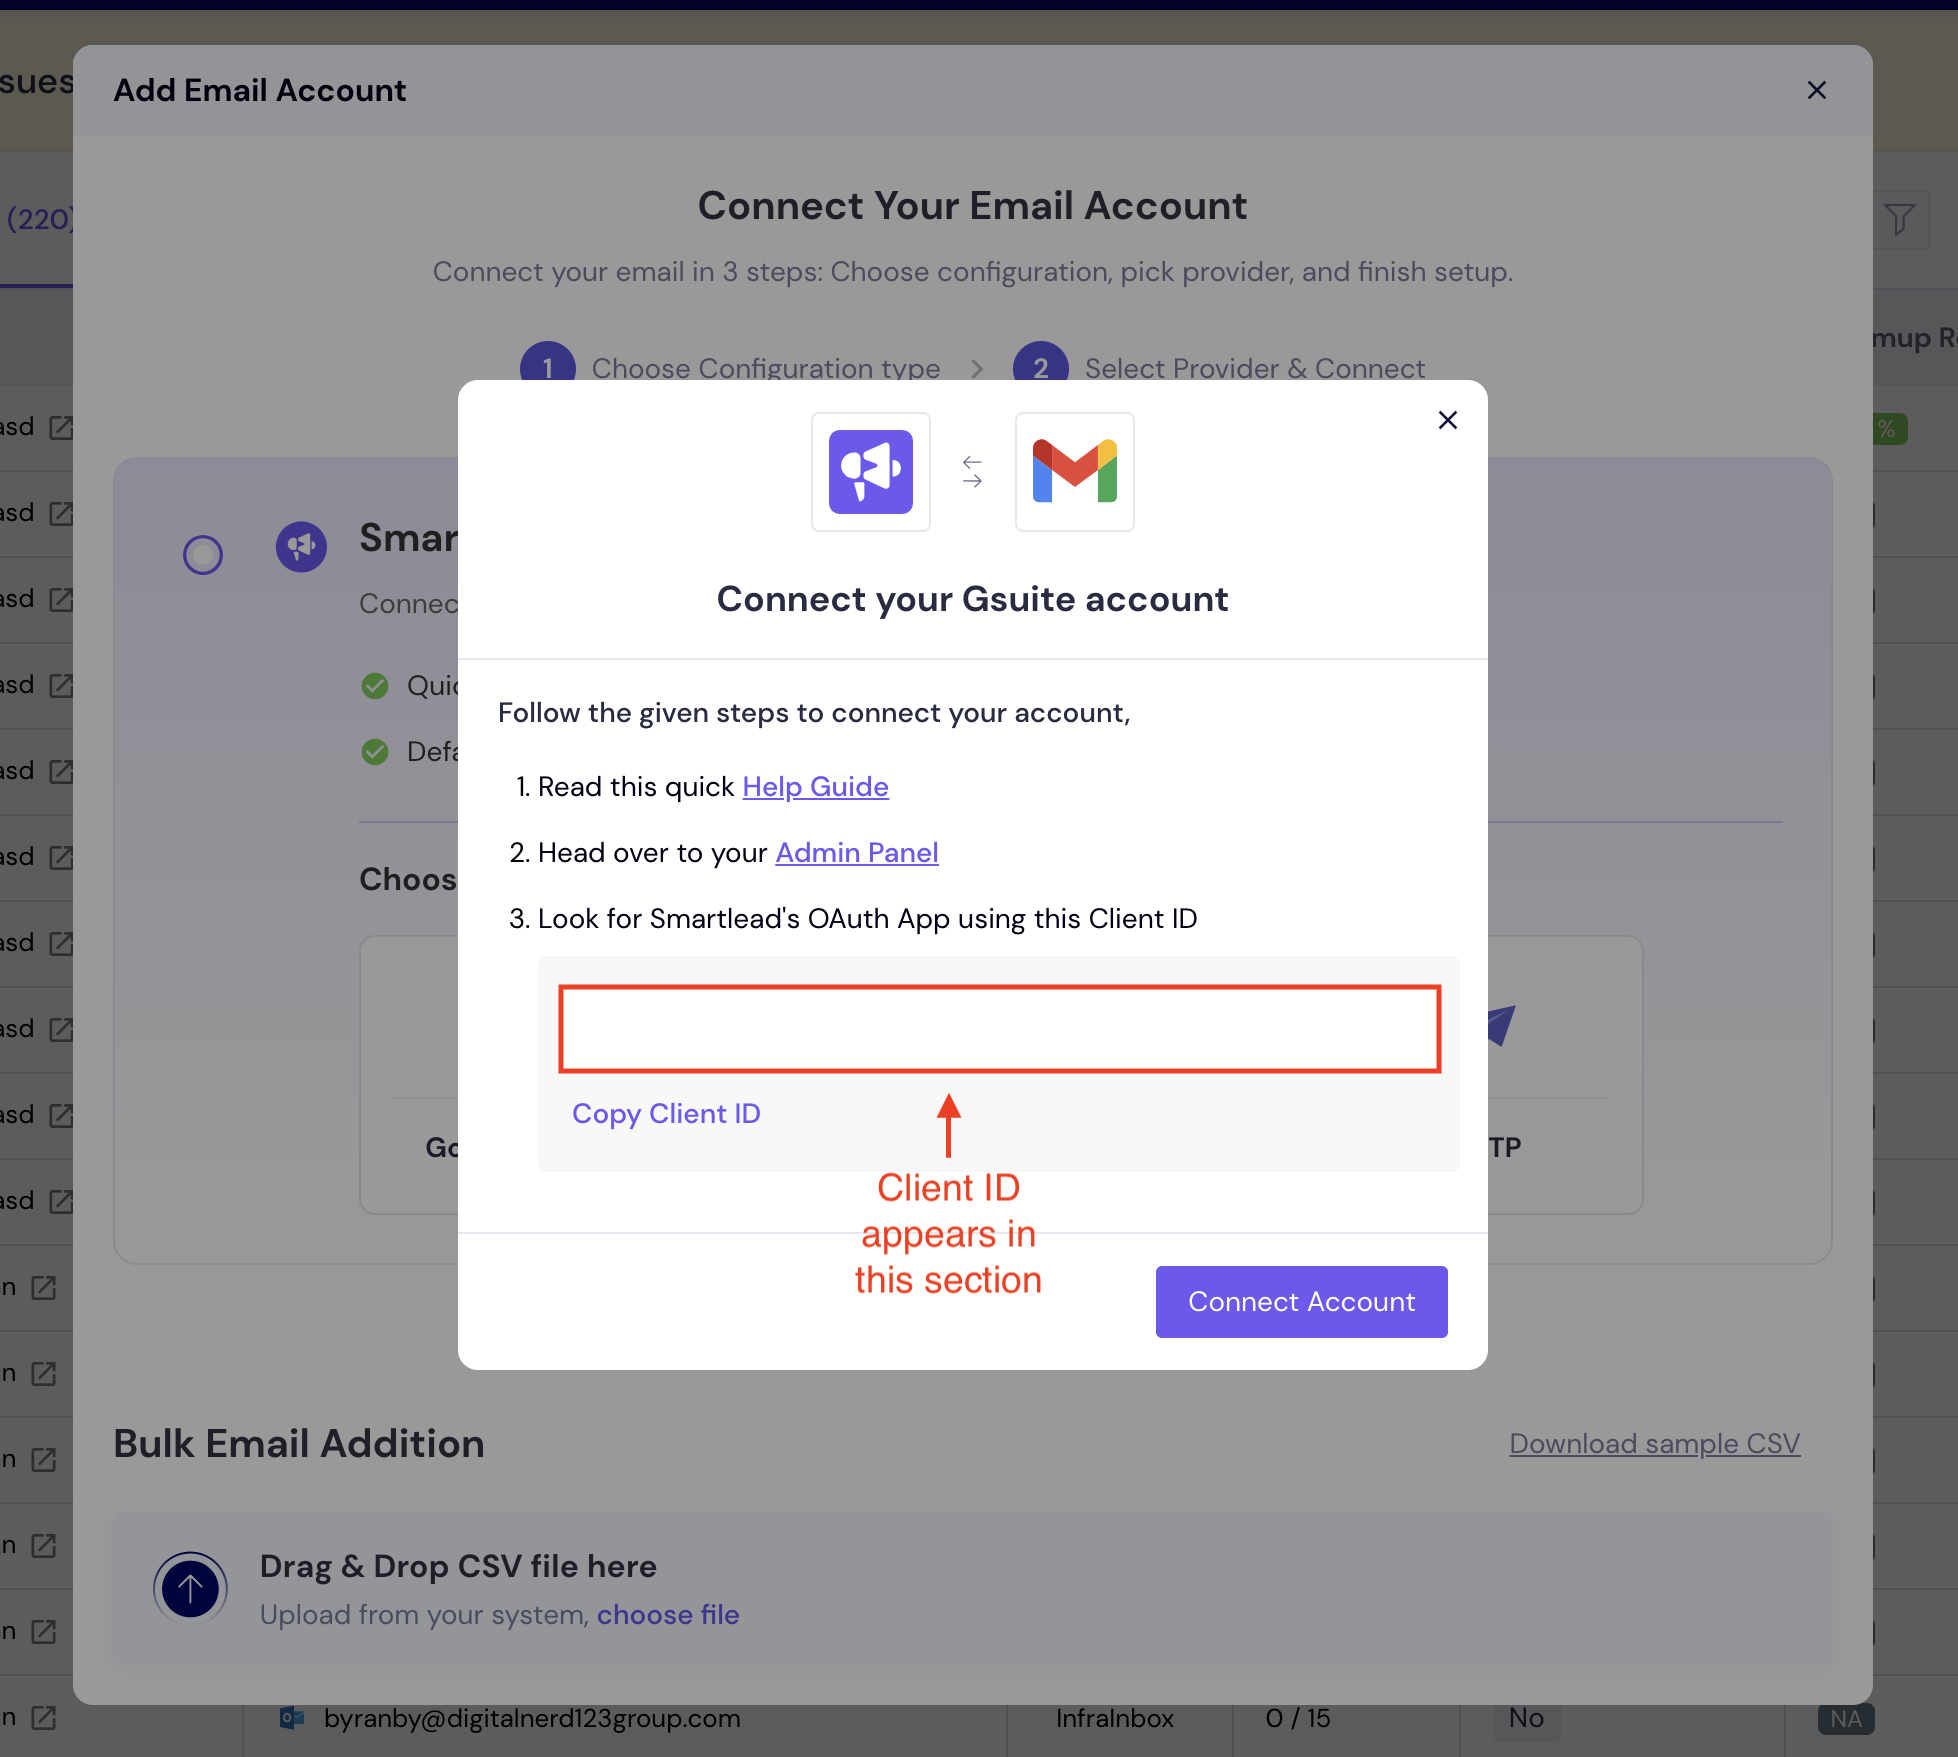
Once you copy the client ID, click on the Admin Panel link (as shown in the above screenshot). This will take you to the Admin Panel of your Google Workspace.
If this is your organization’s first time connecting Smartlead via OAuth, your Google Workspace Admin must approve Smartlead’s app before the connection can proceed.
Go to your Google Admin Console at https://admin.google.com.
Navigate to:
Security → Access and Data Control → API Controls → Manage App Access
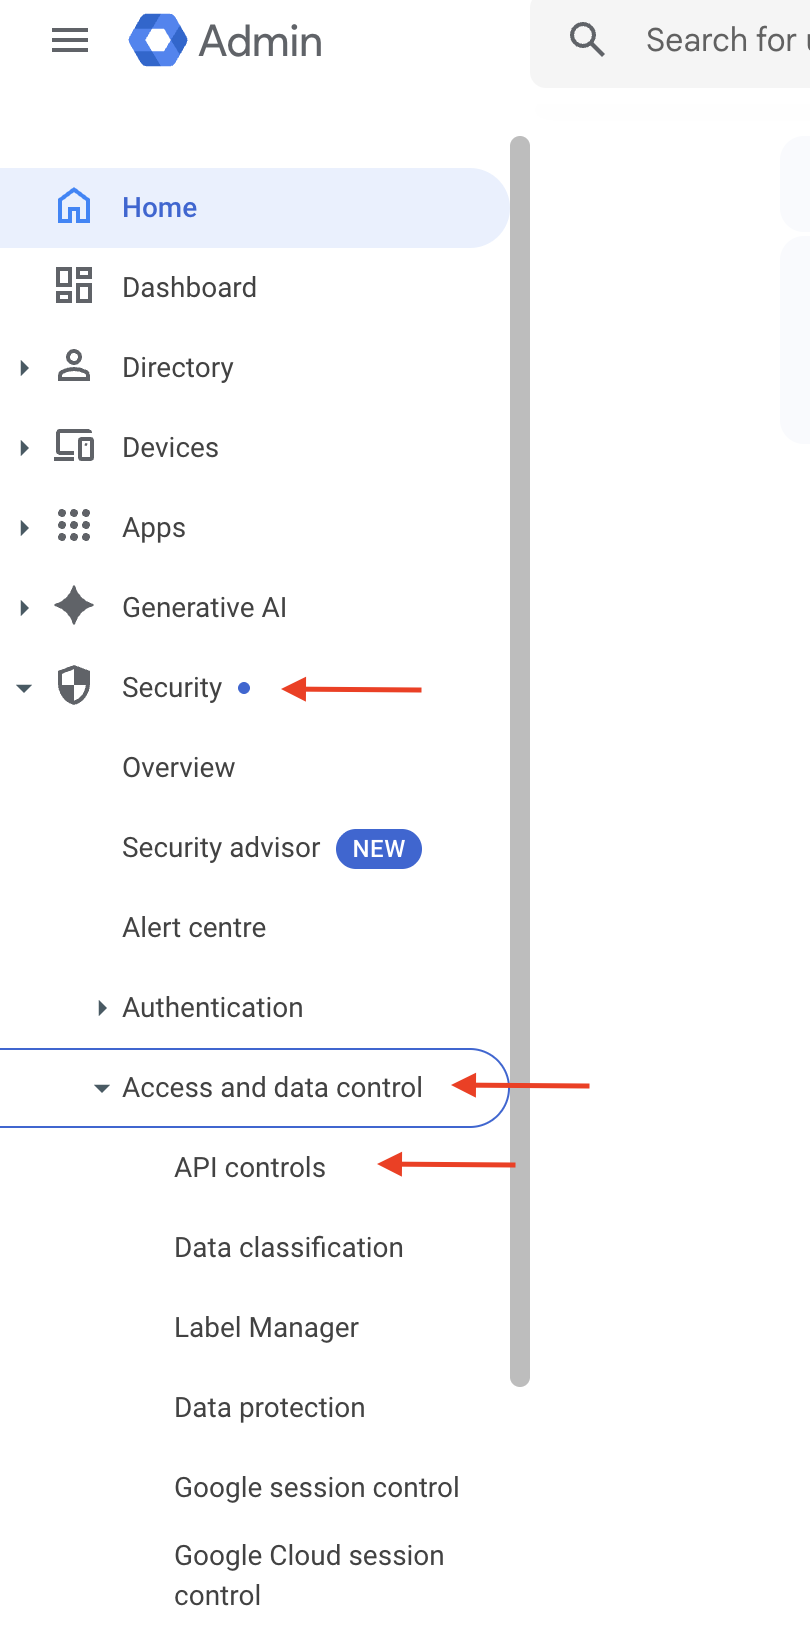
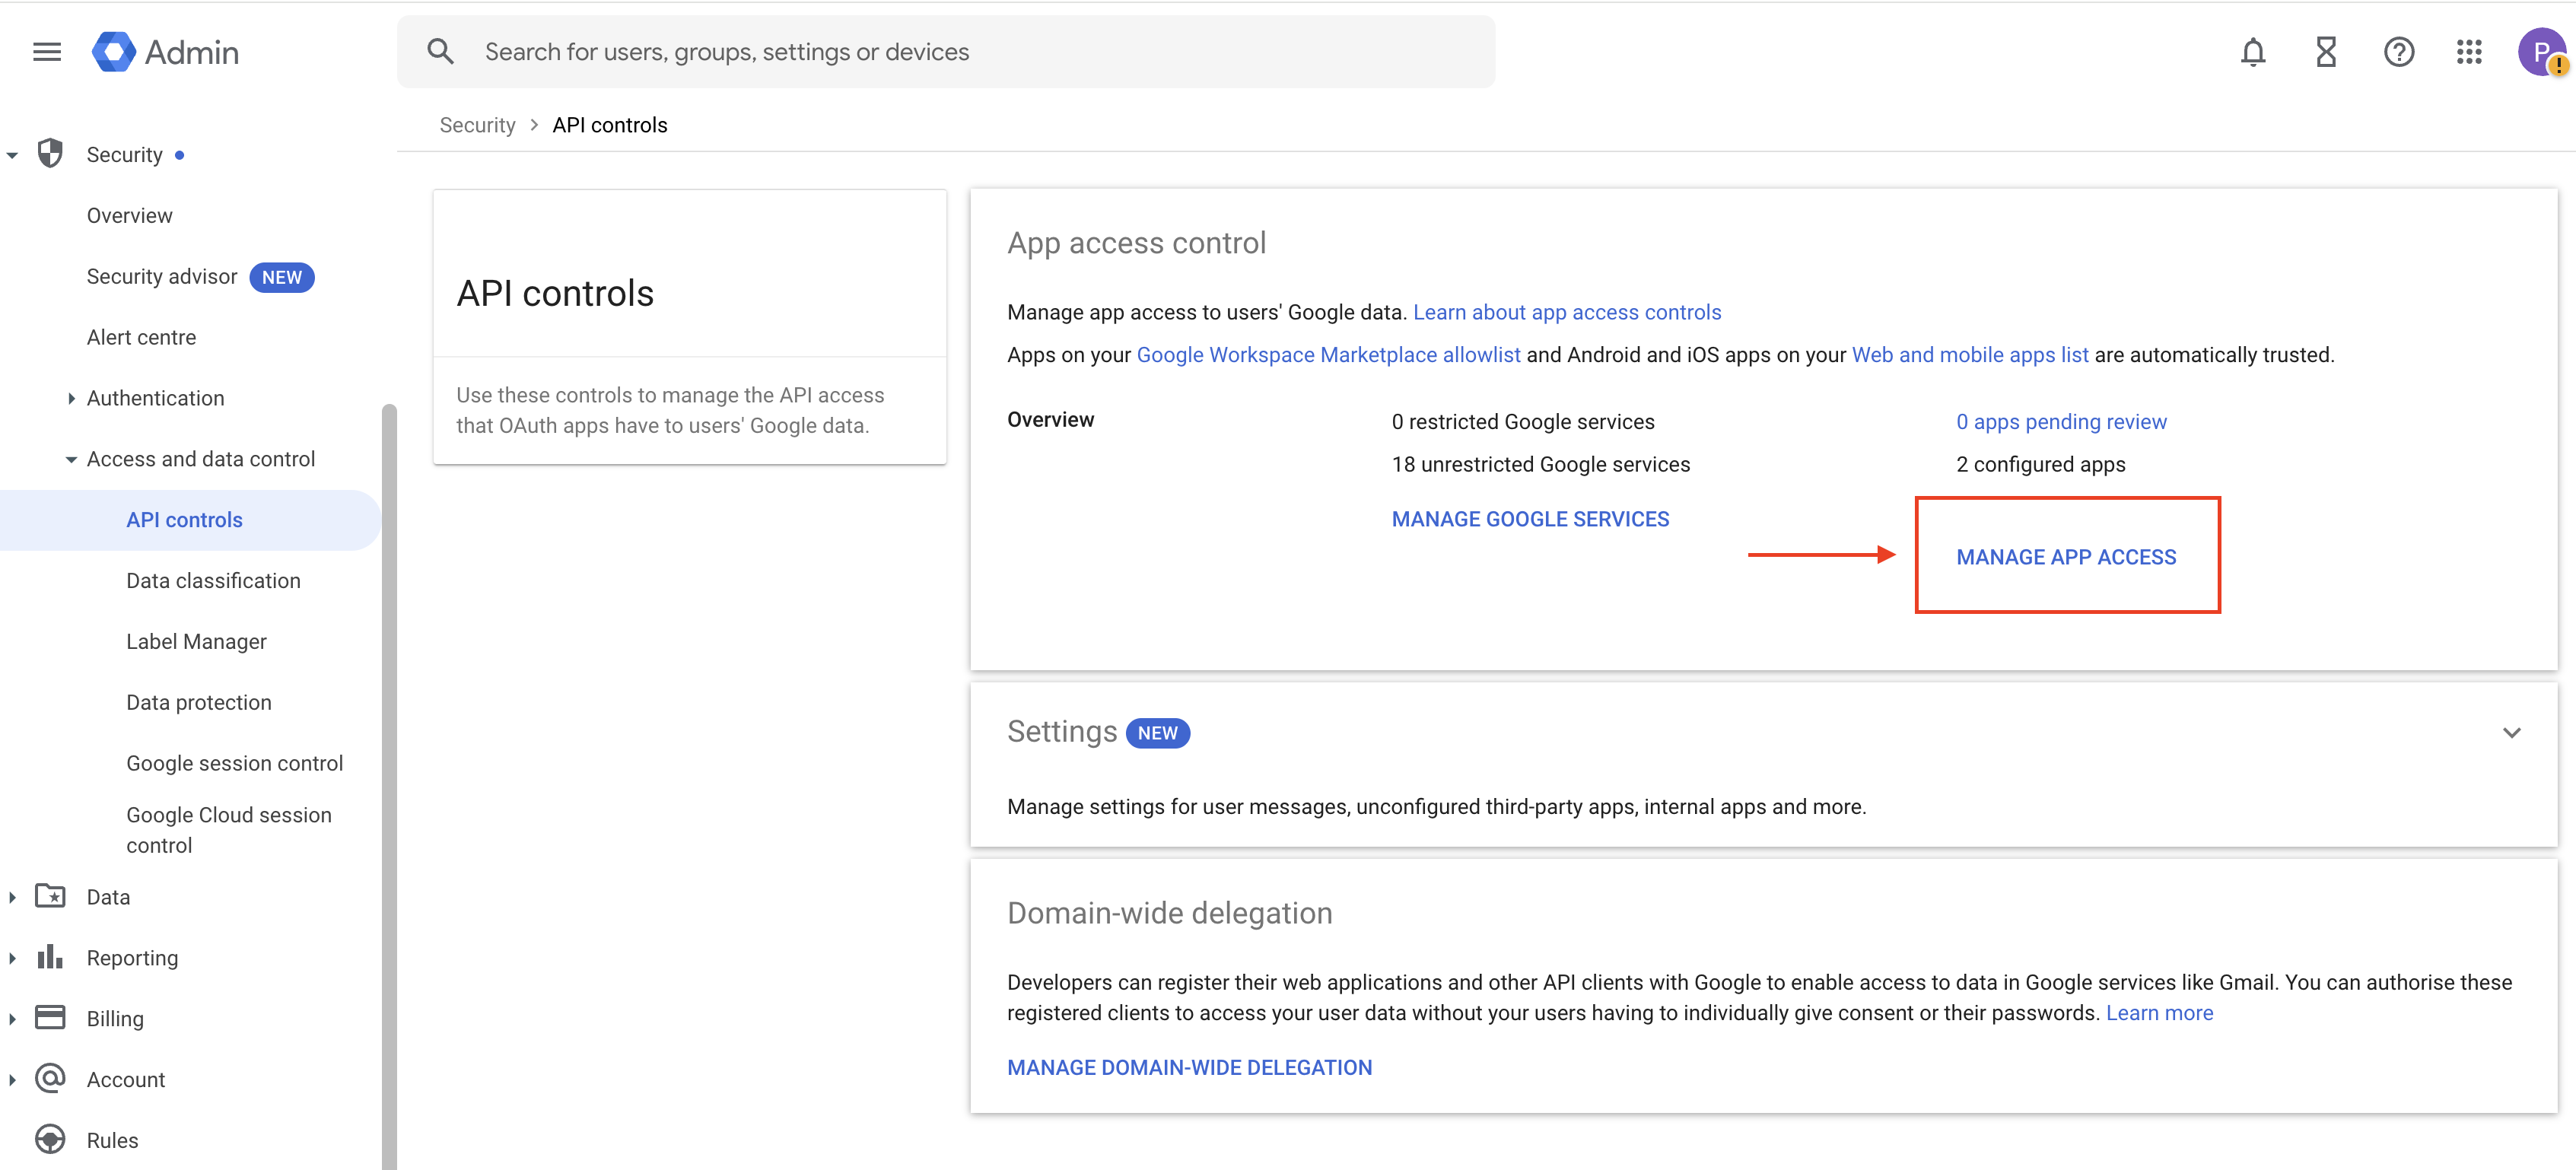
On the API Controls screen, select Manage App Access.
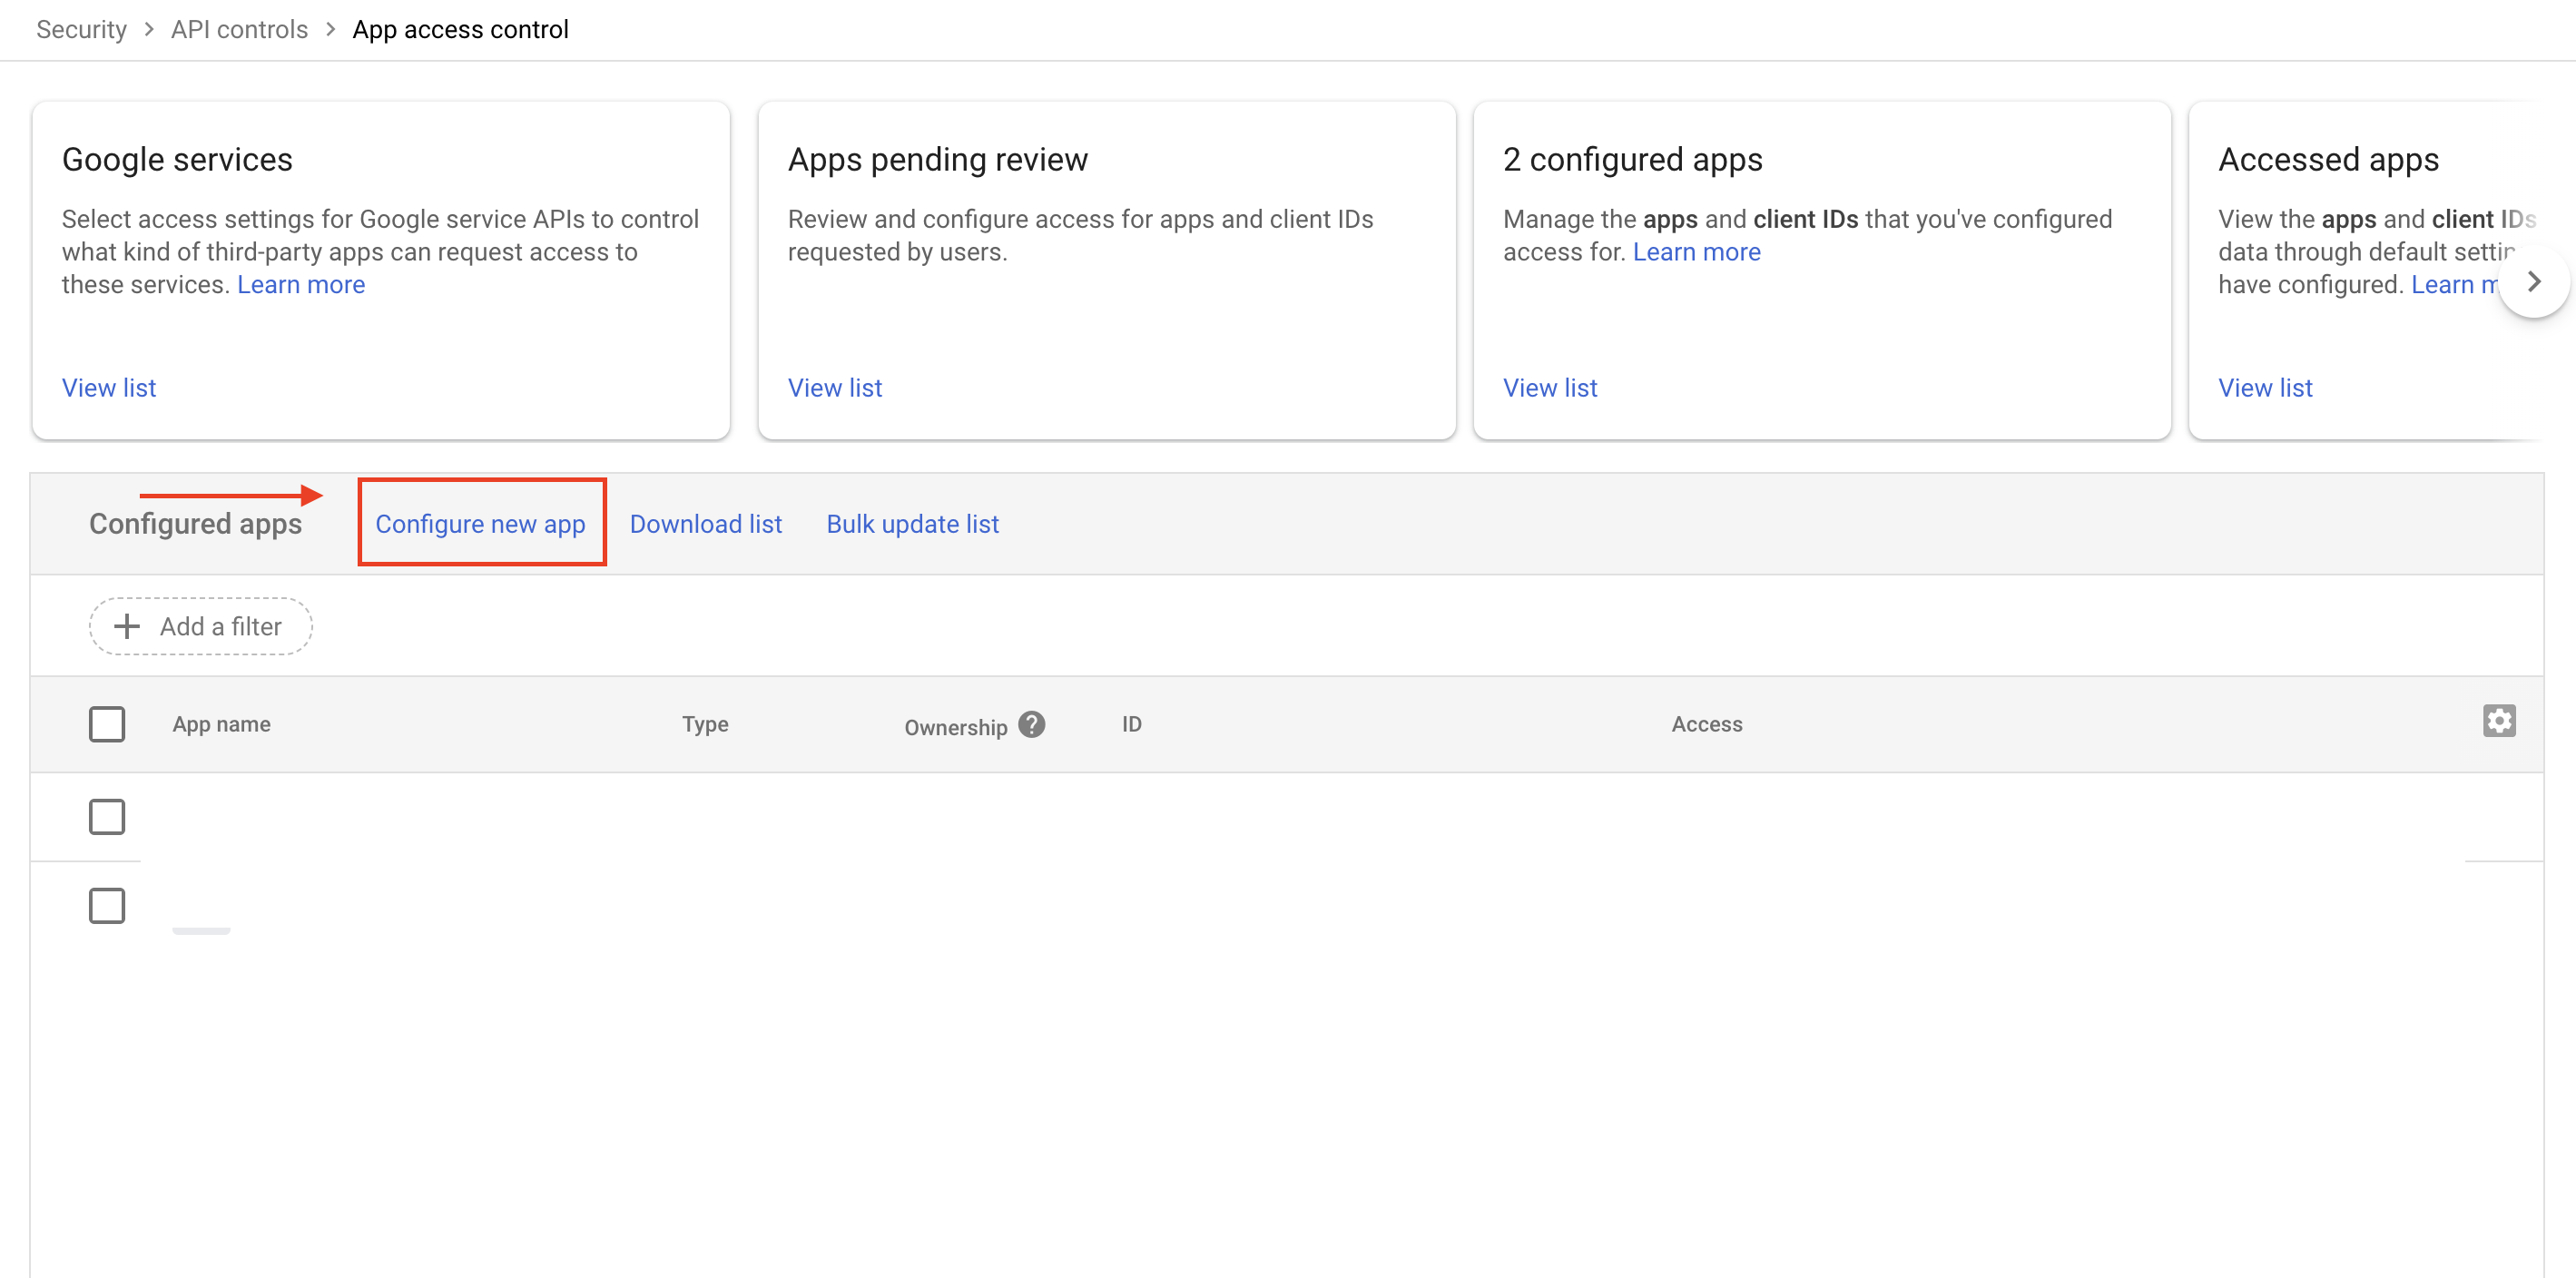
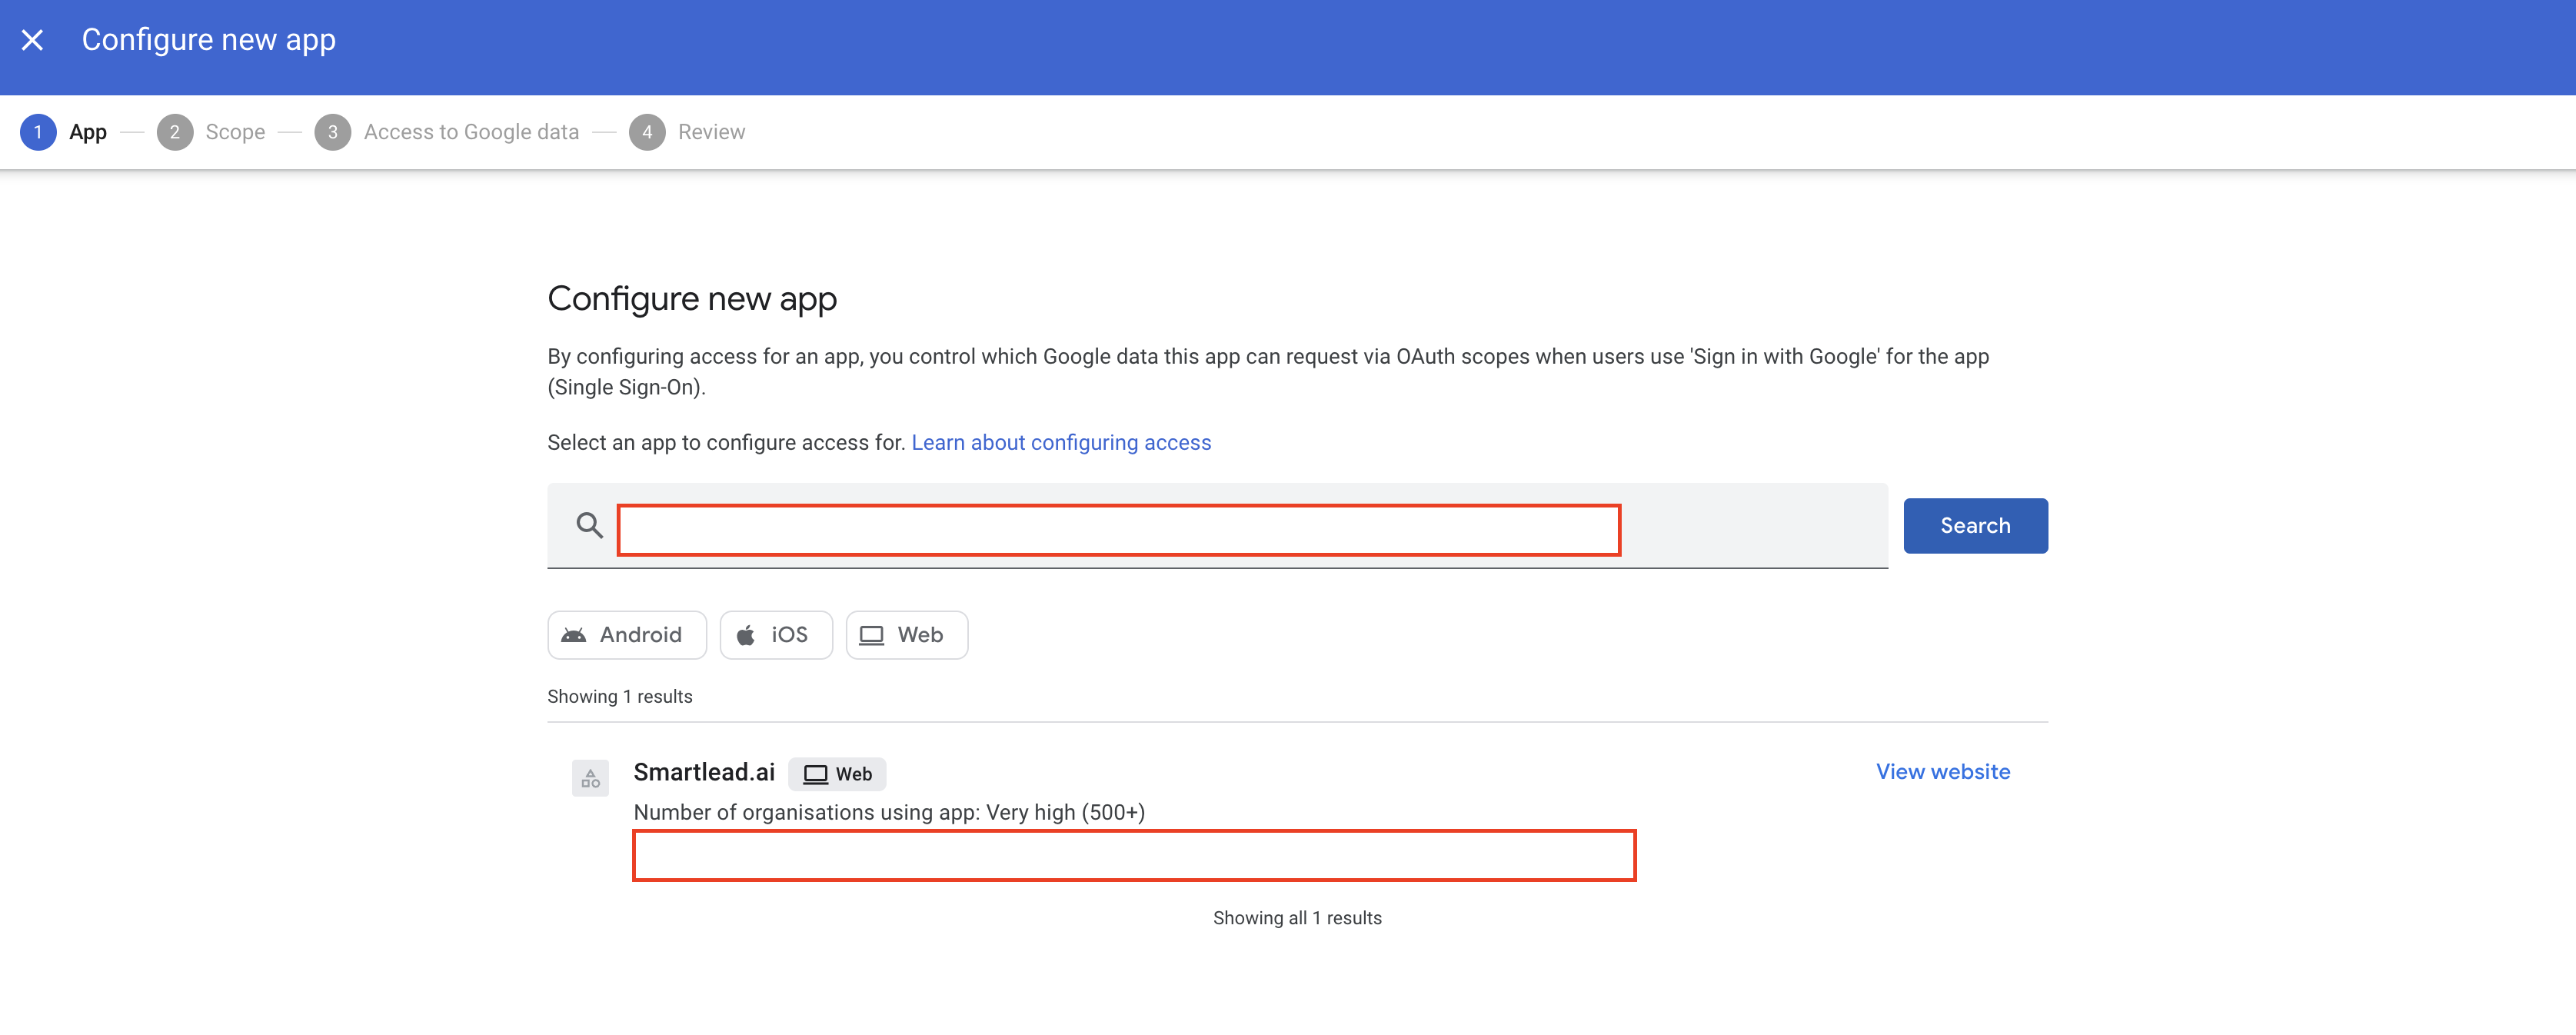
To add Smartlead as trusted apps, click on Configure New App on screen.
Paste the Smartlead Client ID (copied from the Smartlead pop-up earlier) in the search bar.

You’ll see the Smartlead app appear in the results — click on it to proceed.
On the next screen, choose how you want to apply the access:
All users in your organization (same domain), or
A specific organizational unit or department.
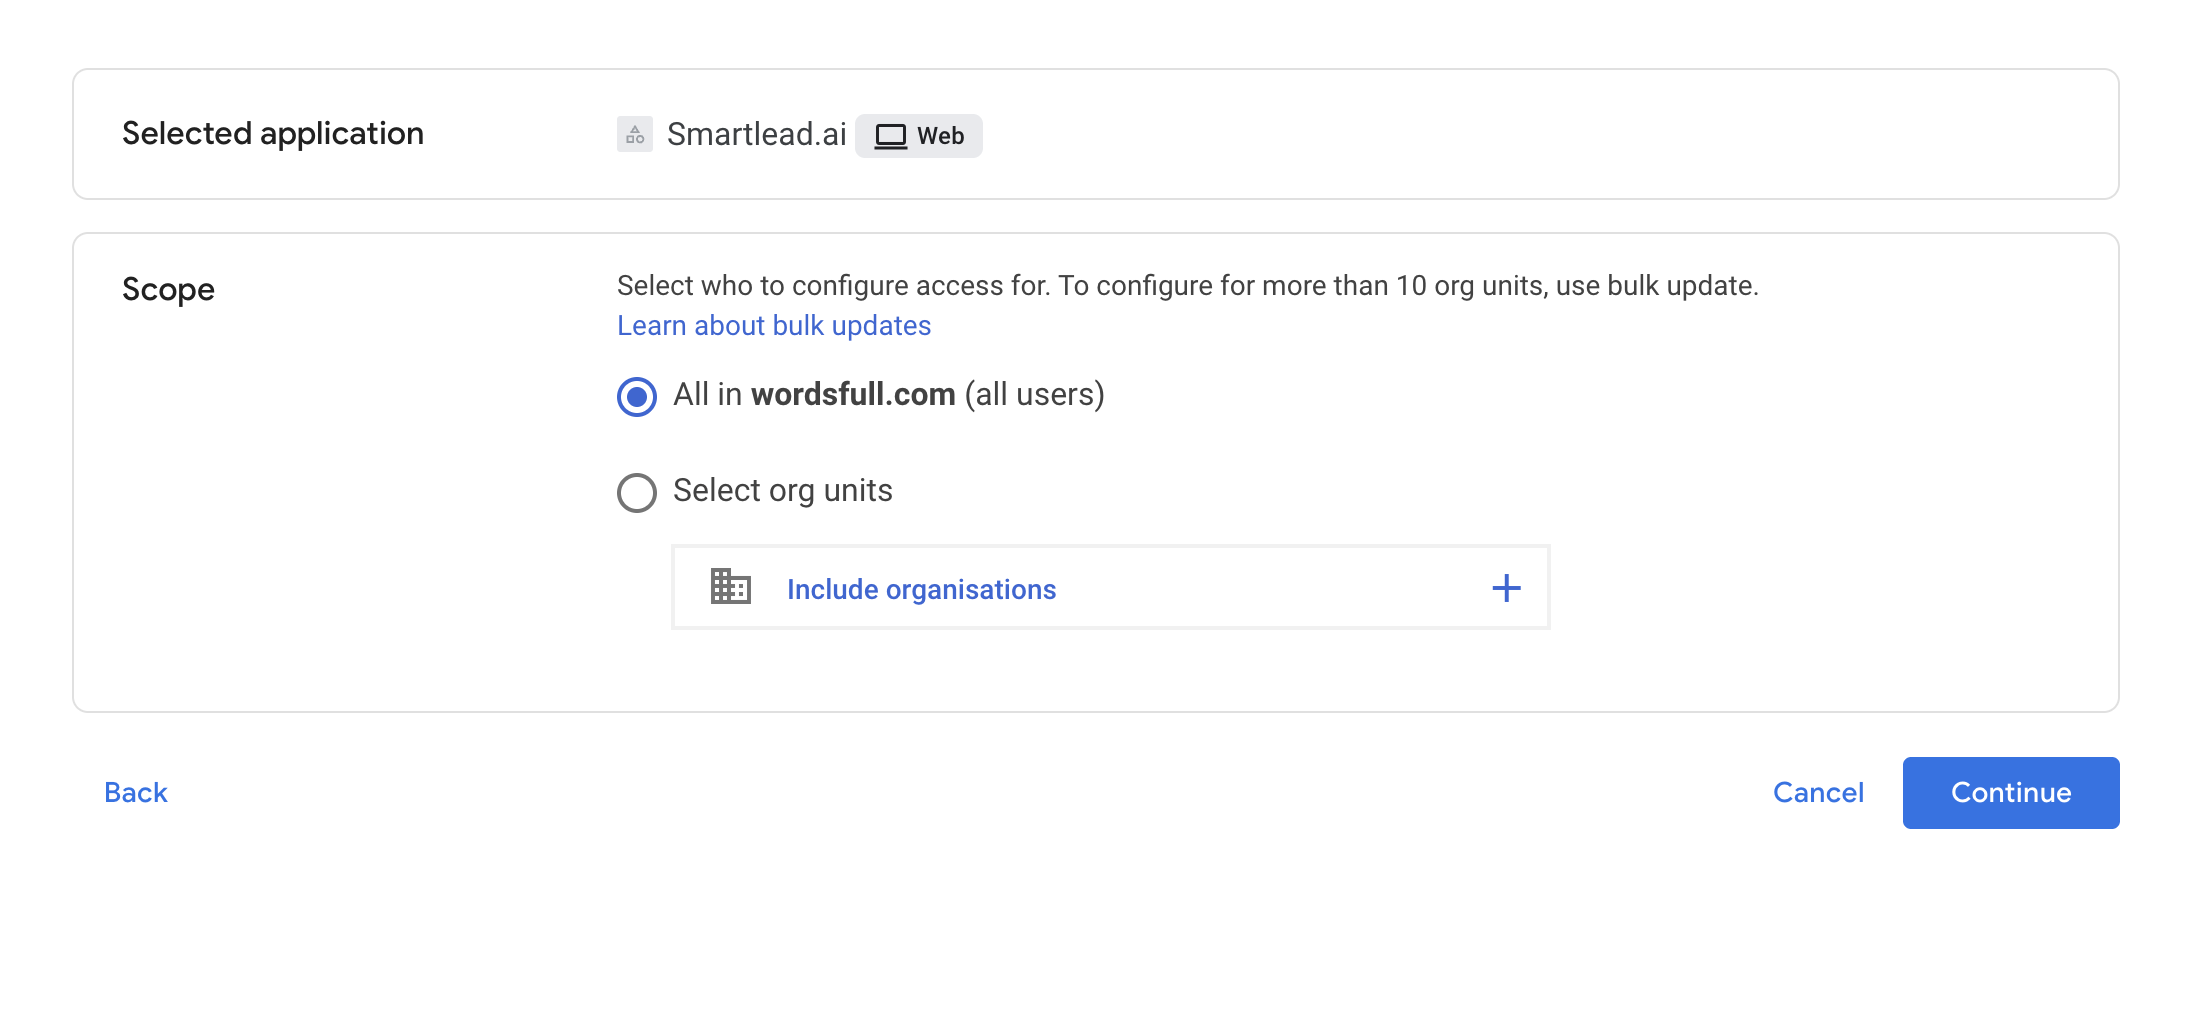
If you want to manage this setting in bulk later, refer to Google’s documentation on bulk updates for app access settings.
Note: Bulk update is only needed if your organization manages multiple domains or organizational units. It allows you to apply the same Smartlead access setting across all of them simultaneously.
Click Continue to proceed.
In the following screen, select Trusted to mark Smartlead as an approved app. This step ensures that Smartlead’s app is recognized as a trusted application in your Workspace. Once trusted, all users within your domain can connect their accounts seamlessly.
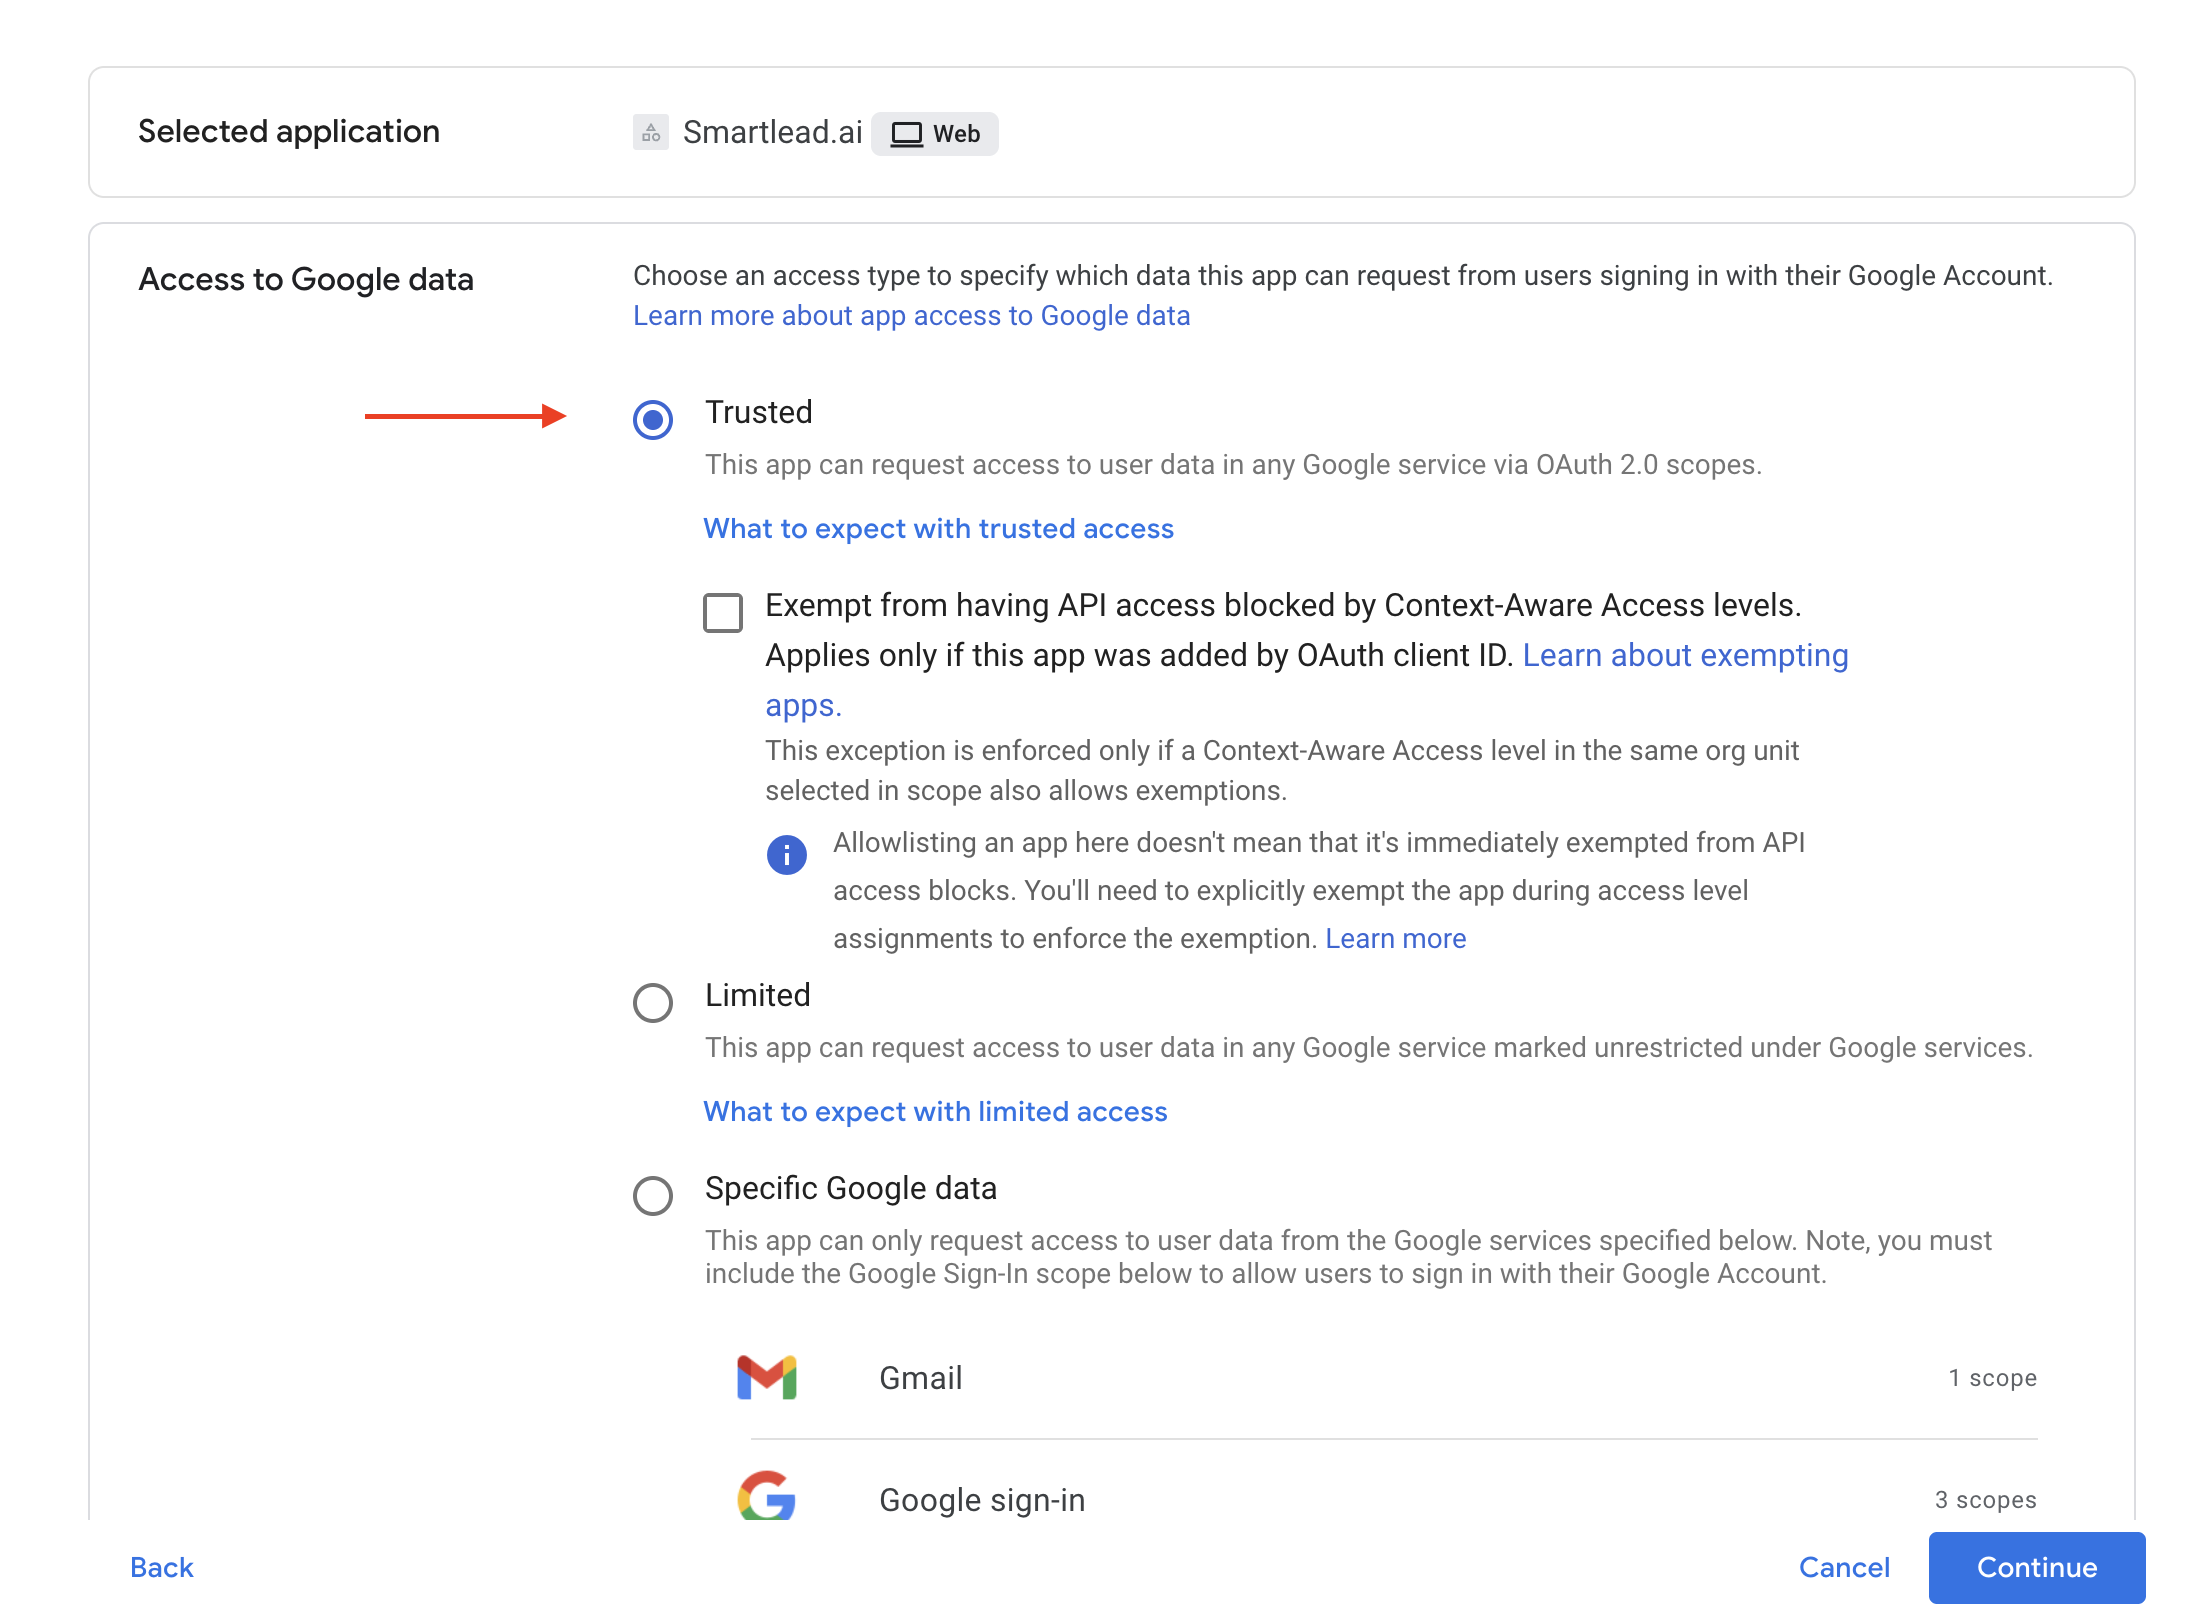
Click Continue, review the configuration details, and then click Finish to complete the setup.
Note: It may take up to 10 minutes for this change to propagate across your Workspace domain.
After the app is approved in your Google Admin Console:
Return to Smartlead → Email Accounts → Add Account → Shared Infrastructure → Google.
Click Connect Account.
The Google OAuth consent screen will open in a new pop-up window.
If the window doesn’t appear, check your browser settings and allow pop-ups for Smartlead.
Select the Google Workspace account you want to connect to.
Review the requested permissions (Gmail API, send mail, read profile).
Click Allow to grant access.
Wait to be redirected back to Smartlead - your mailbox will now appear as Connected or Active.
If you attempt to connect before the Smartlead app is approved in your Workspace, Google will display the following error:
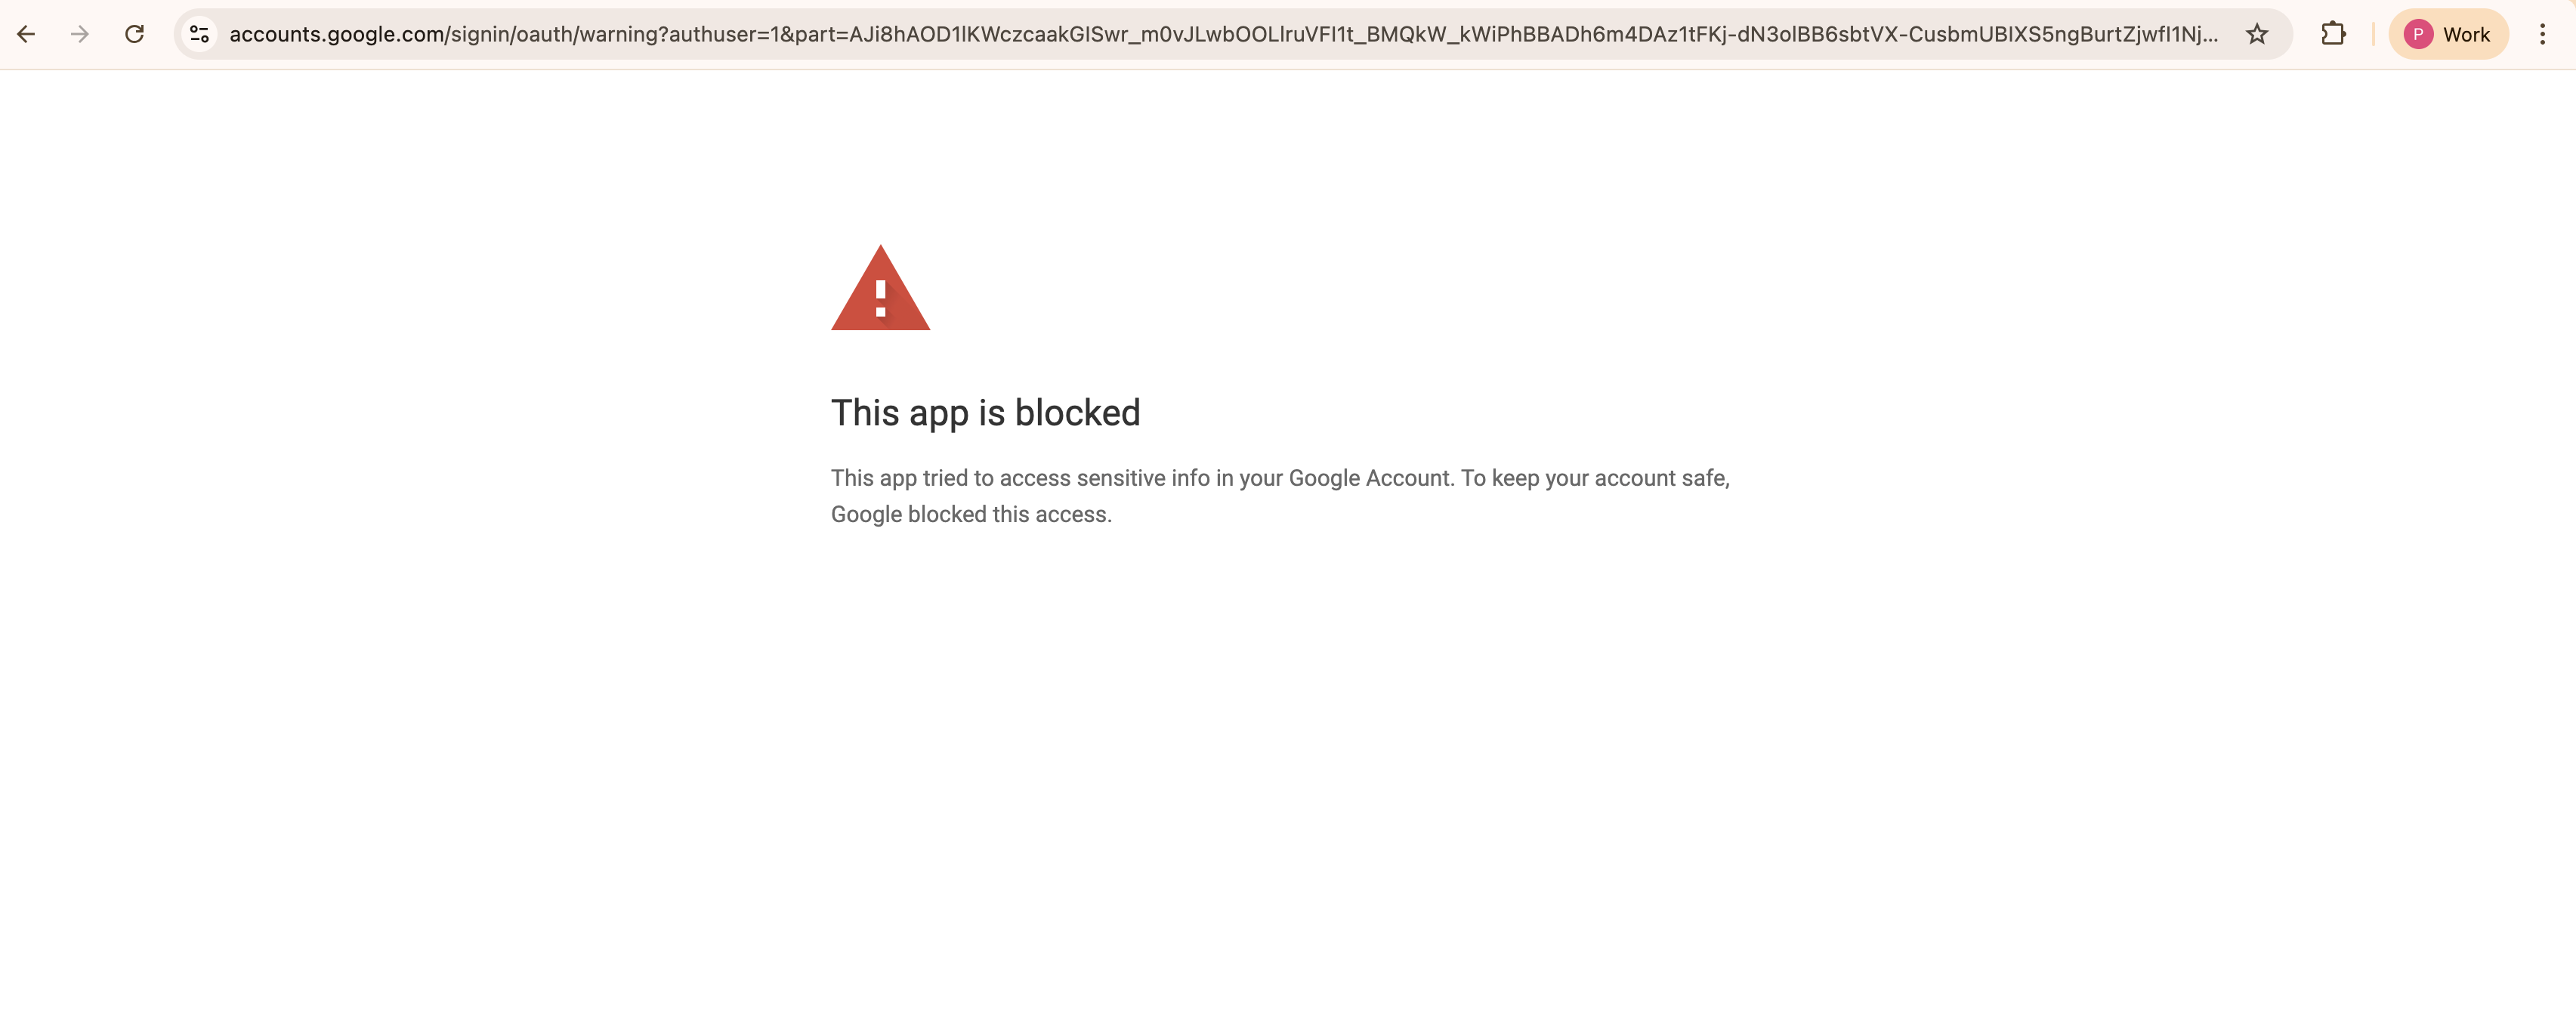
This is expected behavior when Smartlead has not yet been added as a trusted third-party app in your organization. If you encounter this, simply add Smartlead as a trusted app by following the steps we discussed above.
Smartlead app is safe and compliant.
Your Workspace Admin simply needs to approve it once.
After approval, the message will no longer appear for any user in your domain.
Once the admin approval is completed:
Return to Smartlead and click Connect again.
The consent screen should now appear normally.
Complete the OAuth authorization and confirm the connection.
If the blocked message still appears, wait a few minutes and retry - the permission update may take time to propagate.
If you continue to face issues connecting your account after approval, contact our chat support with a screenshot of the error.
