Smartlead’s Email Deliverability Testing, known as SmartDelivery is your go-to solution for enhancing email deliverability and having more control over the outcomes of your outreach campaigns.
You can run comprehensive deliverability tests—both manual and automated—to evaluate how your campaign performs against various deliverability parameters - like spam filters. email authentication, IP and domain health, blacklisting, etc. You'll receive detailed deliverability reports that highlight any issues, helping you pinpoint problems and optimize your email campaign performance.
In this write-up, let’s learn how to run a manual deliverability test in SmartDelivery.
Make sure you have a Smartlead account (create a trial if needed).
Have at least one campaign set up for testing.
If you don’t have an account yet, create a trial account.
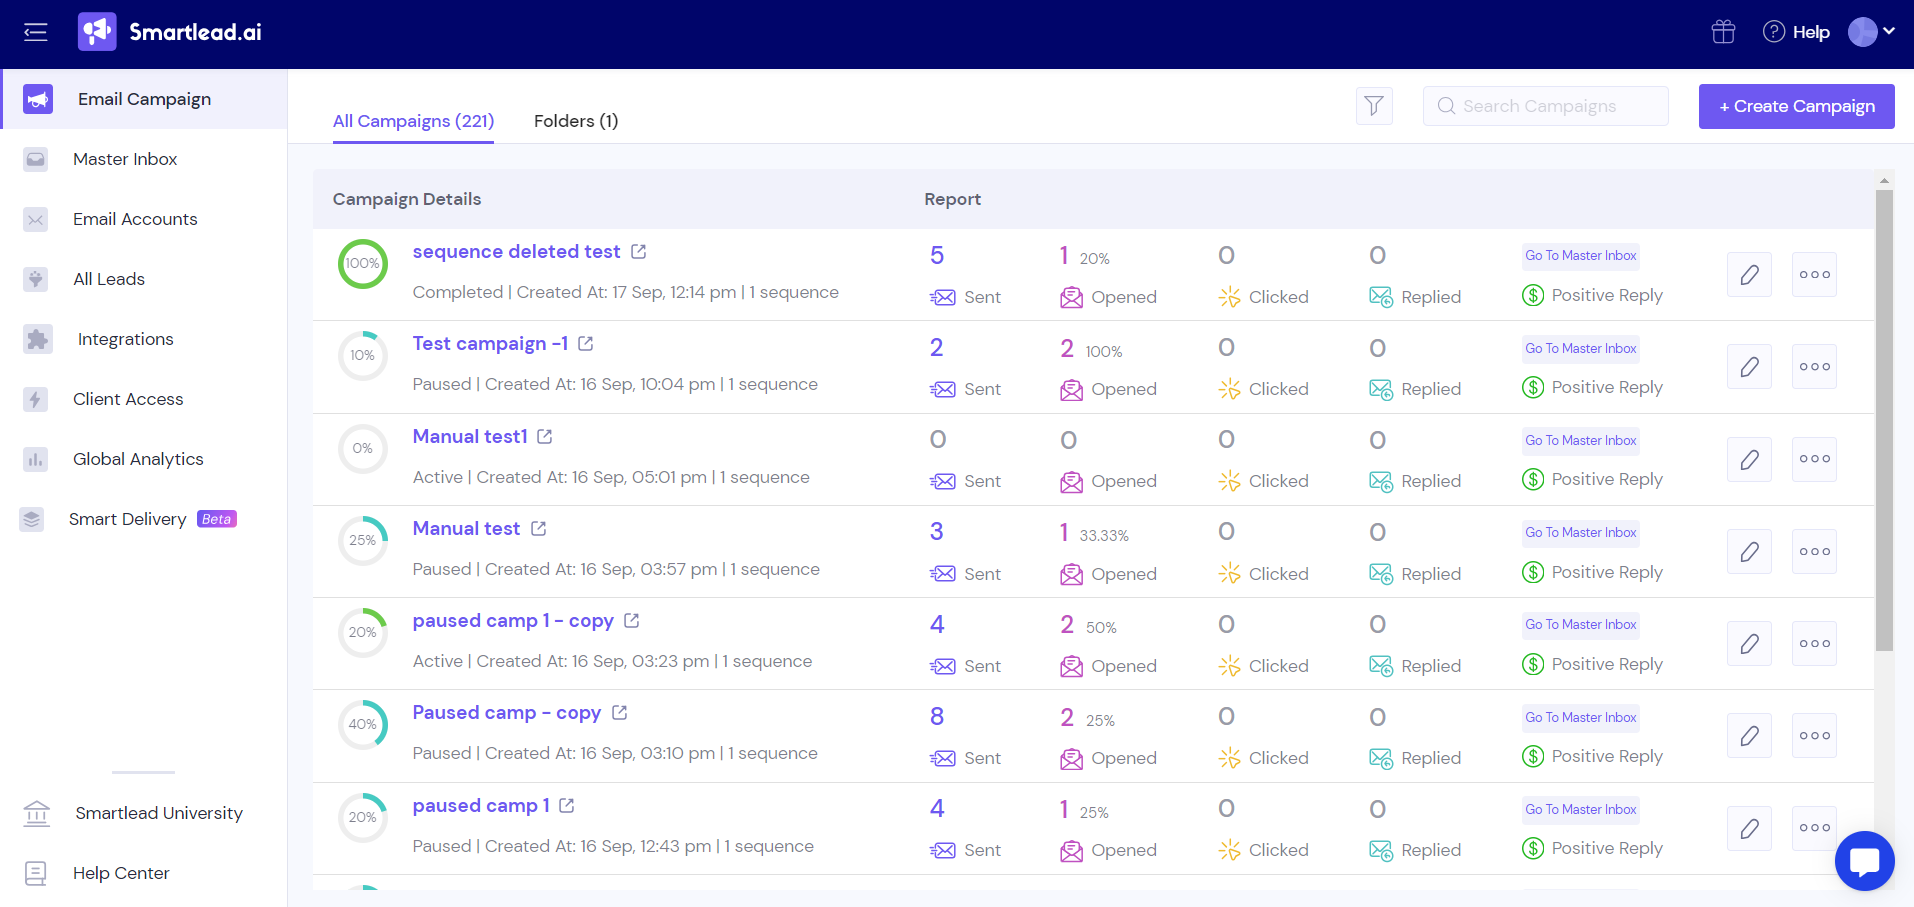
Once you login, you will see the dashboard as shown below:
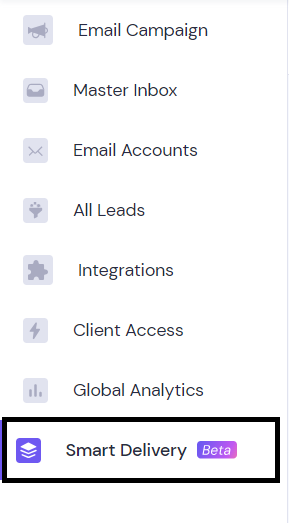
From the left-hand navigation, click on SmartDelivery.
If you’re running a test for the first time, you’ll be presented with a screen that allows you to select the test mode - Manual or Automatic.
Alternatively, you can simply click on the ‘Start Spam Test’ button on the top right corner of the screen to start your deliverability testing.
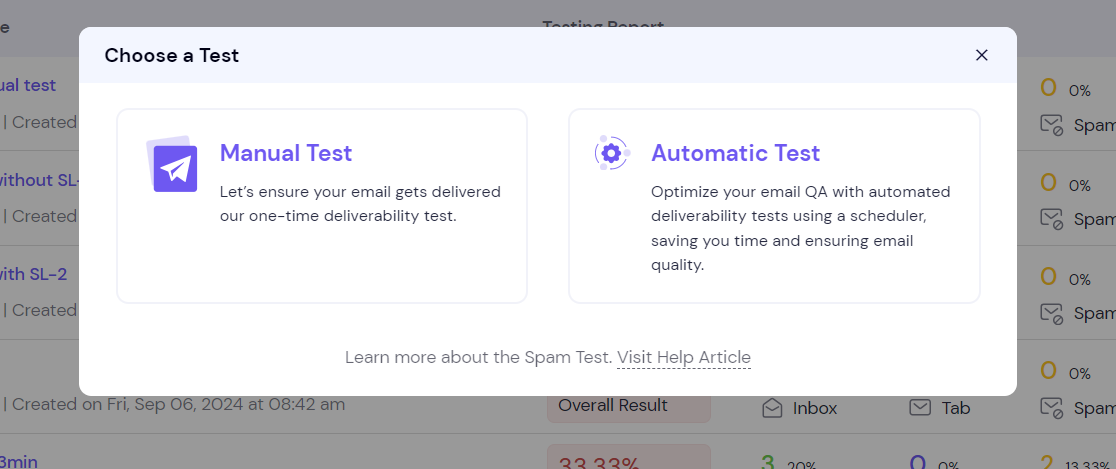
For this guide, select Manual Test.
Next, you will see the below screen where you have to provide a few general details.
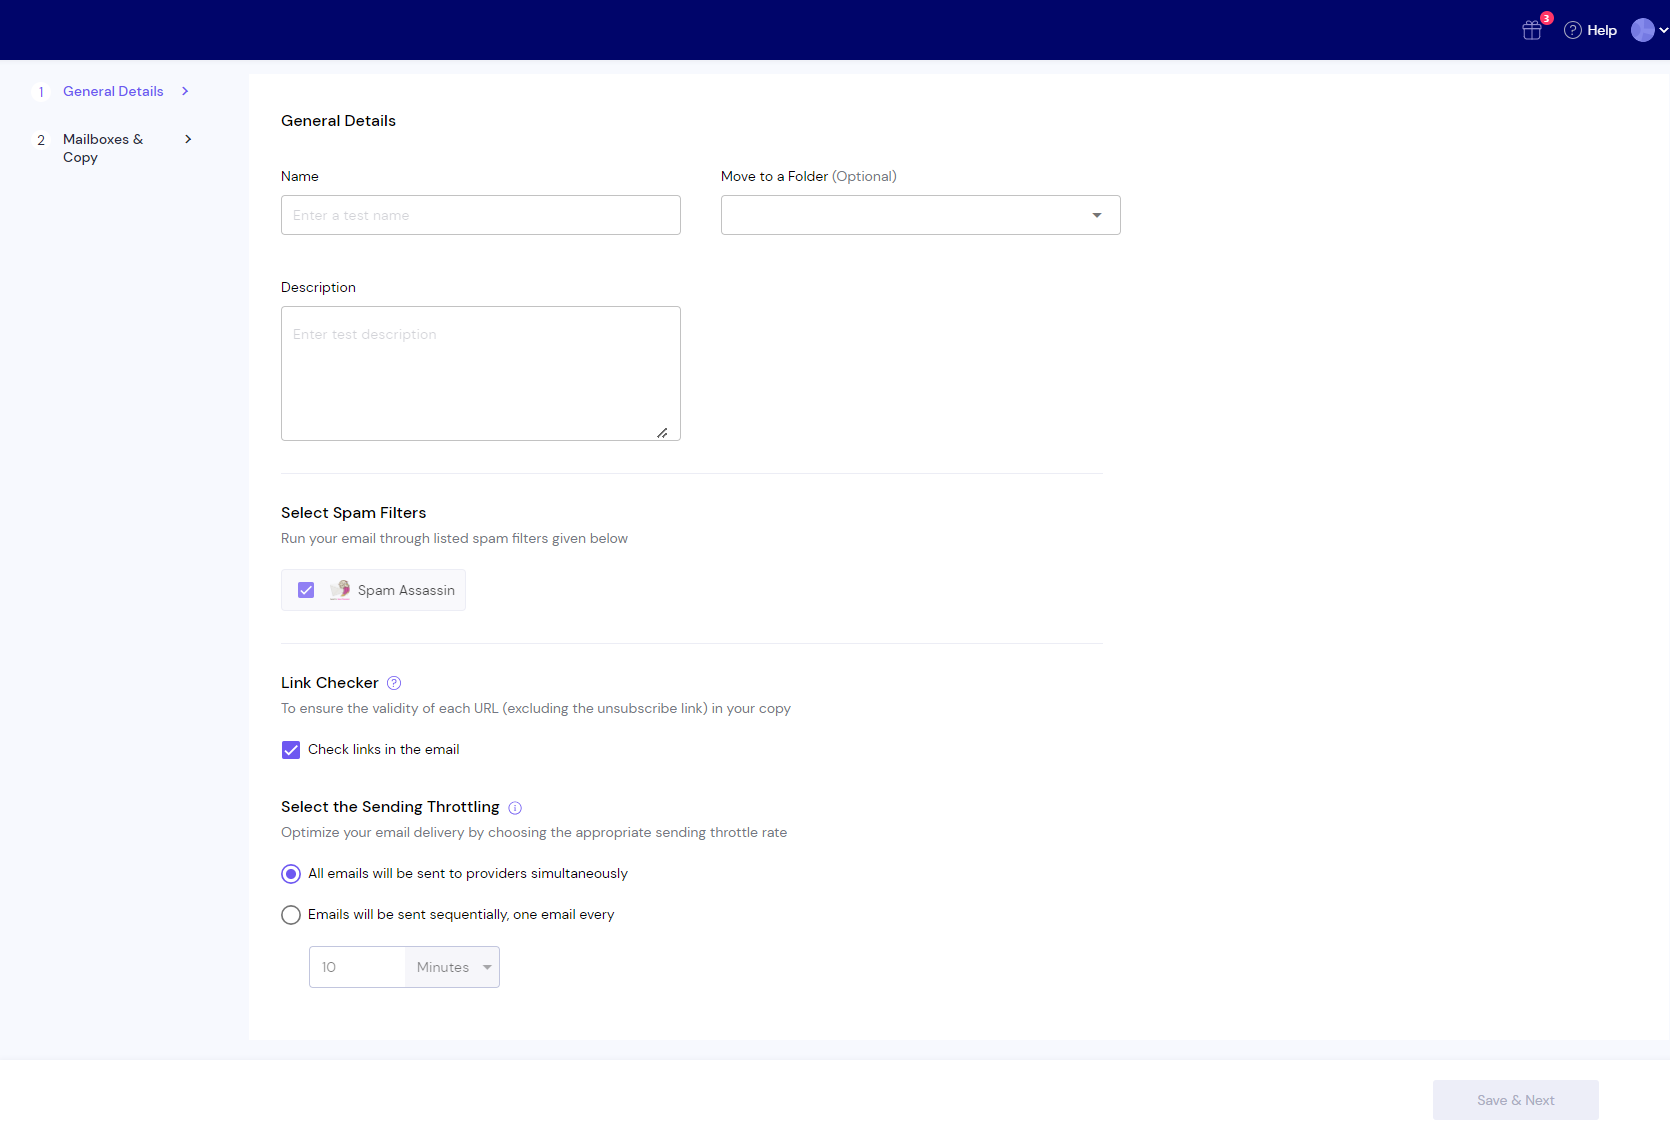
Fill out the following details:
Test Name: Name your test to distinguish it from others.
Description: A short description of your test.
Move to a Folder: Organize tests by moving them into relevant folders (optional).
As per the current settings, your test will run through SpamAssassin spam filter. (Quick Info: A spam filter is a tool used by email providers to analyze incoming emails and determine whether they should be delivered to the inbox or marked as spam. It evaluates factors like content, sender reputation, and technical setup, assigning a score to each email. By running your test through SpamAssassin, you can ensure your emails meet the criteria to pass through these filters and reach the recipient’s inbox.)
Additionally, enable the Link Checker to validate the links in your email (excluding the unsubscribe link).

Next, select the sending throttle rate. Sending throttle rate refers to the speed or rate at which emails are sent from your email server to recipients (in our case, the seed list). It controls how many emails are delivered over a specific period to avoid overwhelming email providers
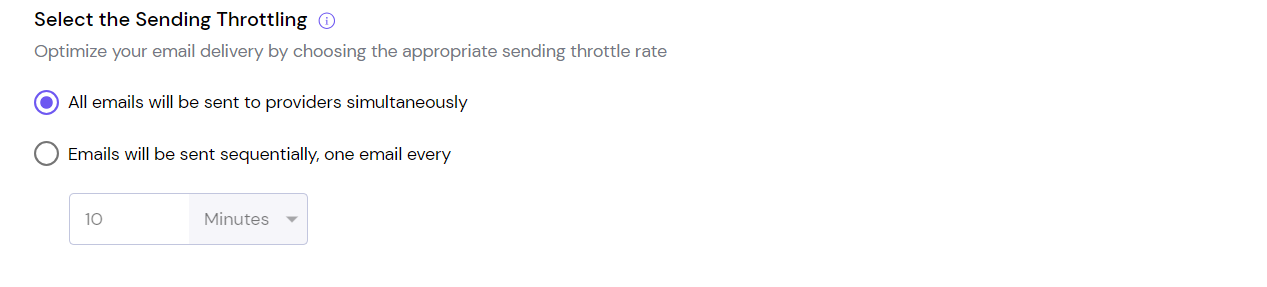
In SmartDelivery, you can either send all emails to providers simultaneously or set a time interval to send emails sequentially, such as one email every defined minute.
Once done with the general details, click and ‘Save & Next’ to move forward.
In the Mailboxes and Copy section, you can set up settings related to the mailboxes you want to check and the email copy.
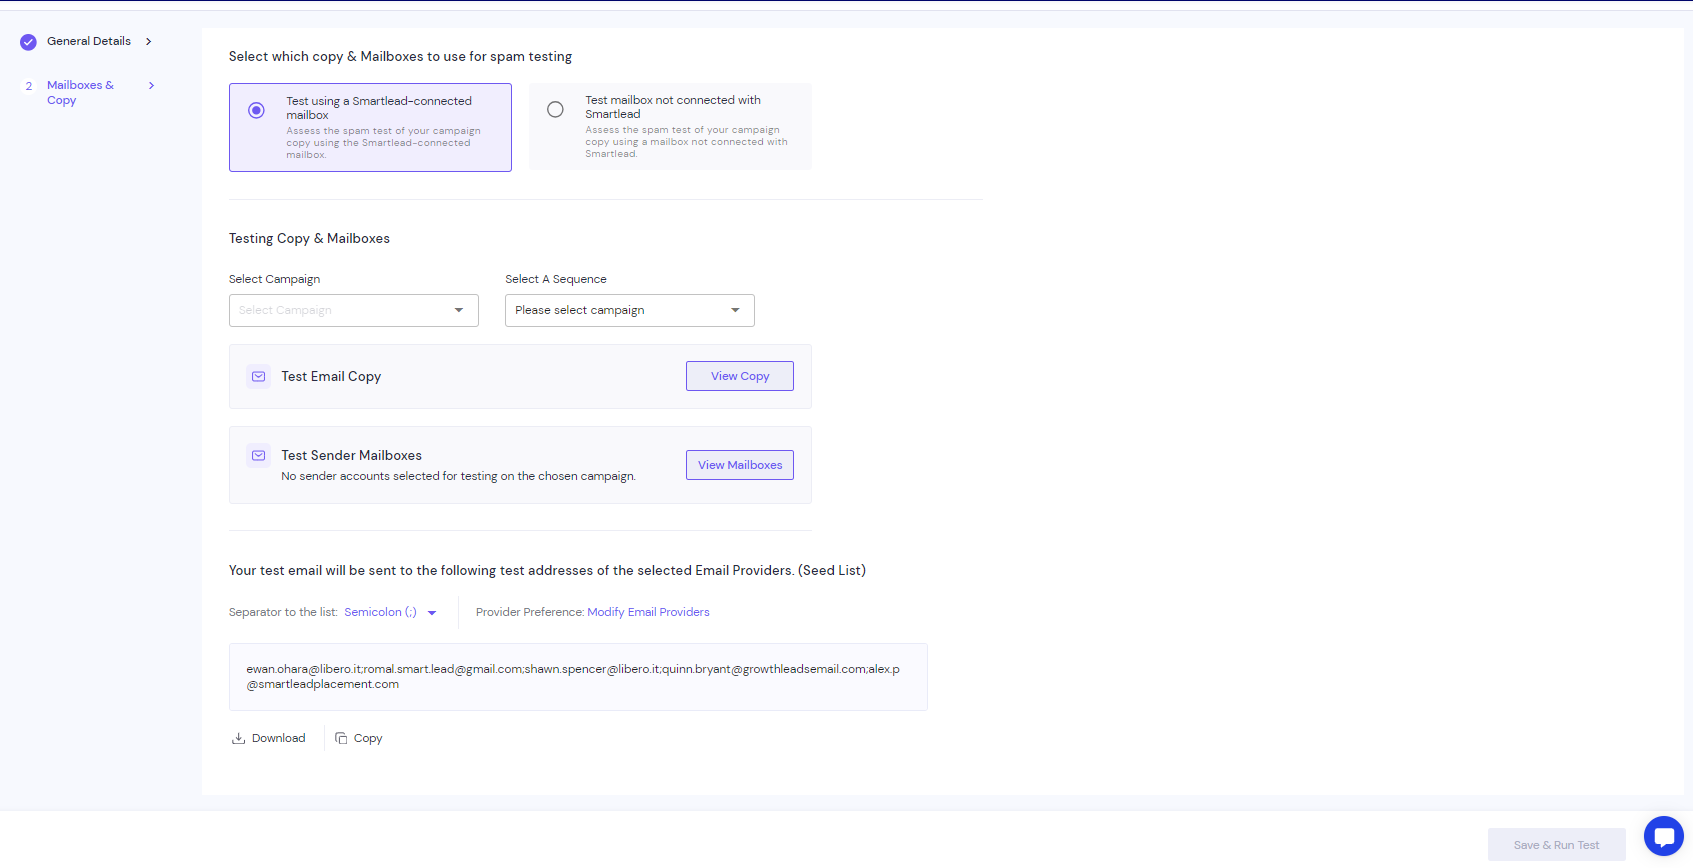
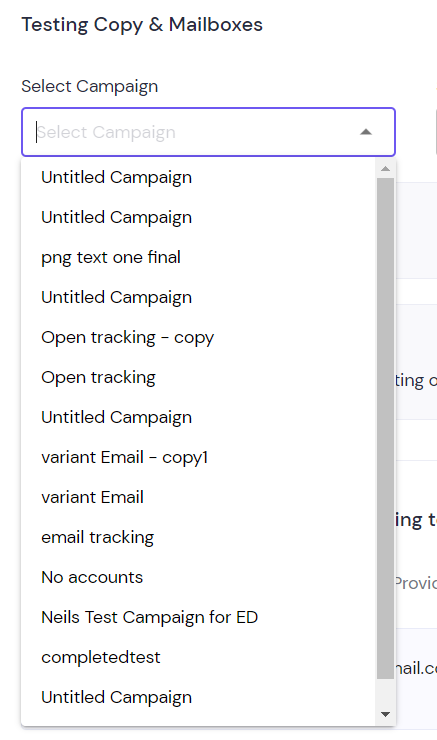
First you will need to select a campaign from the dropdown.
On selecting the campaign, you can select the corresponding sequence copy you wish to test from the Sequence dropdown.
You can preview the sequence copy.
You can either go with:
A Smartlead Connected Mailbox (one that you have added in your Smartlead account)
A non-connected Mailbox (one you have not added on Smartlead)
The deliverability testing in case of a non-connected mailbox is different. For more info, you can check this article.
In this guide, we will select the first radio button - Test Using a Smartlead Connected Mailbox.
Next, select the campaign by clicking on select campaign dropdown. You will find all the campaigns you have created in Smartlead here.
Similarly, select the sequence you want to test for a particular campaign in Smartlead using the select sequence dropdown.
Once you have selected the campaign and the sequence, you will be able to ‘View Copy’ which is nothing but the preview of the email copy you want to run the deliverability test on.
(Note: Any variables will automatically be replaced with one of your lead list data)
You can then select the sender accounts you wish to test from the particular campaign.
(Note: Limit applies on the selected sender accounts based on the subscription plan)
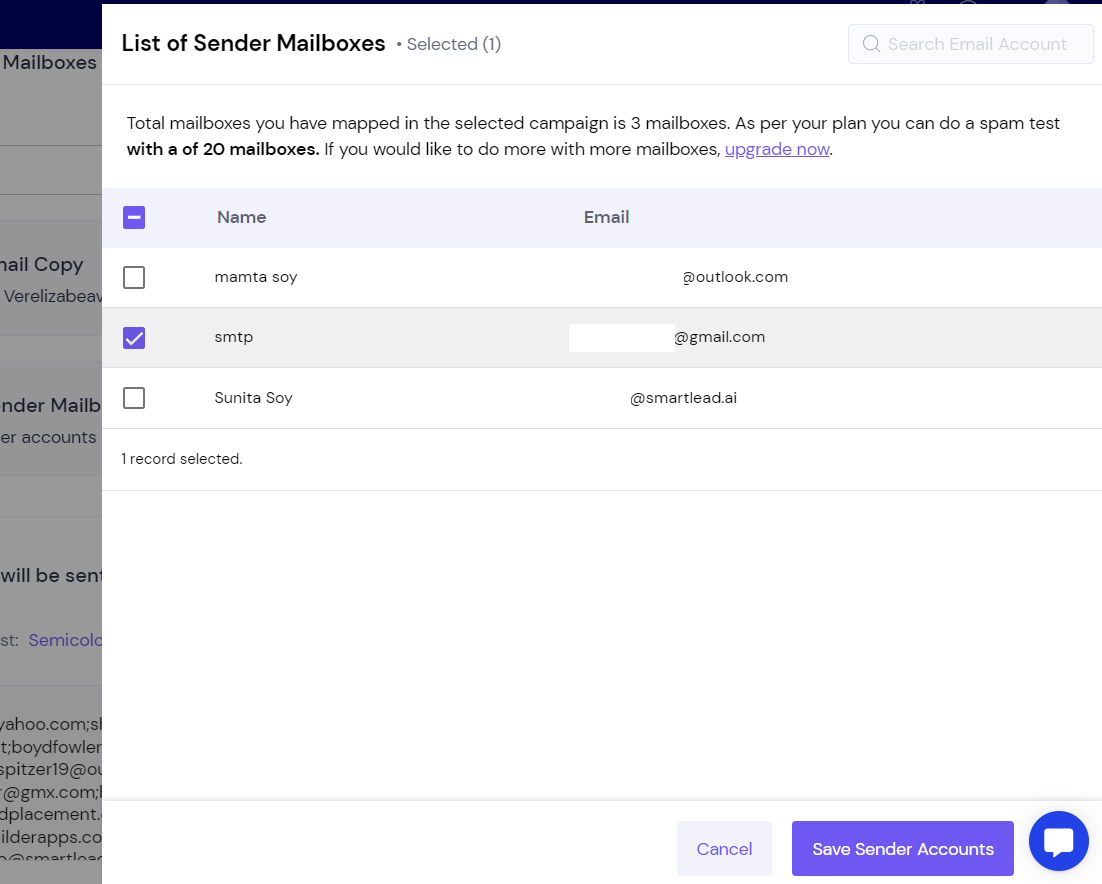
Note: Email IDs have been hidden in the above image
Modify Email Providers (Optional)
You can also Modify Email Providers when you run the test.
The test you run is sent to a seed list that contains over 50 email addresses from multiple providers to understand how your email is performing across various ESPs globally.
For that, click on ‘Modify Email Providers’ option above seed list section:
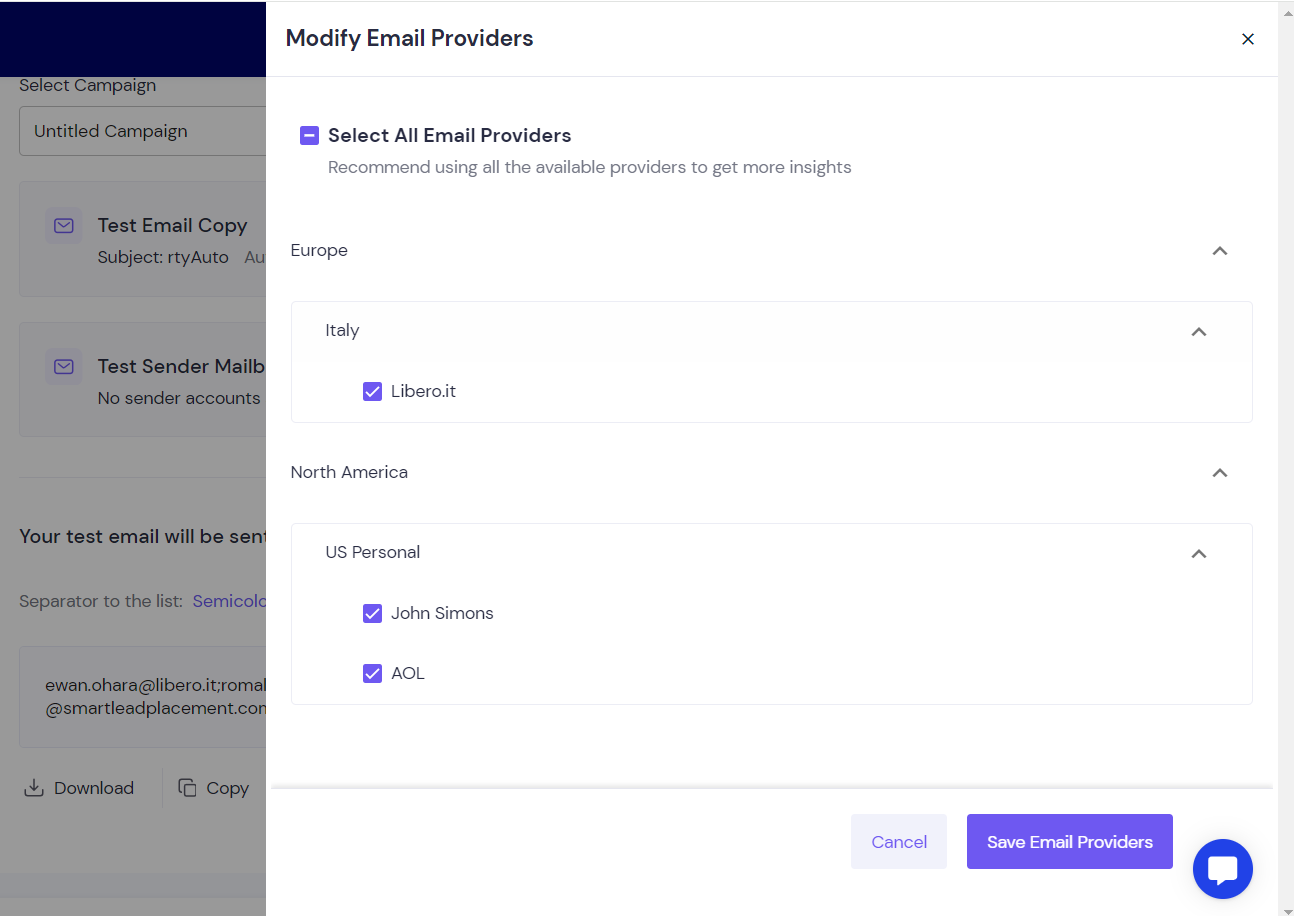
We recommend selecting all email providers to get more comprehensive insights.
After configuring your settings, click on Save & Run Test.
The tool will send your email to the selected seed list, analyzing how it performs across different providers.
Once the test is complete, you will be able to see a detailed deliverability report.
To know more about your deliverability reports in SmartDelivery, click here.
Use the deliverability report to identify authentication or content issues.
Regularly run tests when launching new campaigns or after making major changes to your email content or sending infrastructure.
Test at different throttle rates to find optimal sending speeds that minimize spam flags.
Always ensure SPF, DKIM, and DMARC are properly configured before testing.
Q: What is the difference between Manual and Automatic test modes?
A: Manual tests are triggered by you at any time, letting you customize settings fully. Automatic tests can be scheduled or triggered by campaign events for ongoing monitoring.
Q: How long does the deliverability test take?
A: Tests usually complete within minutes, but the report availability depends on email provider responses and spam filter processing times.
Q: Can I test emails from non-connected mailboxes?
A: Yes, but the testing process and results may differ. See Testing Non-Connected Mailboxes for more information.
Q: What if my test shows my emails are marked as spam?
A: Use the detailed report insights to fix issues—check your content, authentication, sending IP reputation, and try adjusting your sending throttle rate.
Q: How many emails does SmartDelivery send during a test?
A: It sends emails to a seed list of around 50+ addresses covering a wide range of ISPs and providers worldwide for comprehensive analysis.
