In the evolving business world, efficient client management is essential. Adding a new client to your Smartlead account streamlines this process. In this article, we will walk you through the steps to create a new client in Smartlead.
Start by logging in to your Smartlead account. Ensure you have your username and password handy.
Once you have logged in, head over to the Client Access Dashboard. This area of your Smartlead account allows you to manage all your client's information in one centralized location.
Look for the "Add Client" button, located in the top right corner, Click on this button to proceed with the client creation process.

Fill in the necessary information, including their name, company name, email, and password. Make sure the information you input is accurate to avoid complications down the line.
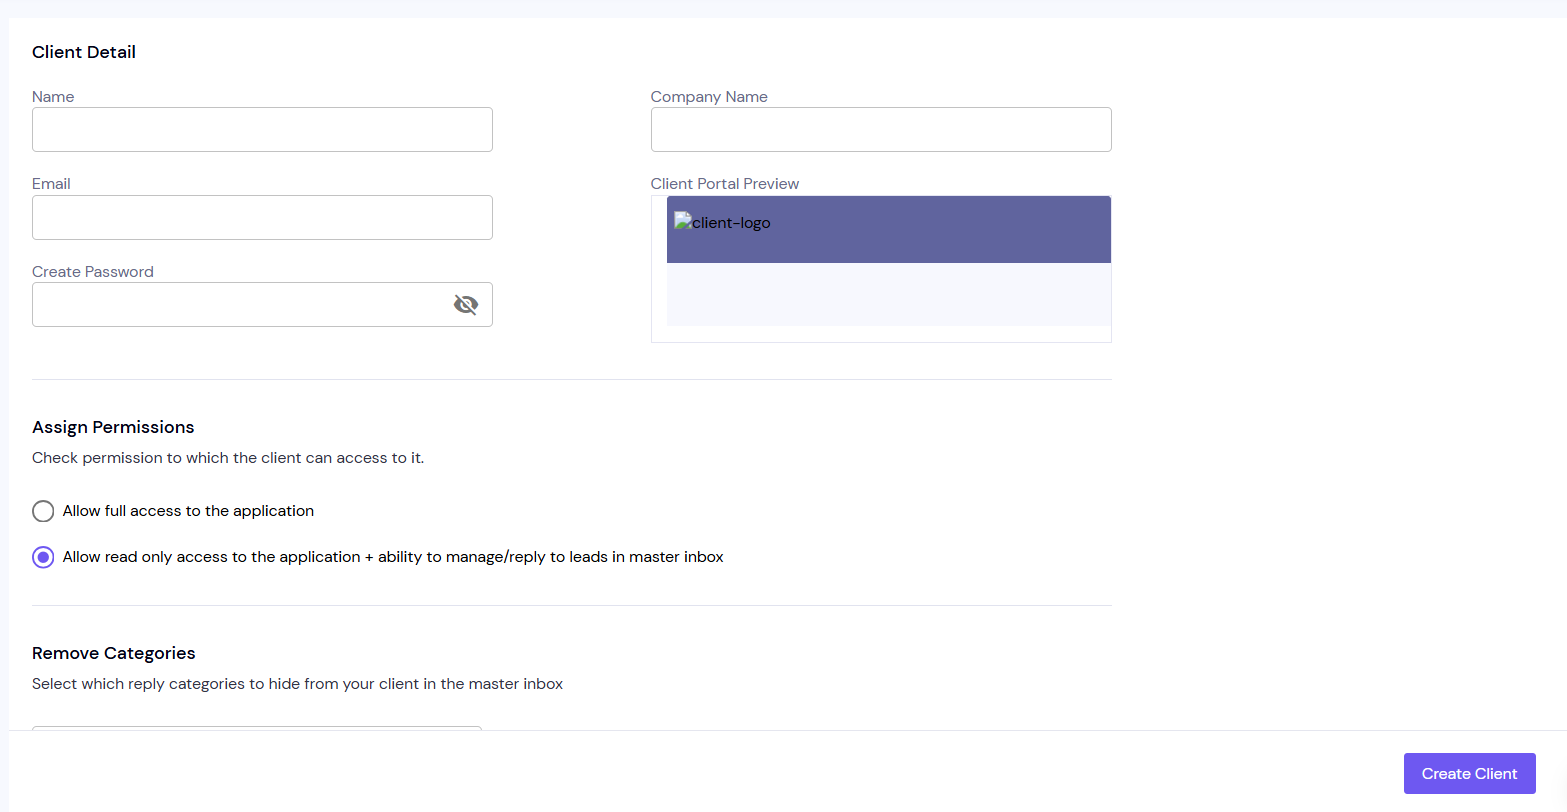
Smartlead offers the option to assign various permissions to your clients based on your preference. This feature helps in providing the right level of access to each client, maintaining privacy, and ensuring effective collaboration.

In Smartlead, you can choose which categories you want to show up in the Master Inbox for your clients. Tailor this feature based on what you believe would be most useful for each client.

Smartlead allows you to allocate email and lead credits for your clients.

Finally, after all the details have been filled in and preferences set, click on "Create Client". Your client will now be added to your Smartlead account, and they will receive an email with their login credentials.
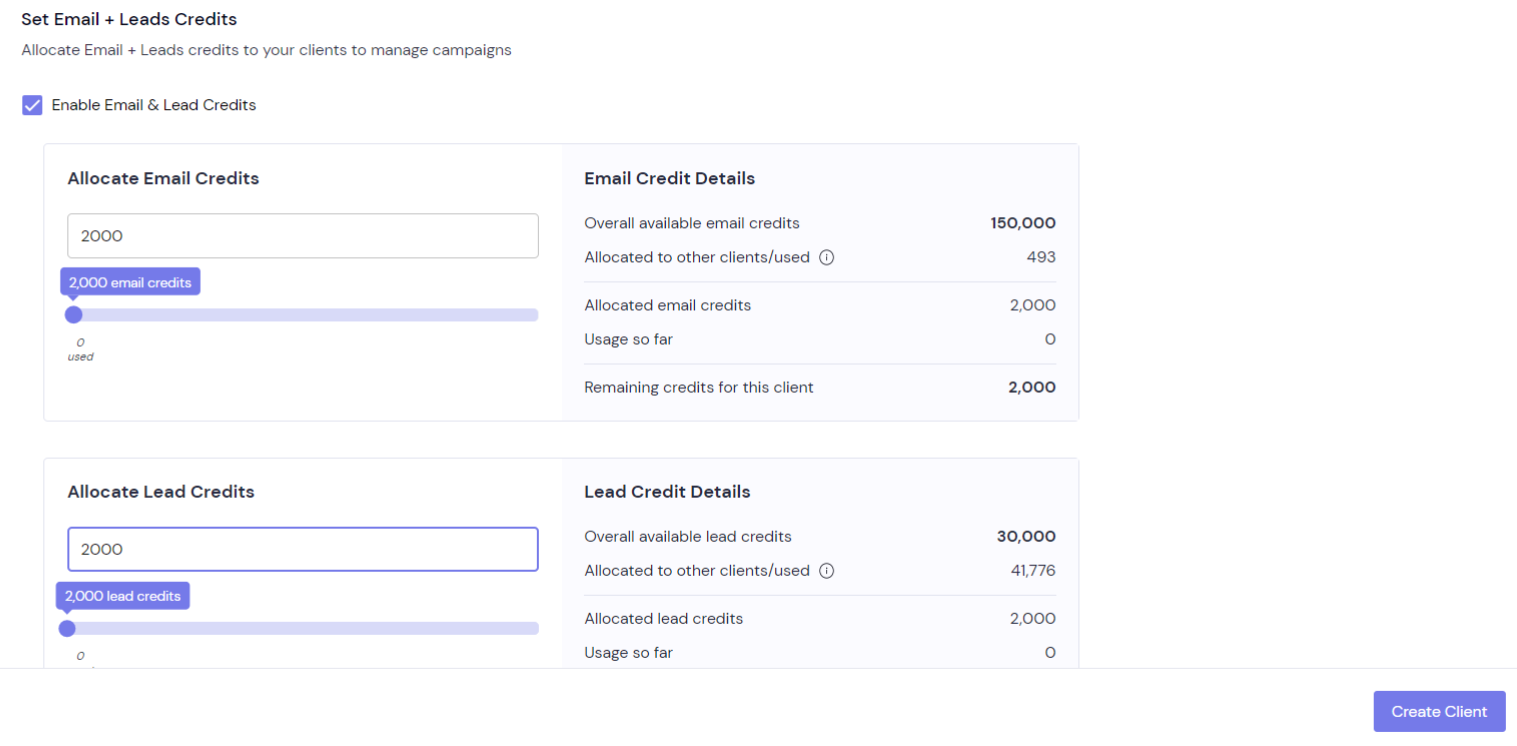
Note: You can edit the Email credits and Lead credits as per your preference for your clients.
