SmartServers is a premium feature in Smartlead that provides users with dedicated servers for sending email campaigns.
This ensures improved deliverability, eliminates risks associated with shared infrastructure, and offers advanced features like server rotation, load balancing, and blacklist detection.
This guide will walk you through the steps to purchase, manage, and assign dedicated servers for your campaigns.
SmartServers gives you isolated, dedicated access to your own server, thus giving you complete control over your email-sending infrastructure. Unlike shared servers, where multiple users share the same IP address, SmartServers ensure that your email deliverability is not affected by others' practices.
Each dedicated IP is hosted on individual servers, offering unmatched performance and reliability. These servers operate independently, ensuring zero downtime and complete control over the email-sending process. Learn more about SmartServers by watching this explanatory video.
Auto Server Rotation: Rotates servers automatically to optimize deliverability and prevent blacklisting.
SmartLoad Balancing: Distributes email load evenly across multiple servers.
Blacklist Detection: Monitors IP health and notifies you if an IP is blacklisted.
Granular Control: Assign specific servers to campaigns for more flexibility.
Isolated Dedicated servers: Dedicated individual servers, ensuring zero downtime and full control.
Log in to your Smartlead account.
Navigate to the SmartServers tab on the left-hand menu.
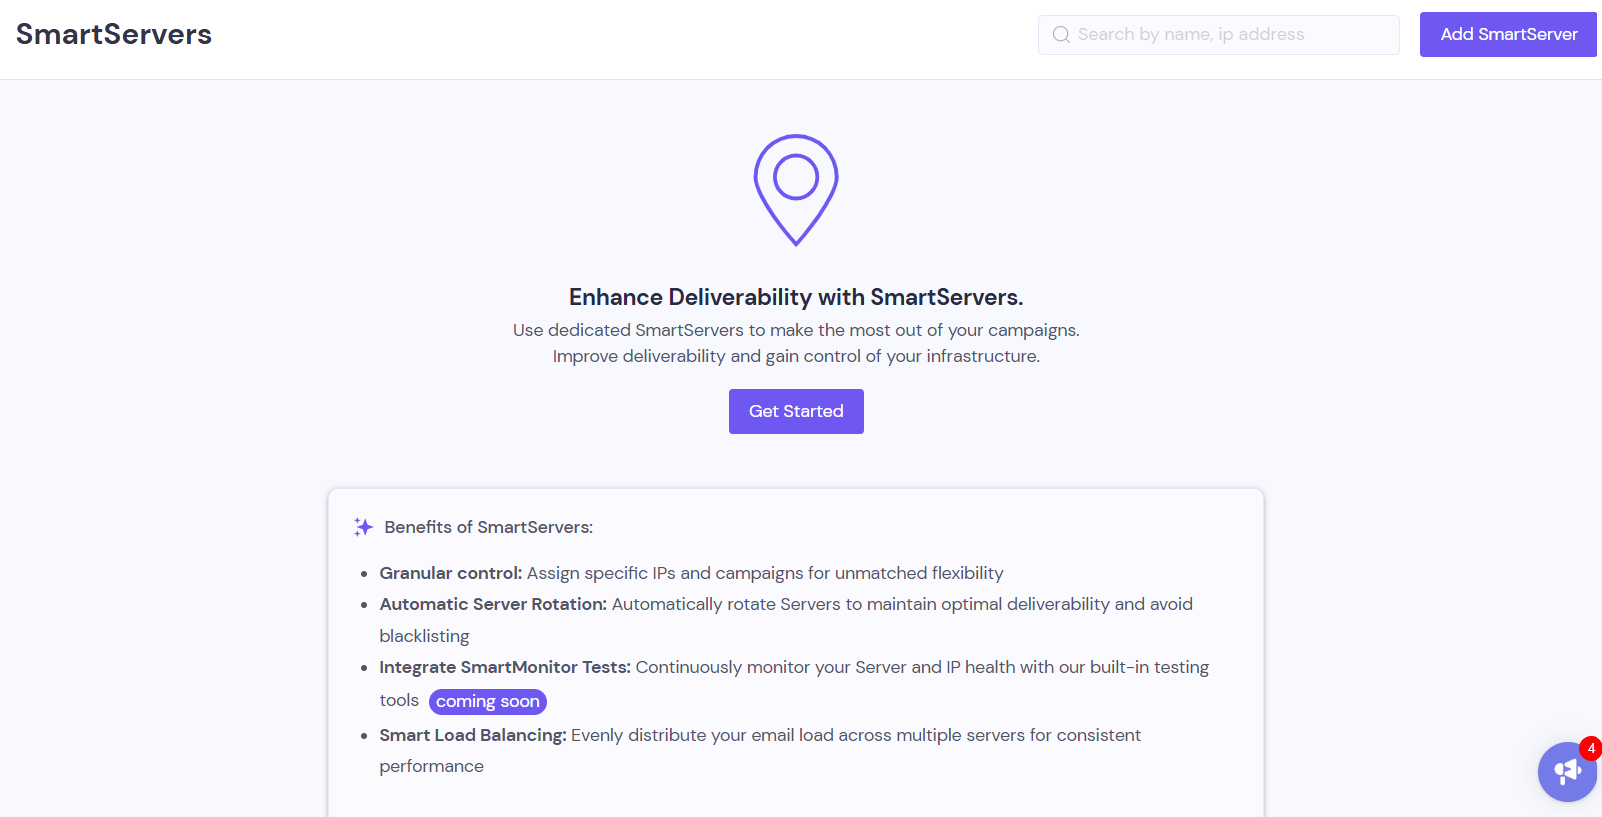
If you are buying for the first time, you will see the below screen:

To start a new purchase, click on the ‘Add Servers’ button on the top right.
If you have already purchased some servers, you will see a list of all your servers on this page, like shown below, to buy new, you can always click on ‘Add Servers’ option.
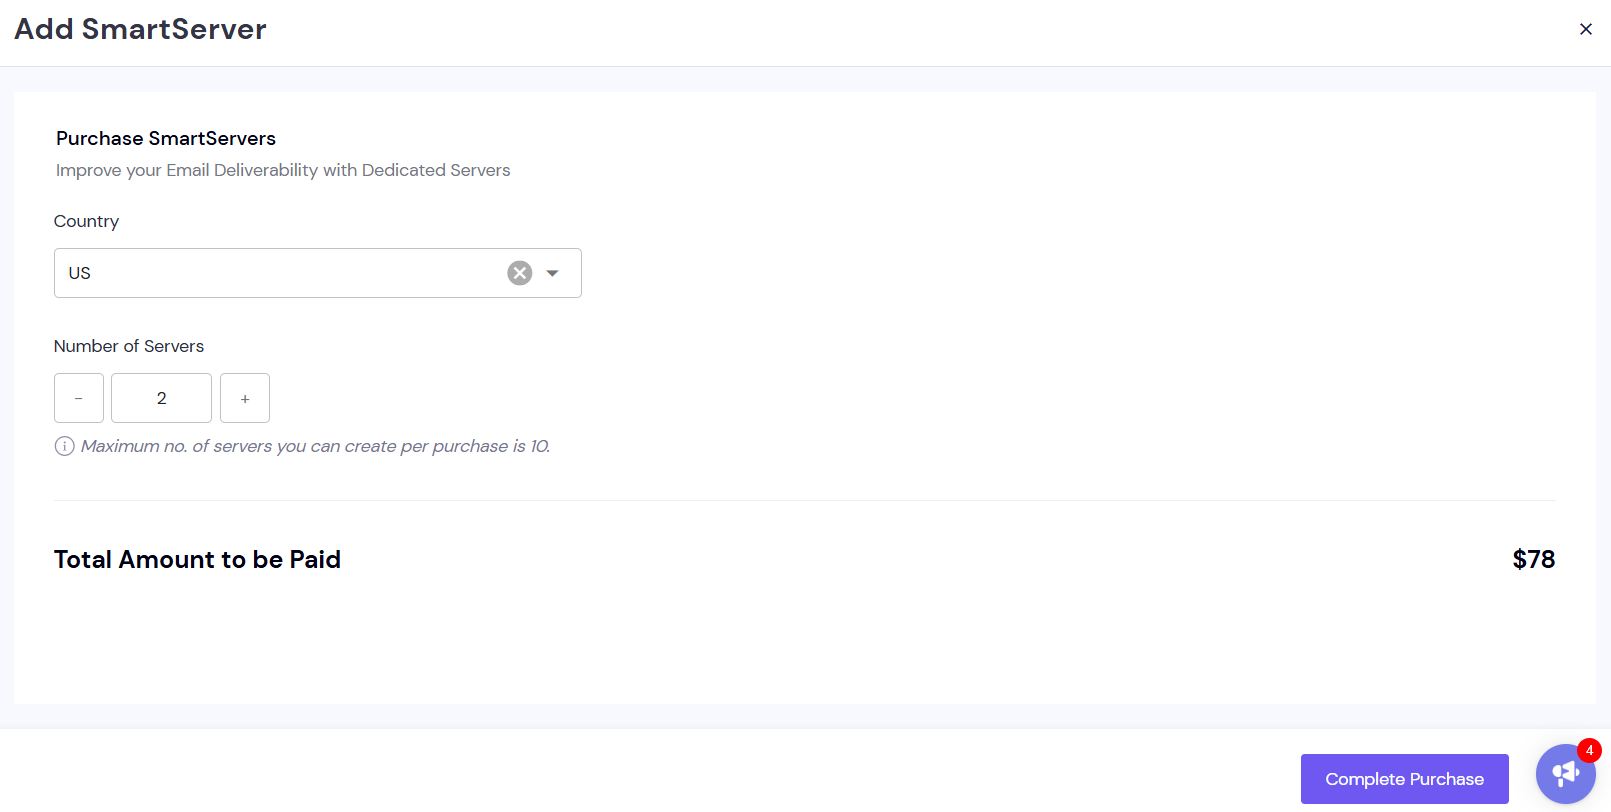
Once you click on Get Started on the welcome screen, follow these steps to add servers:
Select the Region from the dropdown menus. (For now, you will be able to choose from US and EU regions)
Specify the Number of servers you wish to purchase.
View the total amount payable based on your selections.

Click Complete Purchase to finalize the transaction.
Once the purchase is complete, you will see your dedicated servers listed along with their details:
IP Address
Region
Number of campaigns using the server
Email statistics (e.g., emails sent, replies received, and bounce rate)
Use separate servers for each client
Even if servers are used across different campaigns within the same client, the Ideal limit is 80,000 - 100,000 monthly mails per server
Make sure that the Server mailing is ramped up slowly. Warm up (coming soon to SmartServers) should be started with 5000 emails to be processed per server and ramped up by 5000 every day till about 80-100k so ~16 days from the time of starting.
Bounce rates: 1 - 1.5% for each server
There could be a 5 minute delay between spinning up and sending.
Editing and Managing Server Details
You can rename your servers for better organization.
Click on the server you want to edit and then click on the pencil icon on the top right of the screen as shown below:
You will be able to edit the name of the server:

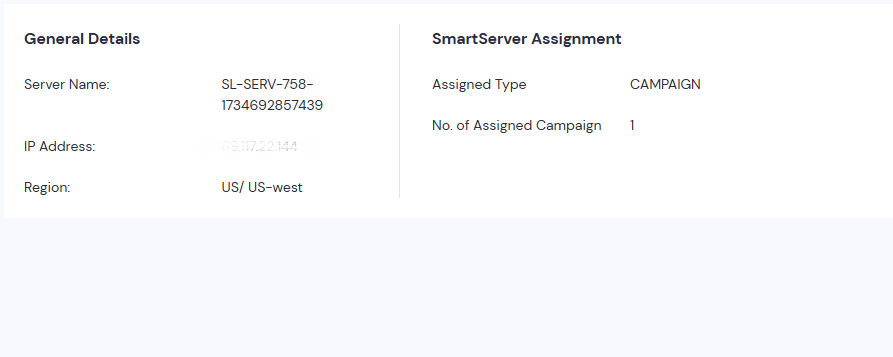
Click on any server to view its details, including:
General information (IP name, address, and region).
Blacklist Status and Reputation Score.
Assignment Type: Indicates whether the server is assigned to a client or campaign.
Assigned Campaigns: Shows the campaigns linked to the server.
Blacklist Detection & Notification
SmartServers continuously monitor the health of your servers. If an IP gets blacklisted, the system will notify you and rotate the IP to avoid further issues.
Server Rotation
Managed servers automatically rotate to distribute email-sending load evenly and maintain high deliverability rates.
Campaign-Level Metrics
Filter metrics such as bounce rates and reply rates at the campaign level to evaluate performance.
You can cancel your subscription to a dedicated server at any time. Upon cancellation:
The server will remain active until the end of the billing cycle.
After the billing cycle ends, the server will be moved to the shared server pool.
SmartServers offers unparalleled control and reliability for your email campaigns. By leveraging dedicated servers, you can ensure better email deliverability, safeguard your reputation, and streamline your campaign management.
For further assistance, feel free to contact our support team or refer to the Smartlead help center.