Smartlead allows you to assign dedicated servers to clients for exclusive use, ensuring that their email-sending infrastructure is completely isolated from others. This guide will walk you through assigning dedicated servers to existing clients.
Log in to your Smartlead account.
Click on Client Access from the left-hand menu.
Click on the client’s name to open their profile.
In the client’s profile, look for the Dedicated Server Address section.
Click on Assign Dedicated Server.
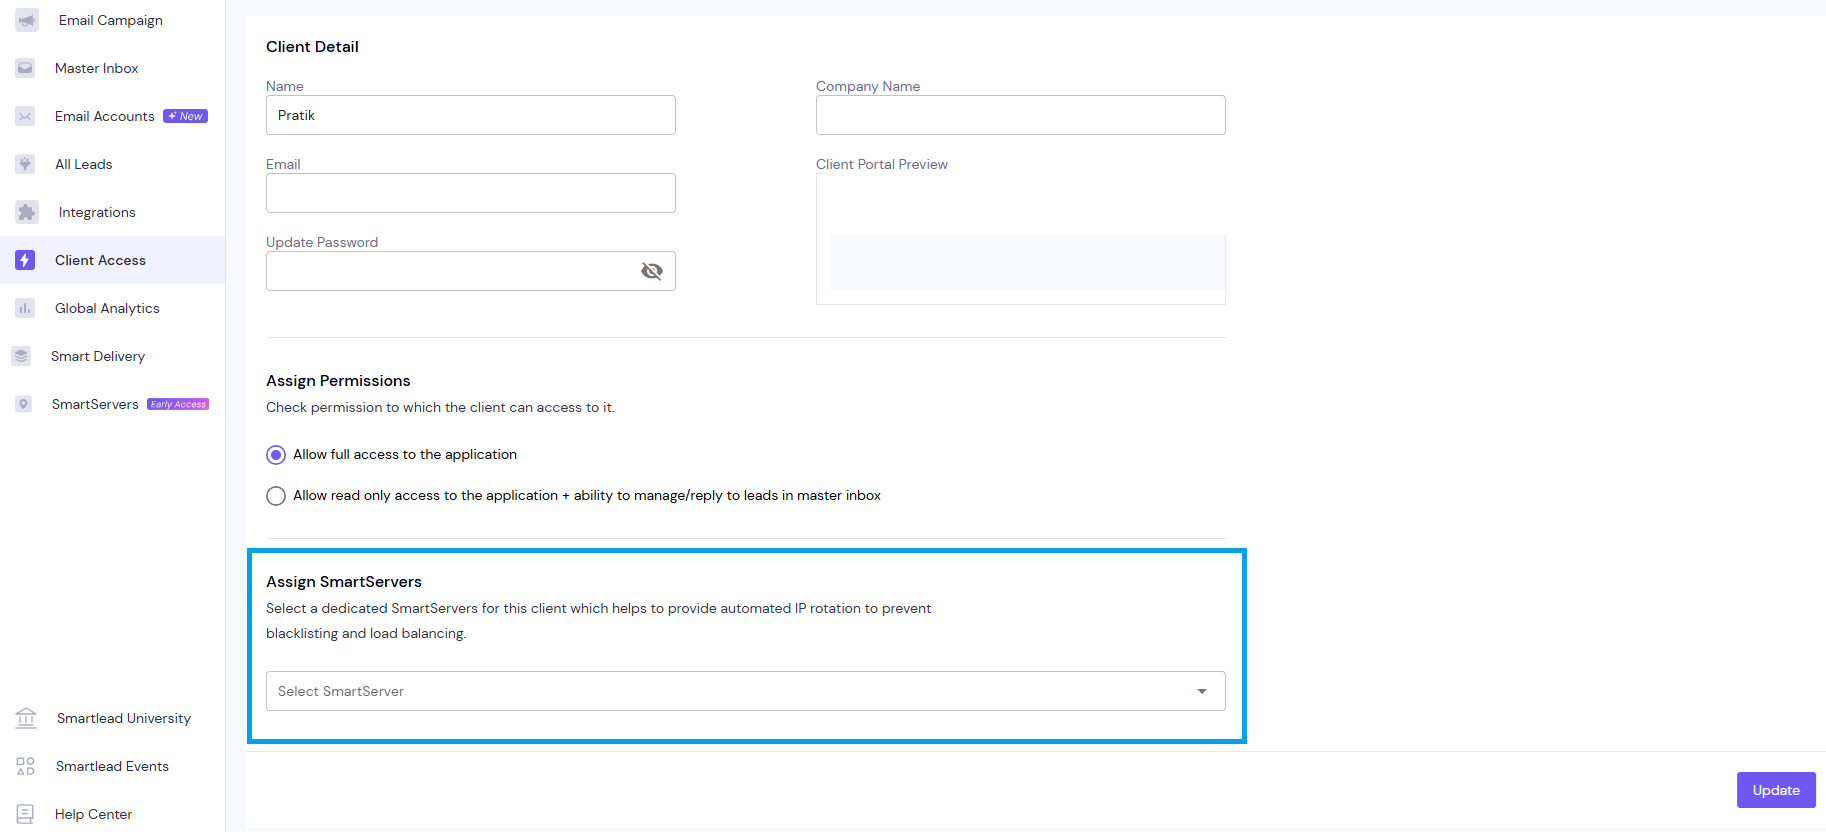
Select an available dedicated Server from the dropdown.
The system will display details about each server, including its region, blacklist status, and current usage.
Rearrange Multiple Servers (Optional):
If you’ve assigned multiple servers to the client, you can rearrange their priority or order as needed.
Click Save to confirm the assignment.
Exclusive Server Usage: Once a server is assigned to a client, it cannot be shared with another client.
Multiple servers per Client: You can assign multiple dedicated servers to a single client, providing greater flexibility for large-scale email campaigns.
Campaign-Level Flexibility: Servers assigned to a client can still be allocated to multiple campaigns within that client’s account.
By assigning dedicated servers to your clients, you give them exclusive control over their email-sending infrastructure, enhancing trust and deliverability.
Note: Some features may just be rolling out at the time of publishing this article. Reach out to support for any queries.
