Your Email Network allows you to connect Outlook mailboxes using your own Microsoft Azure OAuth app. This setup ensures secure authentication, branded user experience, and control over deliverability and mailbox reputation.
Before You Start
Please connect with your Smartlead Customer Success Manager (CSM) before creating your OAuth app. They’ll guide you through the steps to generate your Client ID and Client Secret correctly.
Mistakes here can affect your email deliverability and campaign performance, so we strongly recommend doing this with a CSM.
Go to the Azure Portal and navigate to Azure Active Directory → search for App registrations
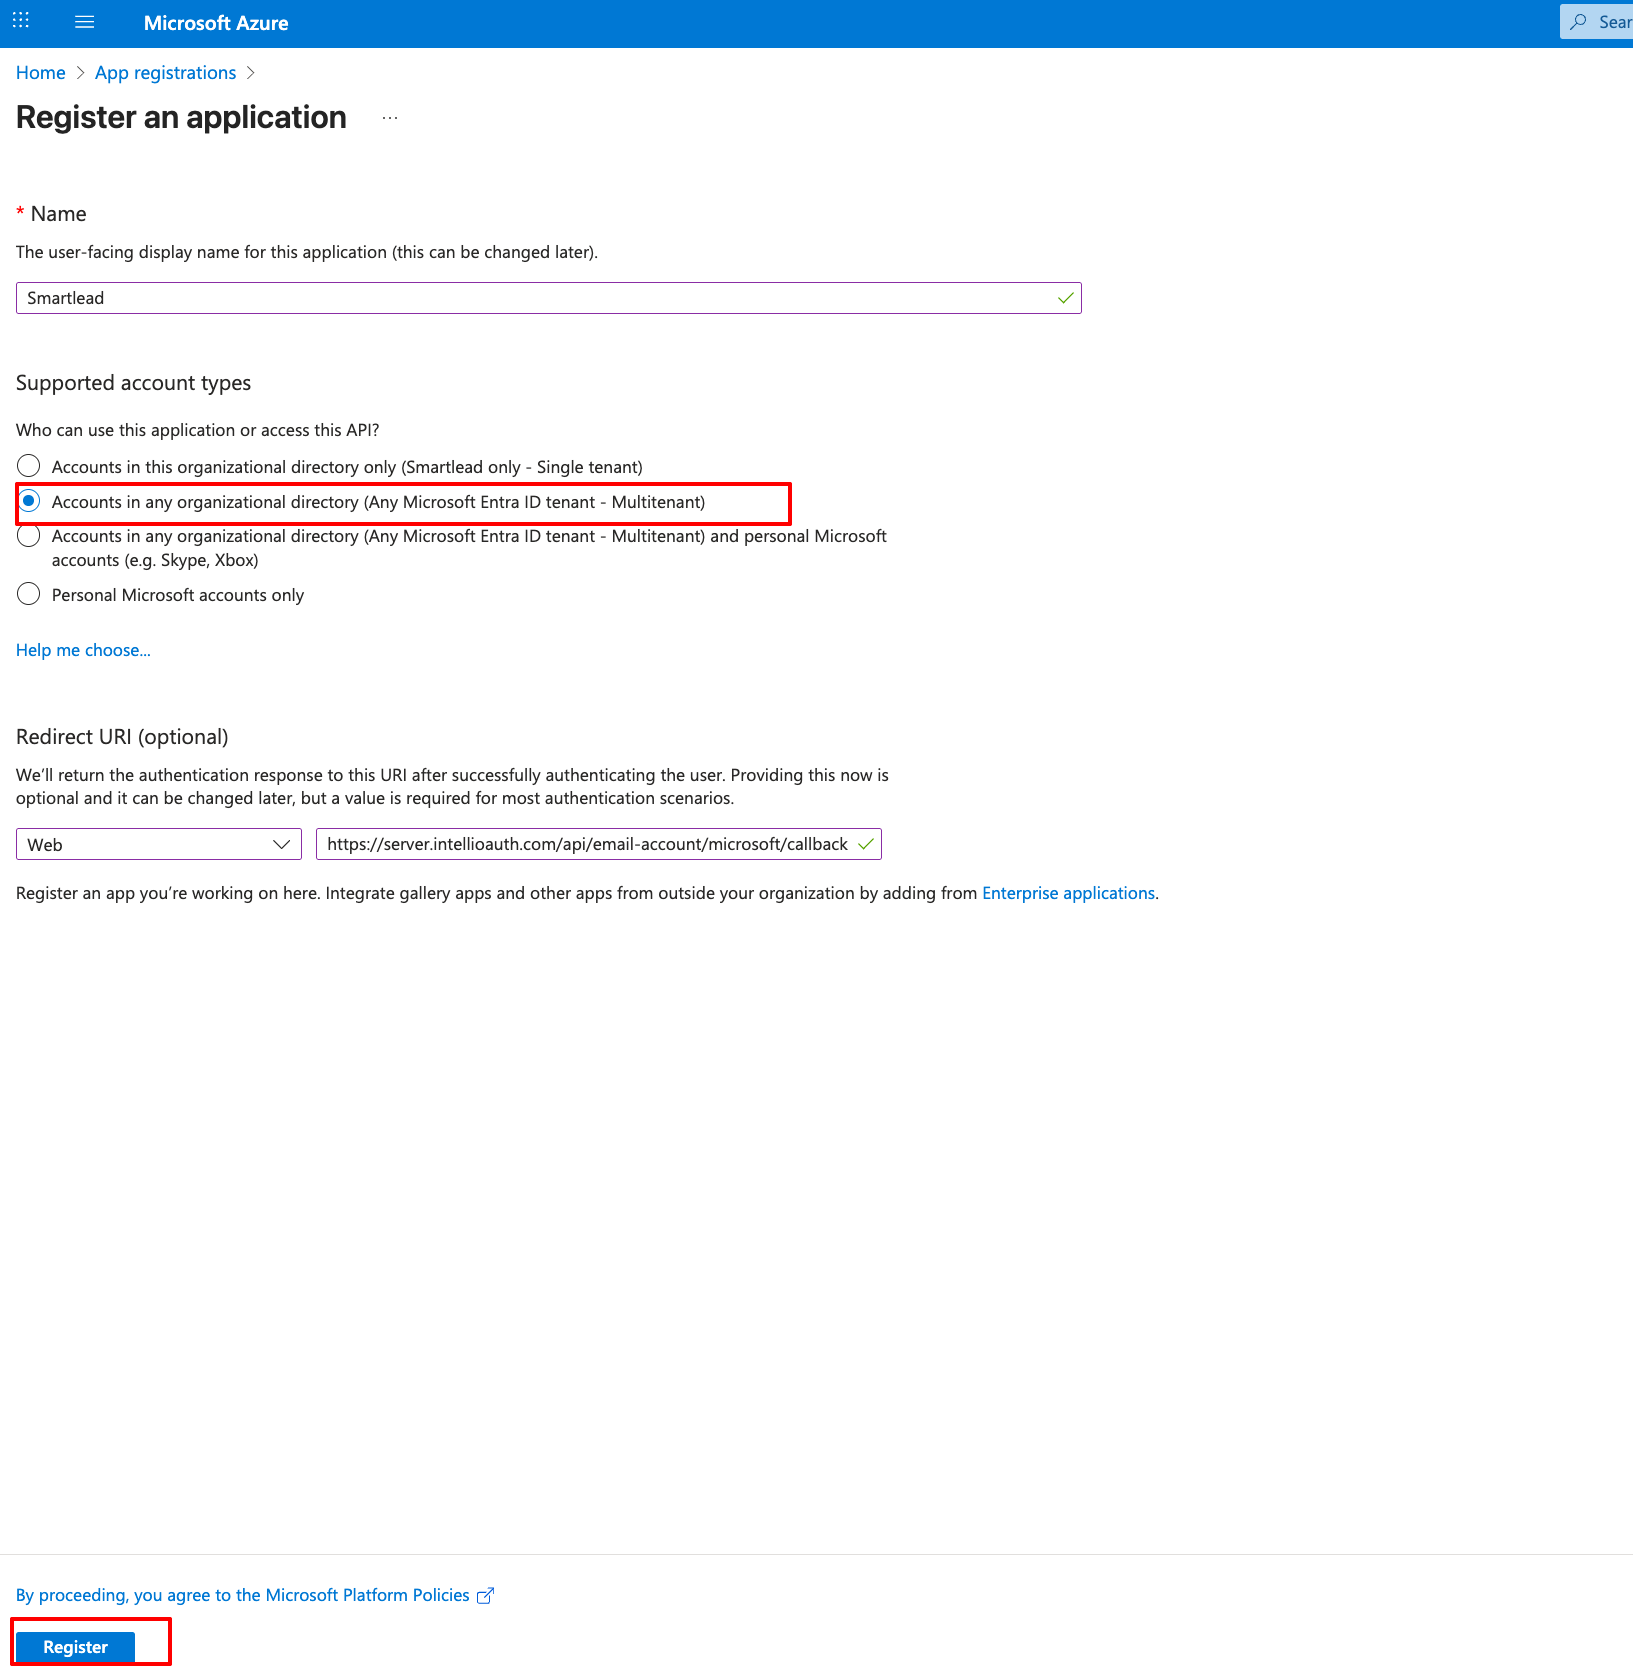
Click New registration
Name your app (this can be your brand or website name—what your users will see when signing in)
Choose Accounts in any organizational directory
Under Redirect URIs, choose Web and enter:
https://server.intellioauth.com/api/email-account/microsoft/callback
This URI is required for Smartlead to complete the OAuth handshake
Click on register
Attaching a screenshot for reference
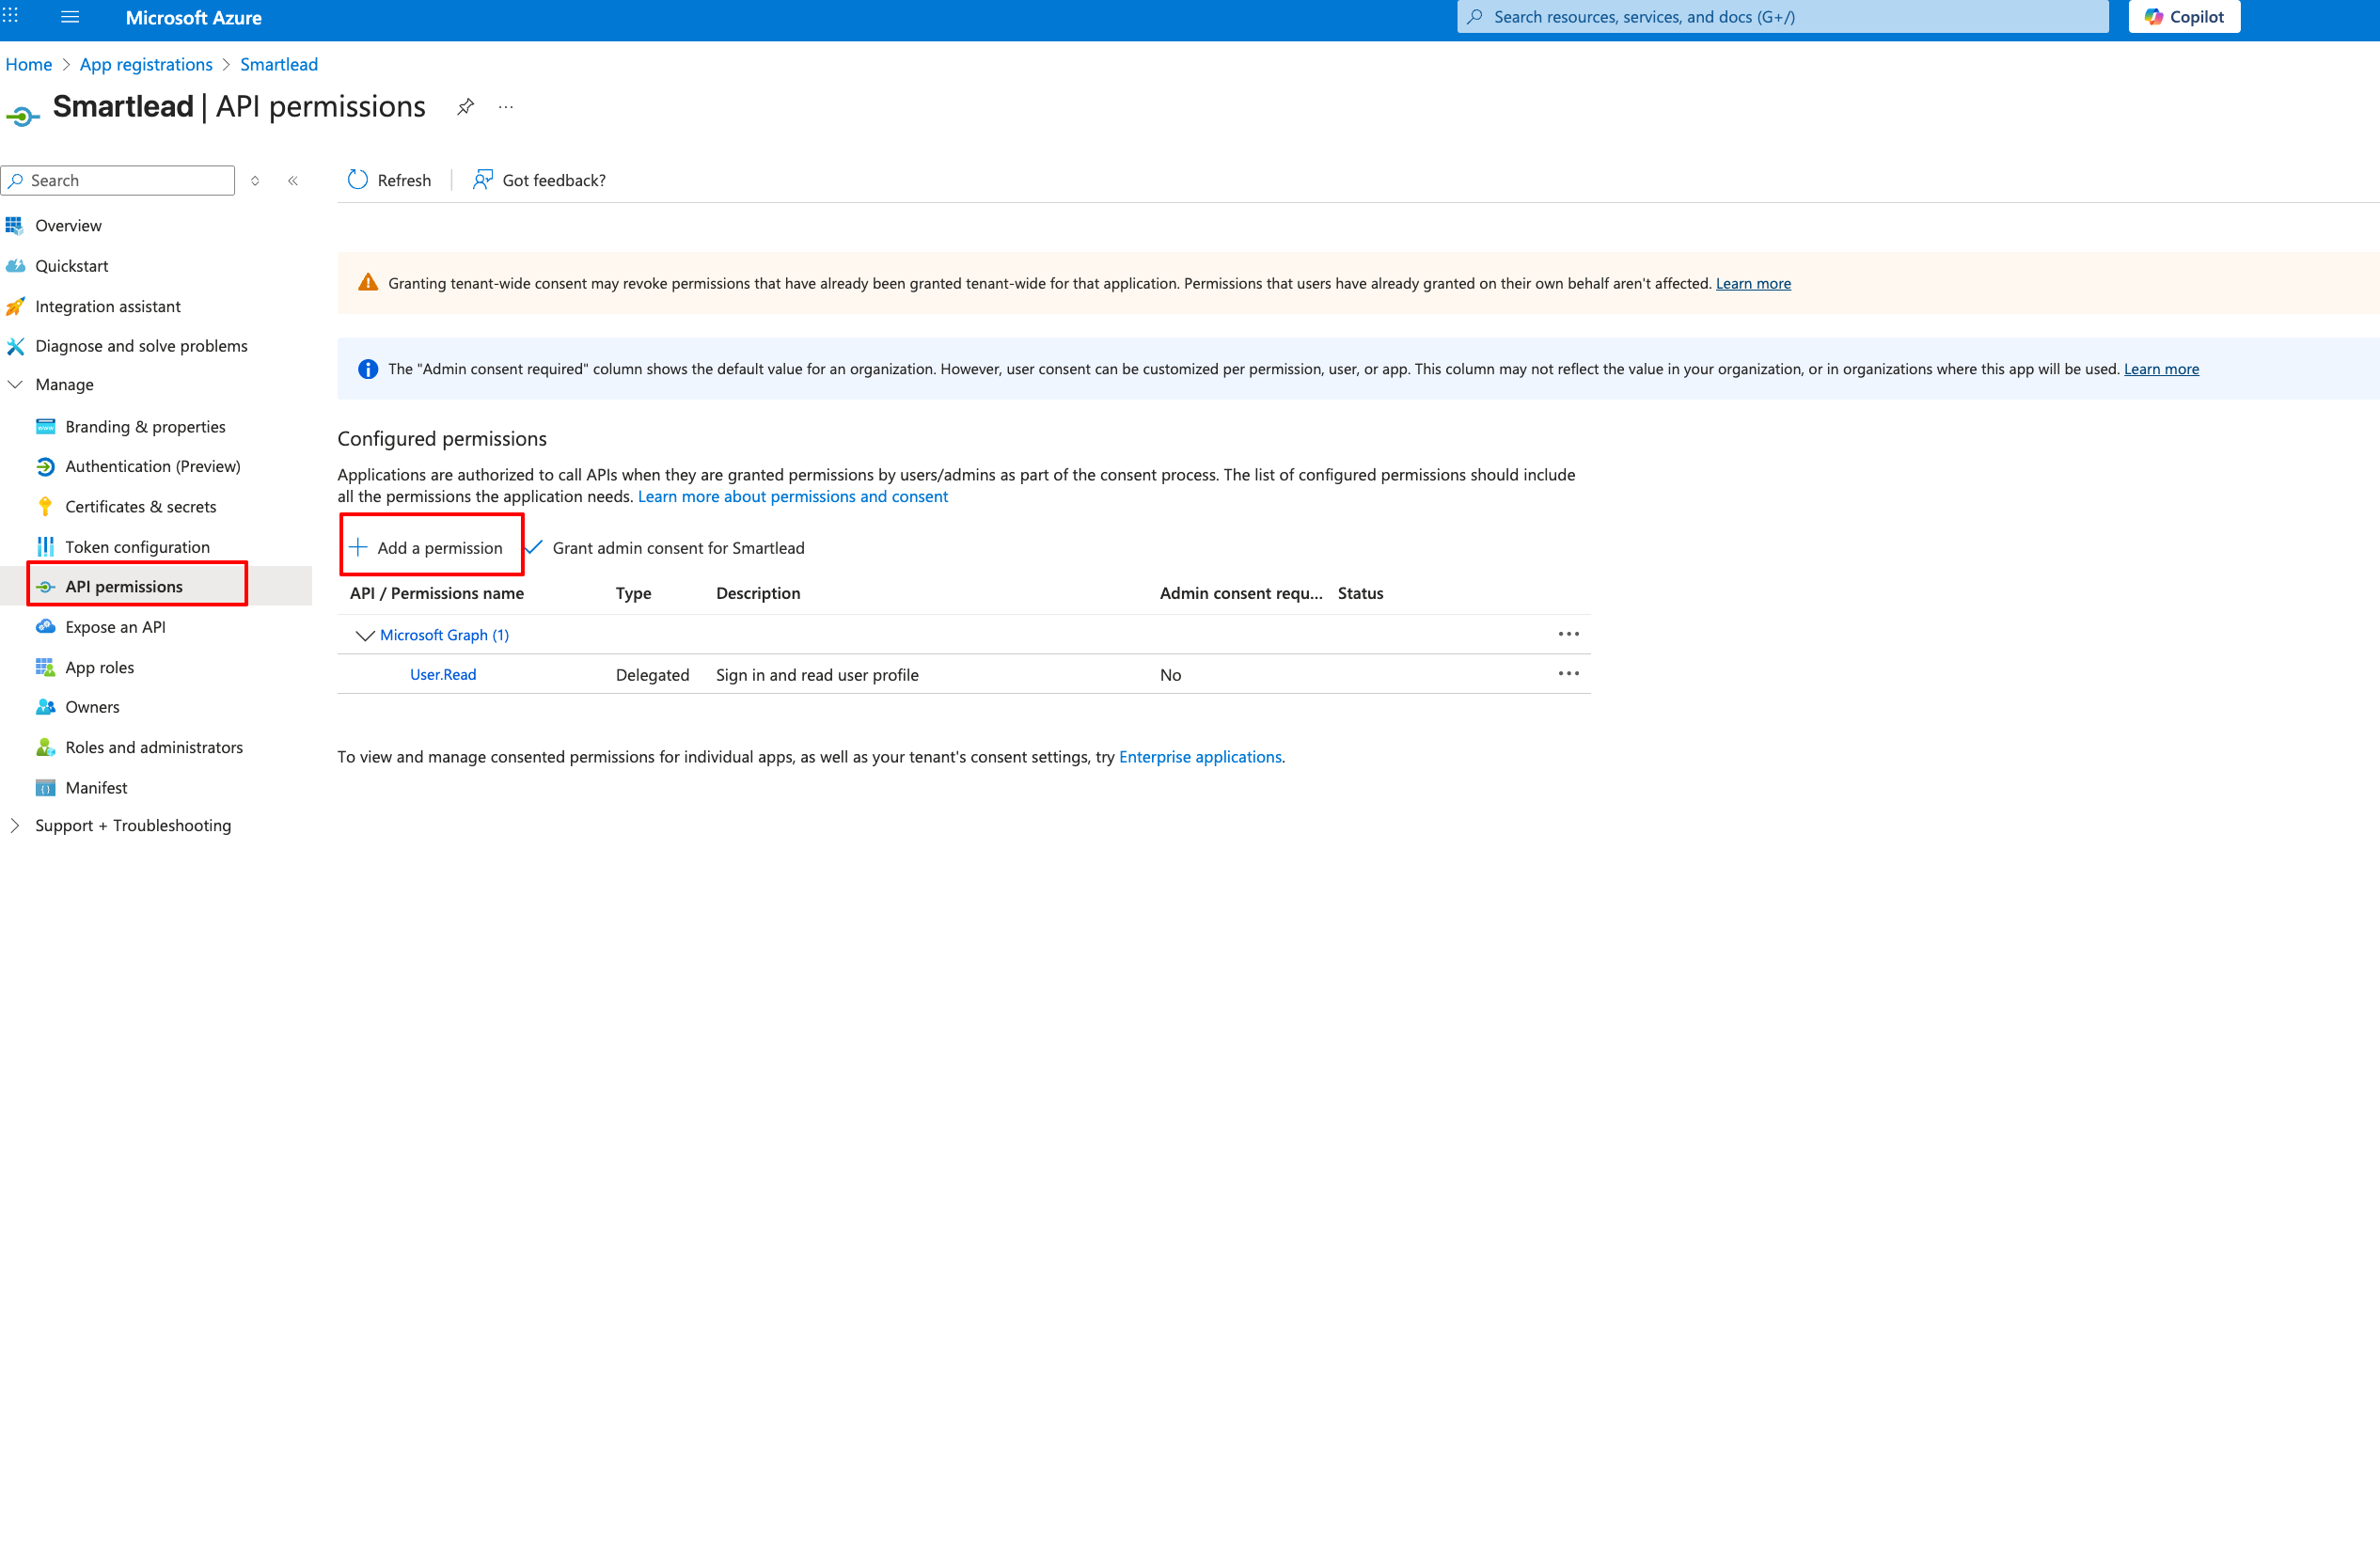
Go to the API permissions section and click on Add a permission
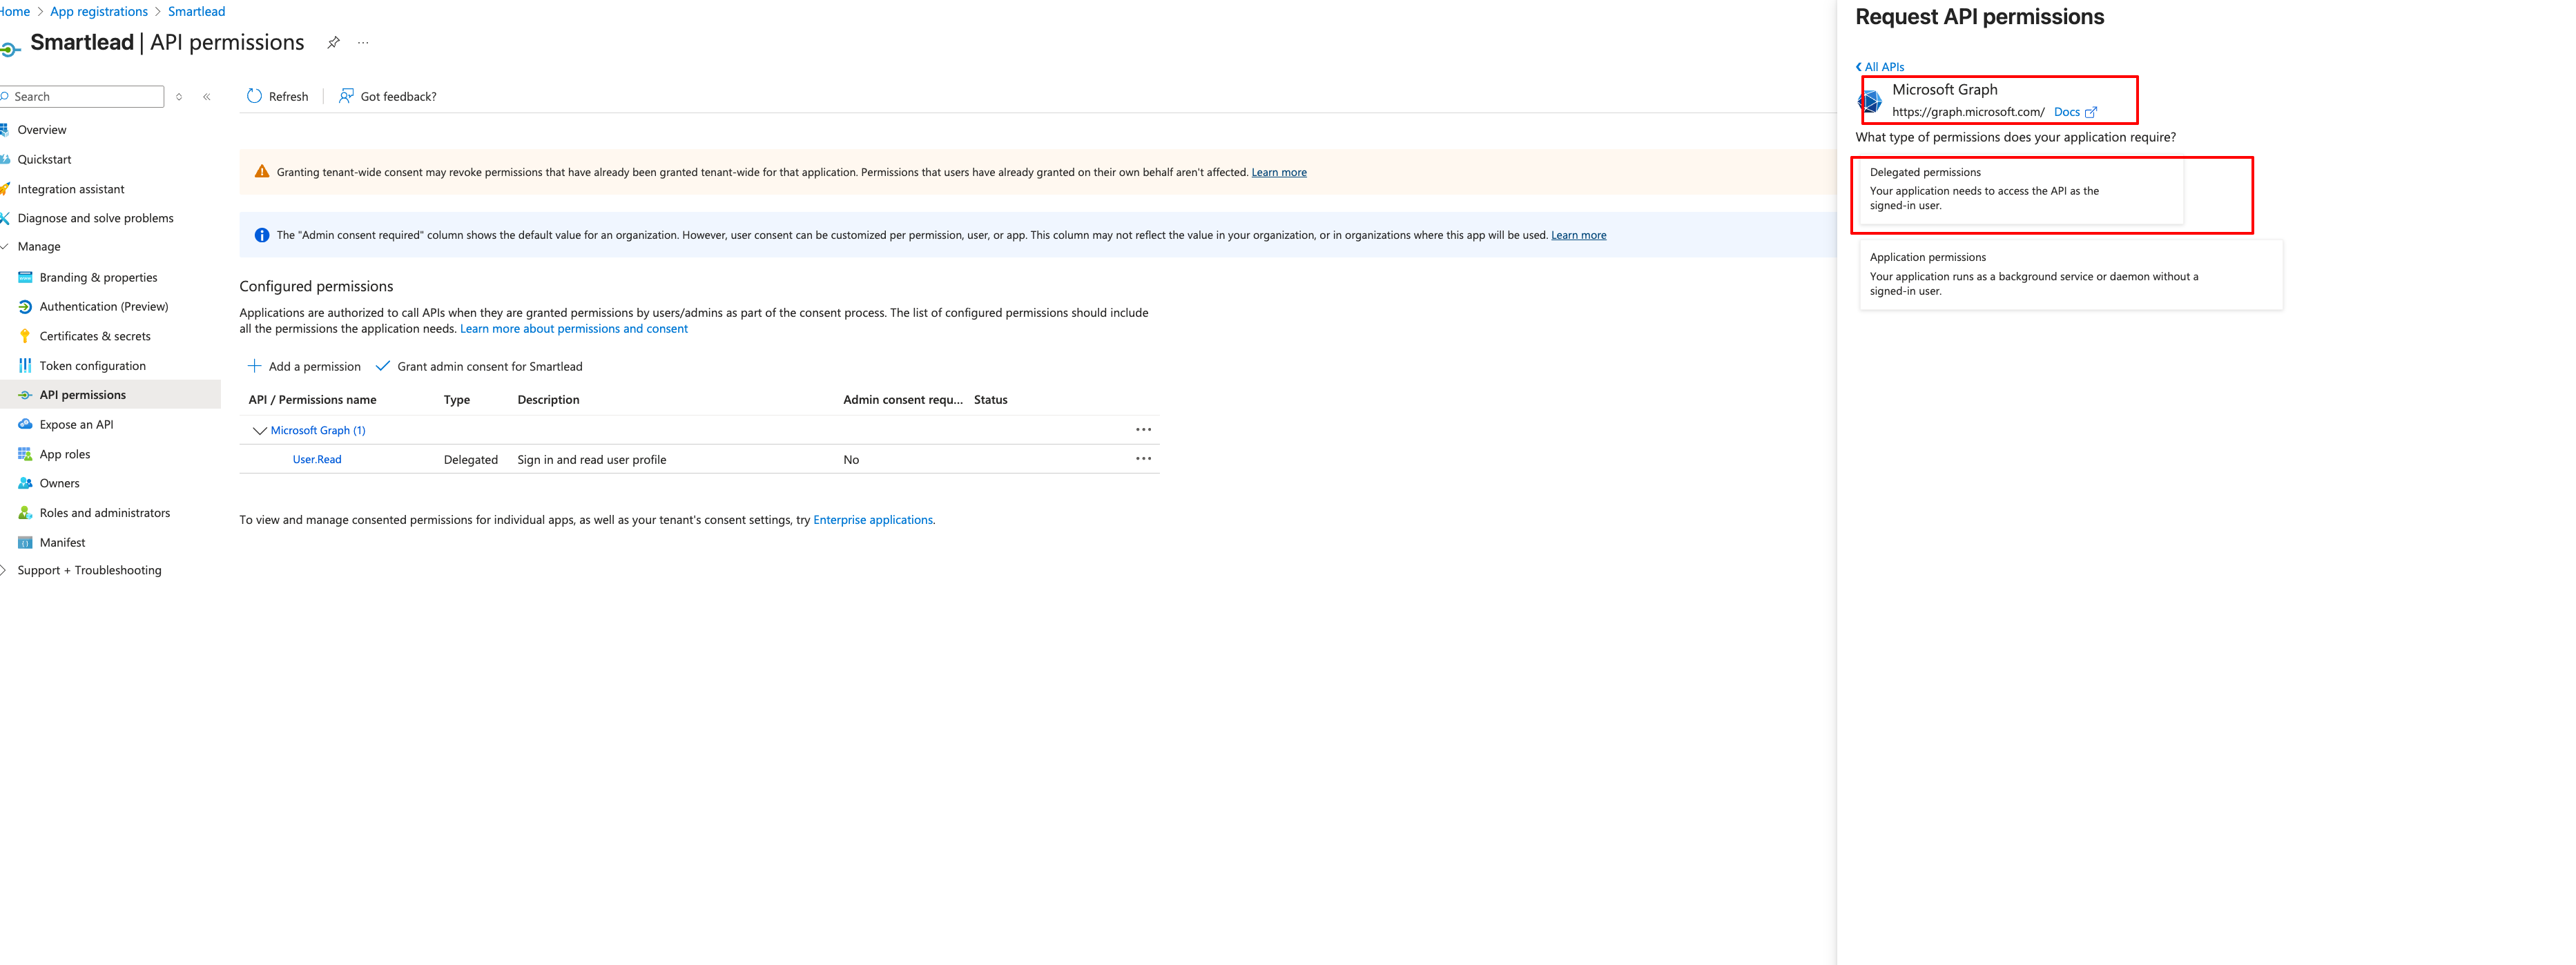
Select Microsoft Graph → delegated permission.
Add the following delegated permissions:
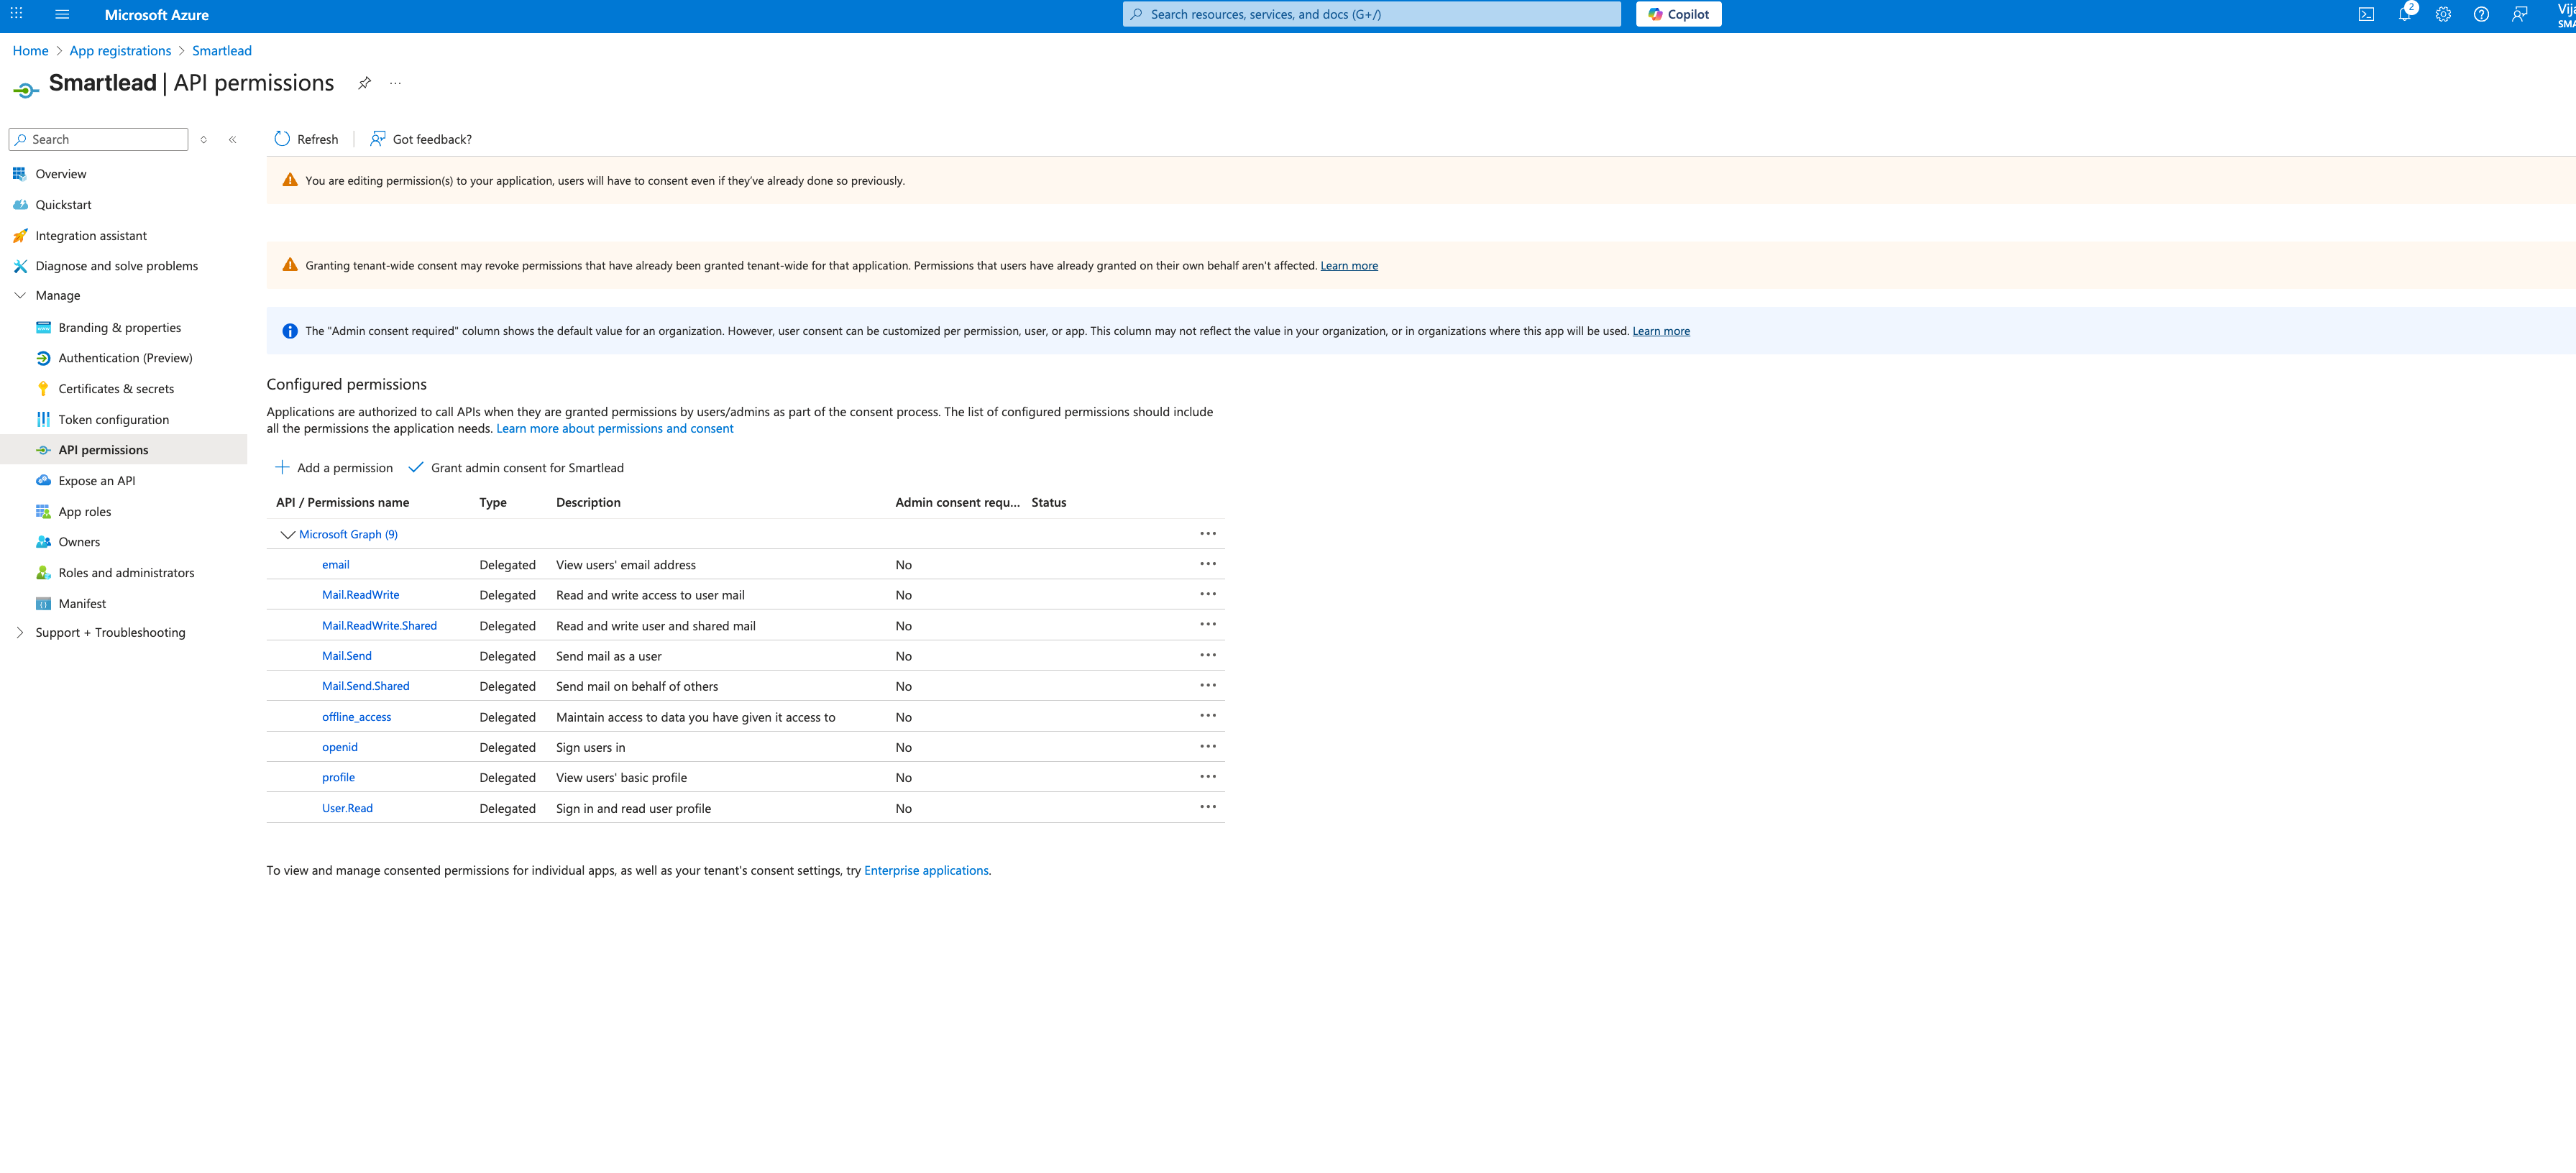
| Category Permissions |
Microsoft Graph | - offline_access |
You should end up with 9 permissions total.
After adding the permissions, click Grant admin consent to authorize access for all users under your directory.
Go to Certificates & Secrets
Click New client secret
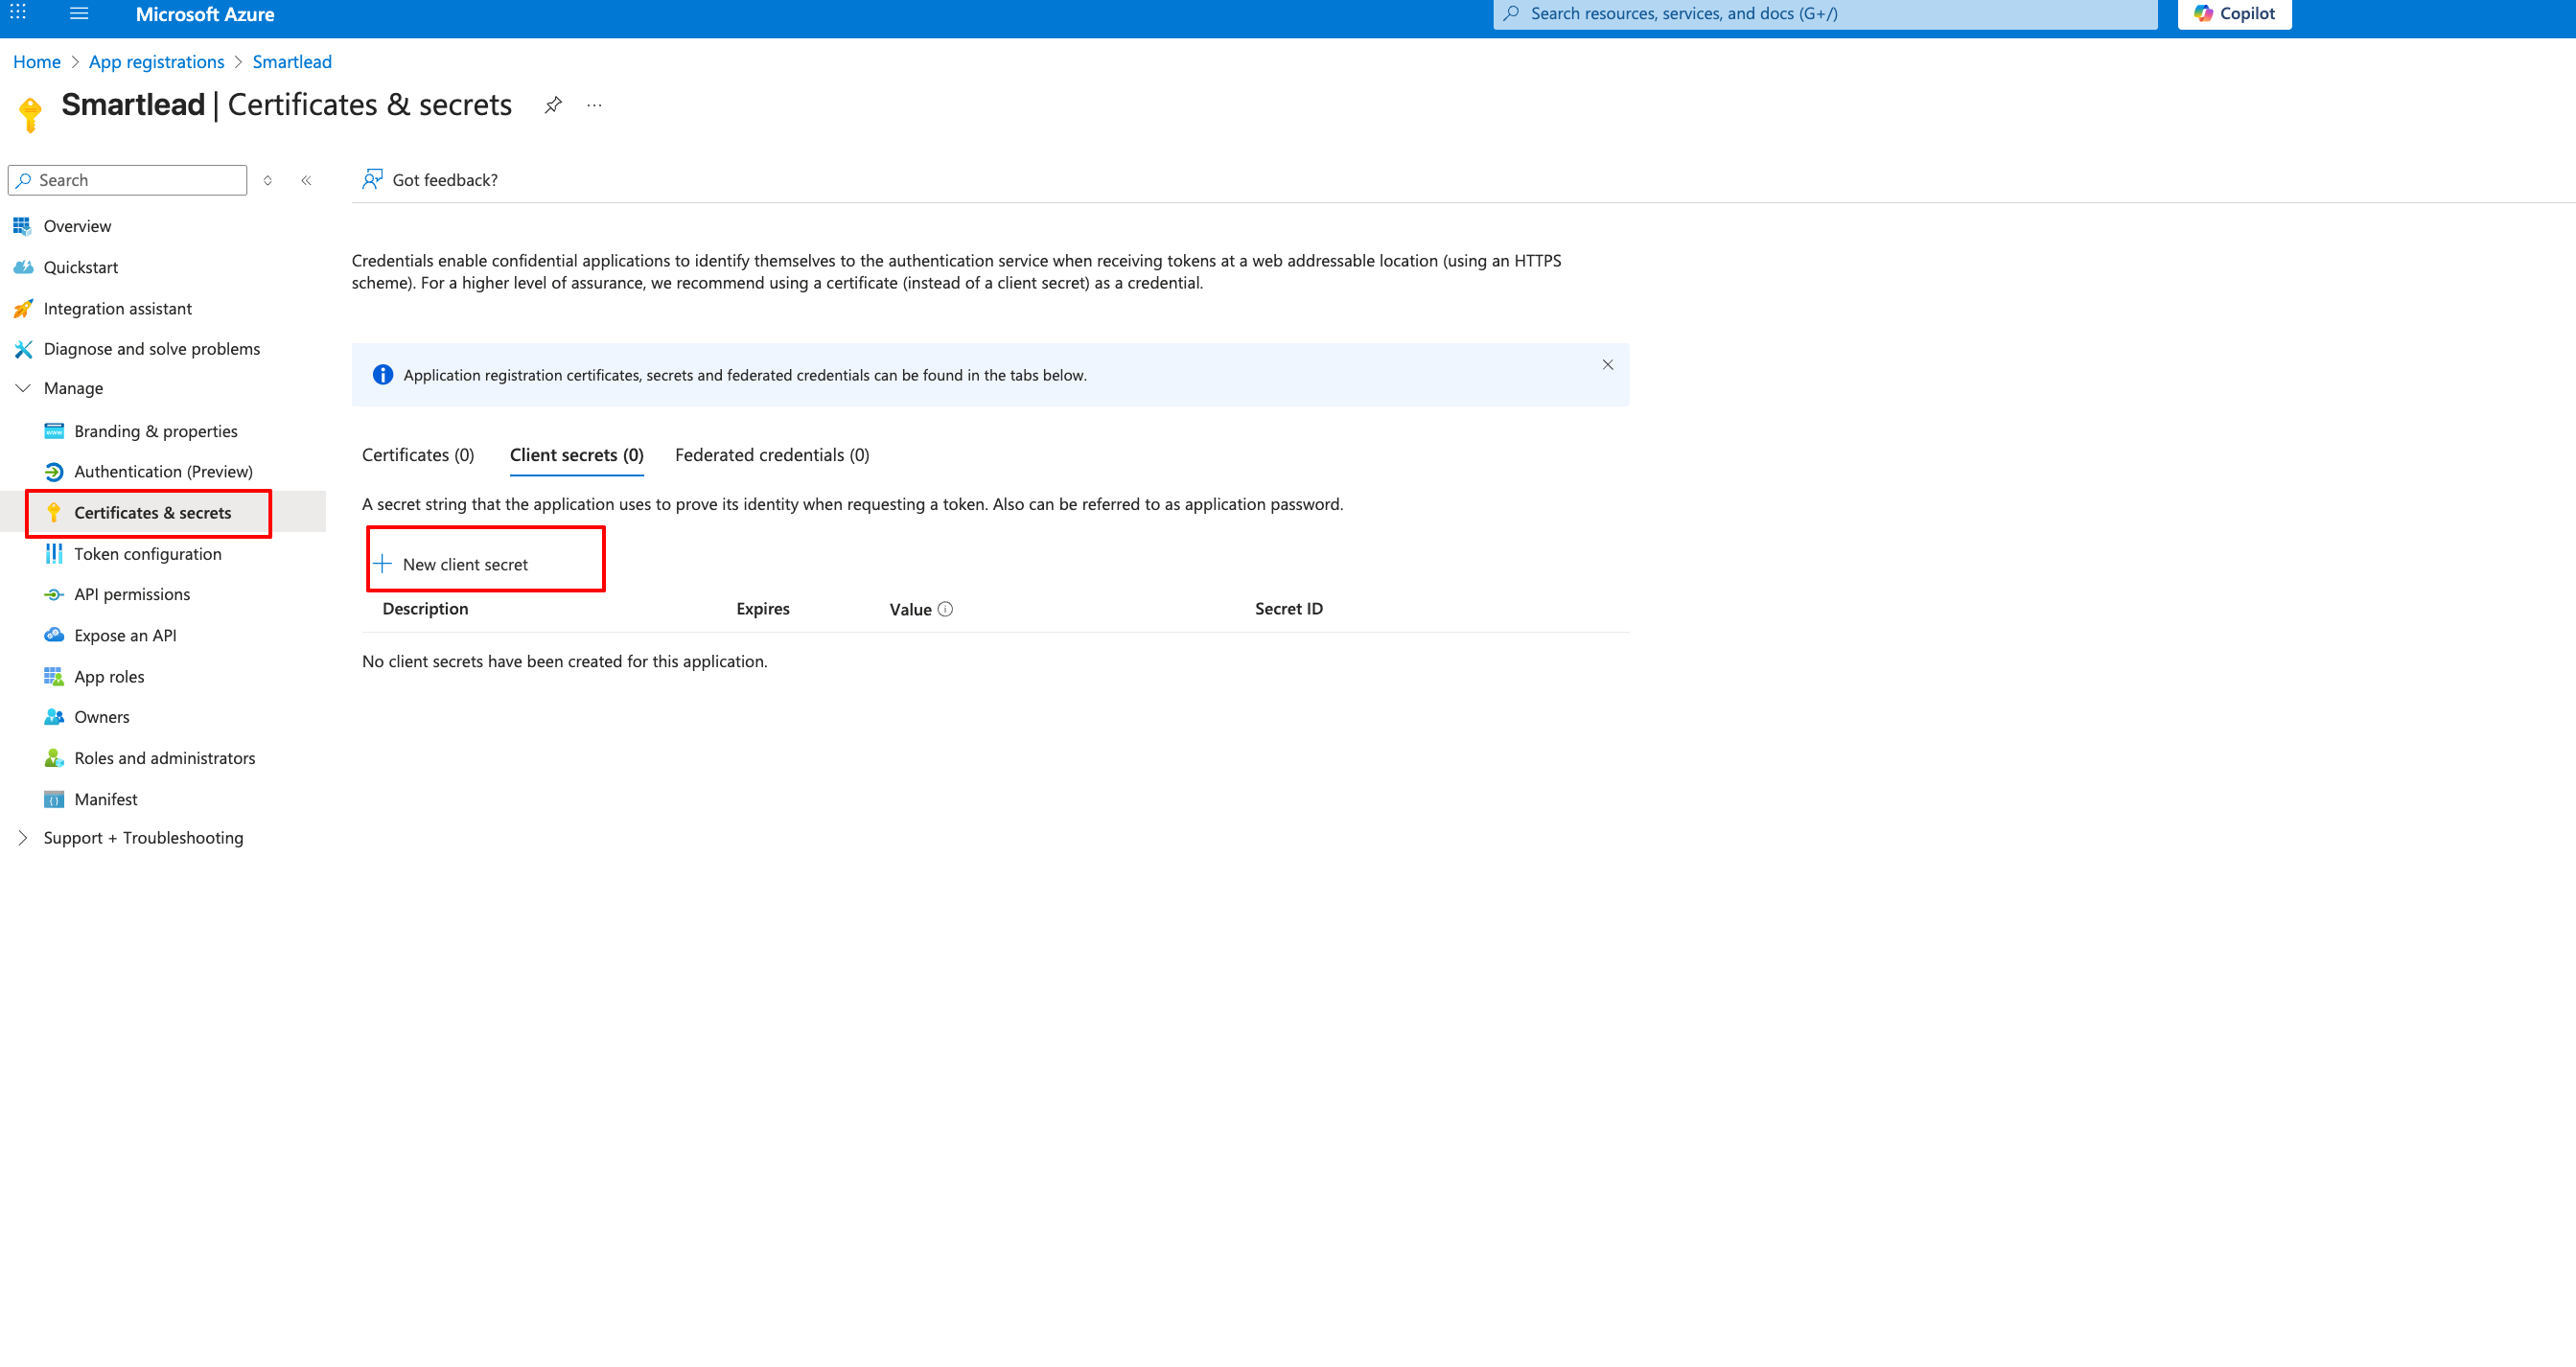
Add a description (e.g., Smartlead OAuth Secret)
Choose an expiry duration (90-180 days is recommended for safety)
You will have the Client id and Secret ID, click on Ok.
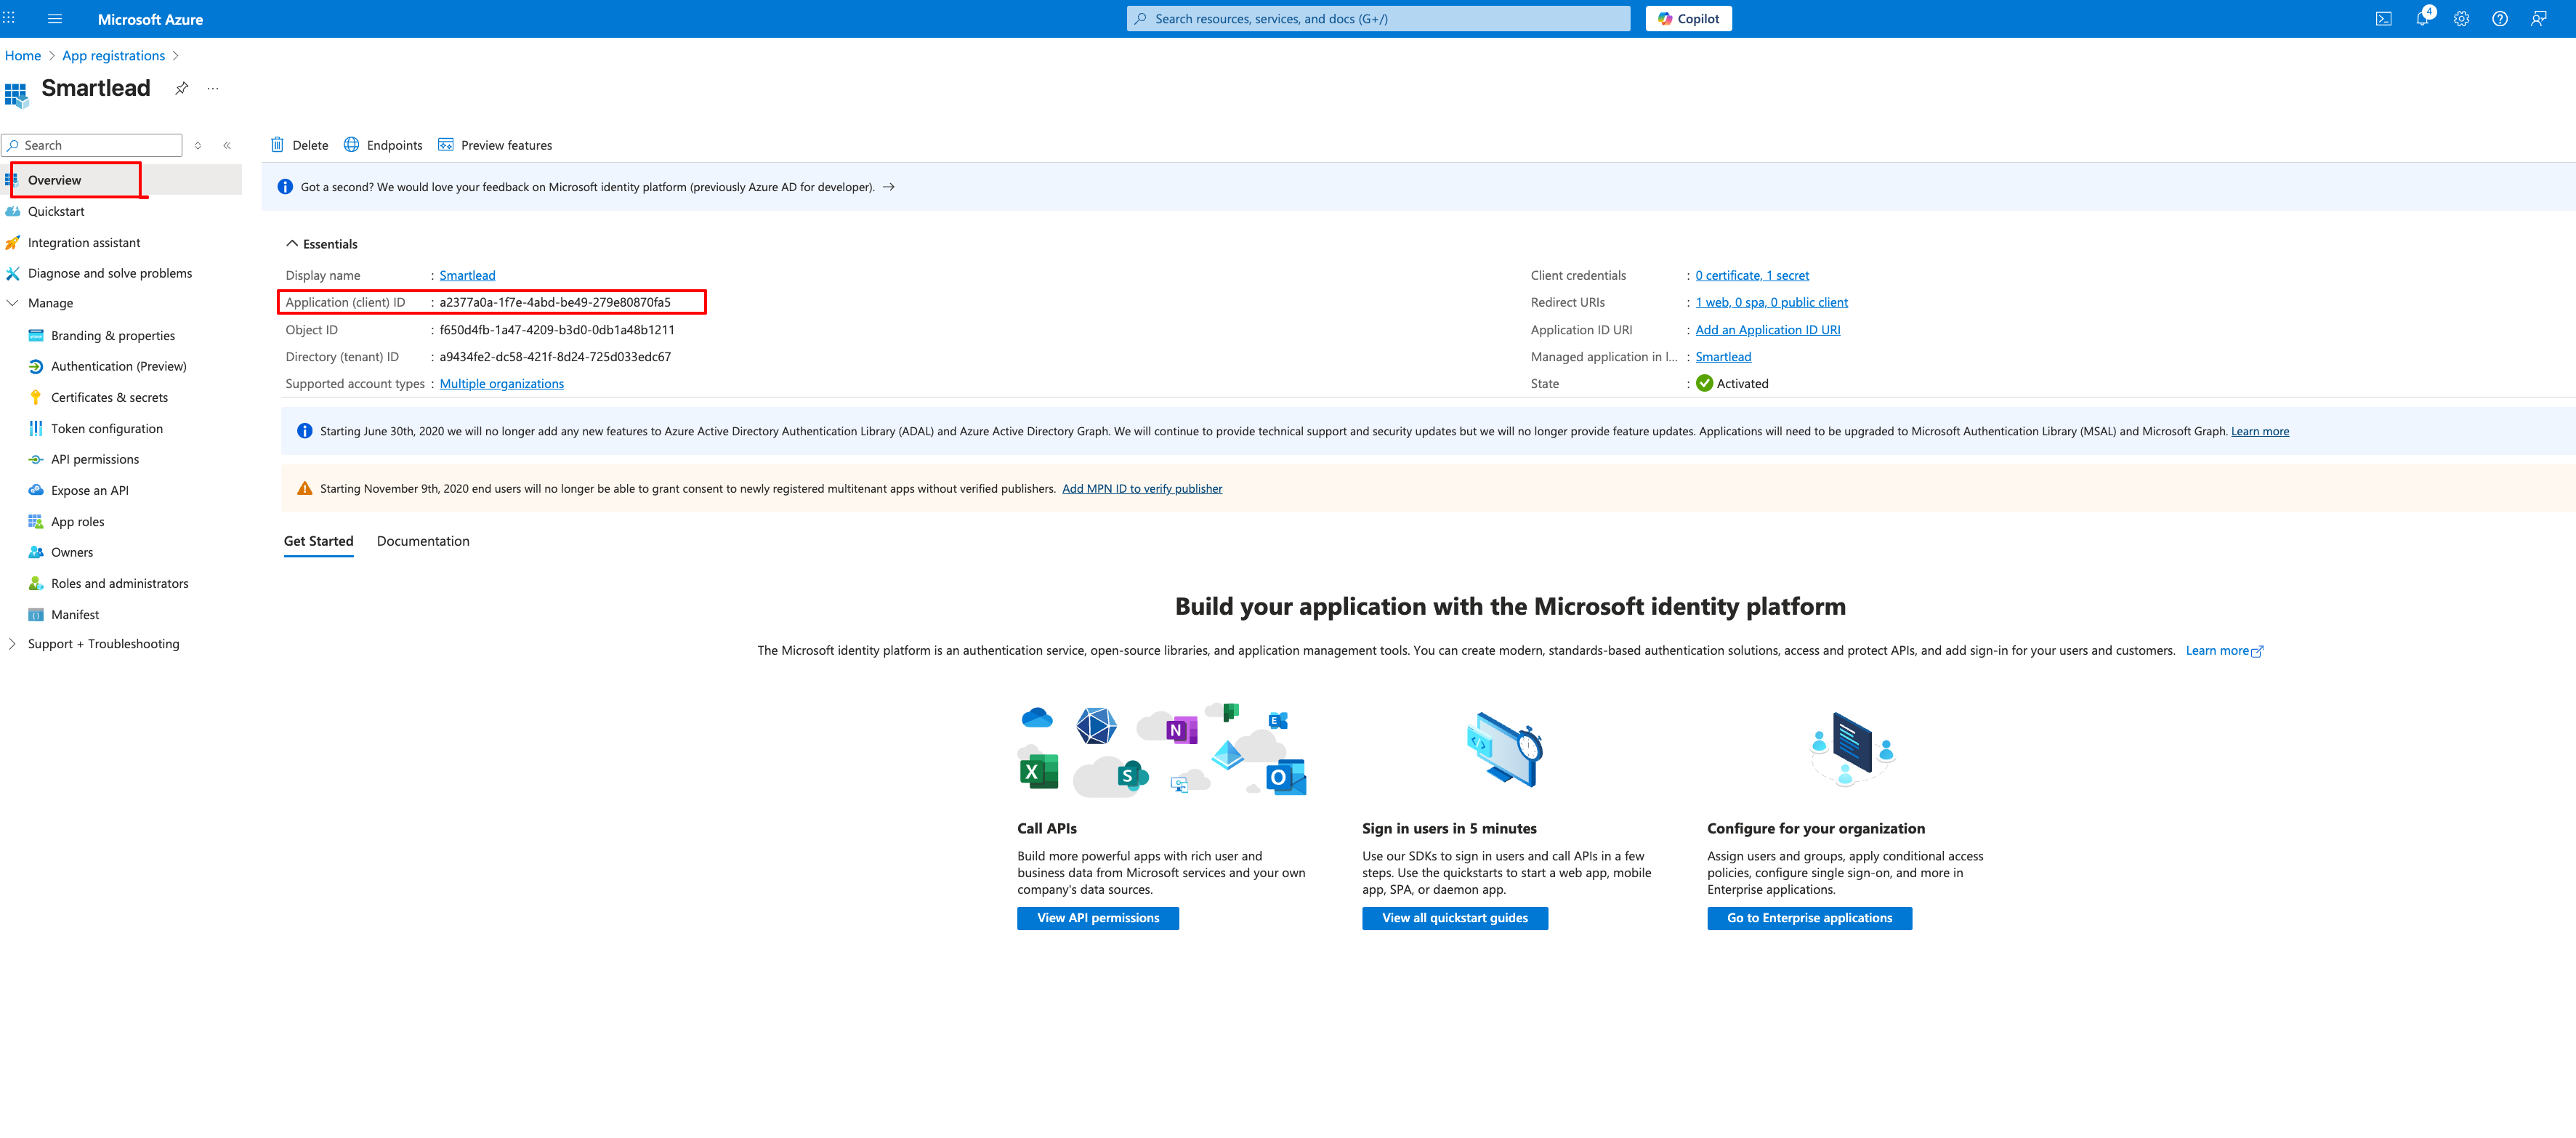
When you navigate to the overview tab, you can see the Application (Client) ID
For the client secret, navigate to certificates and secrets, the secret id is the value in the screenshot.
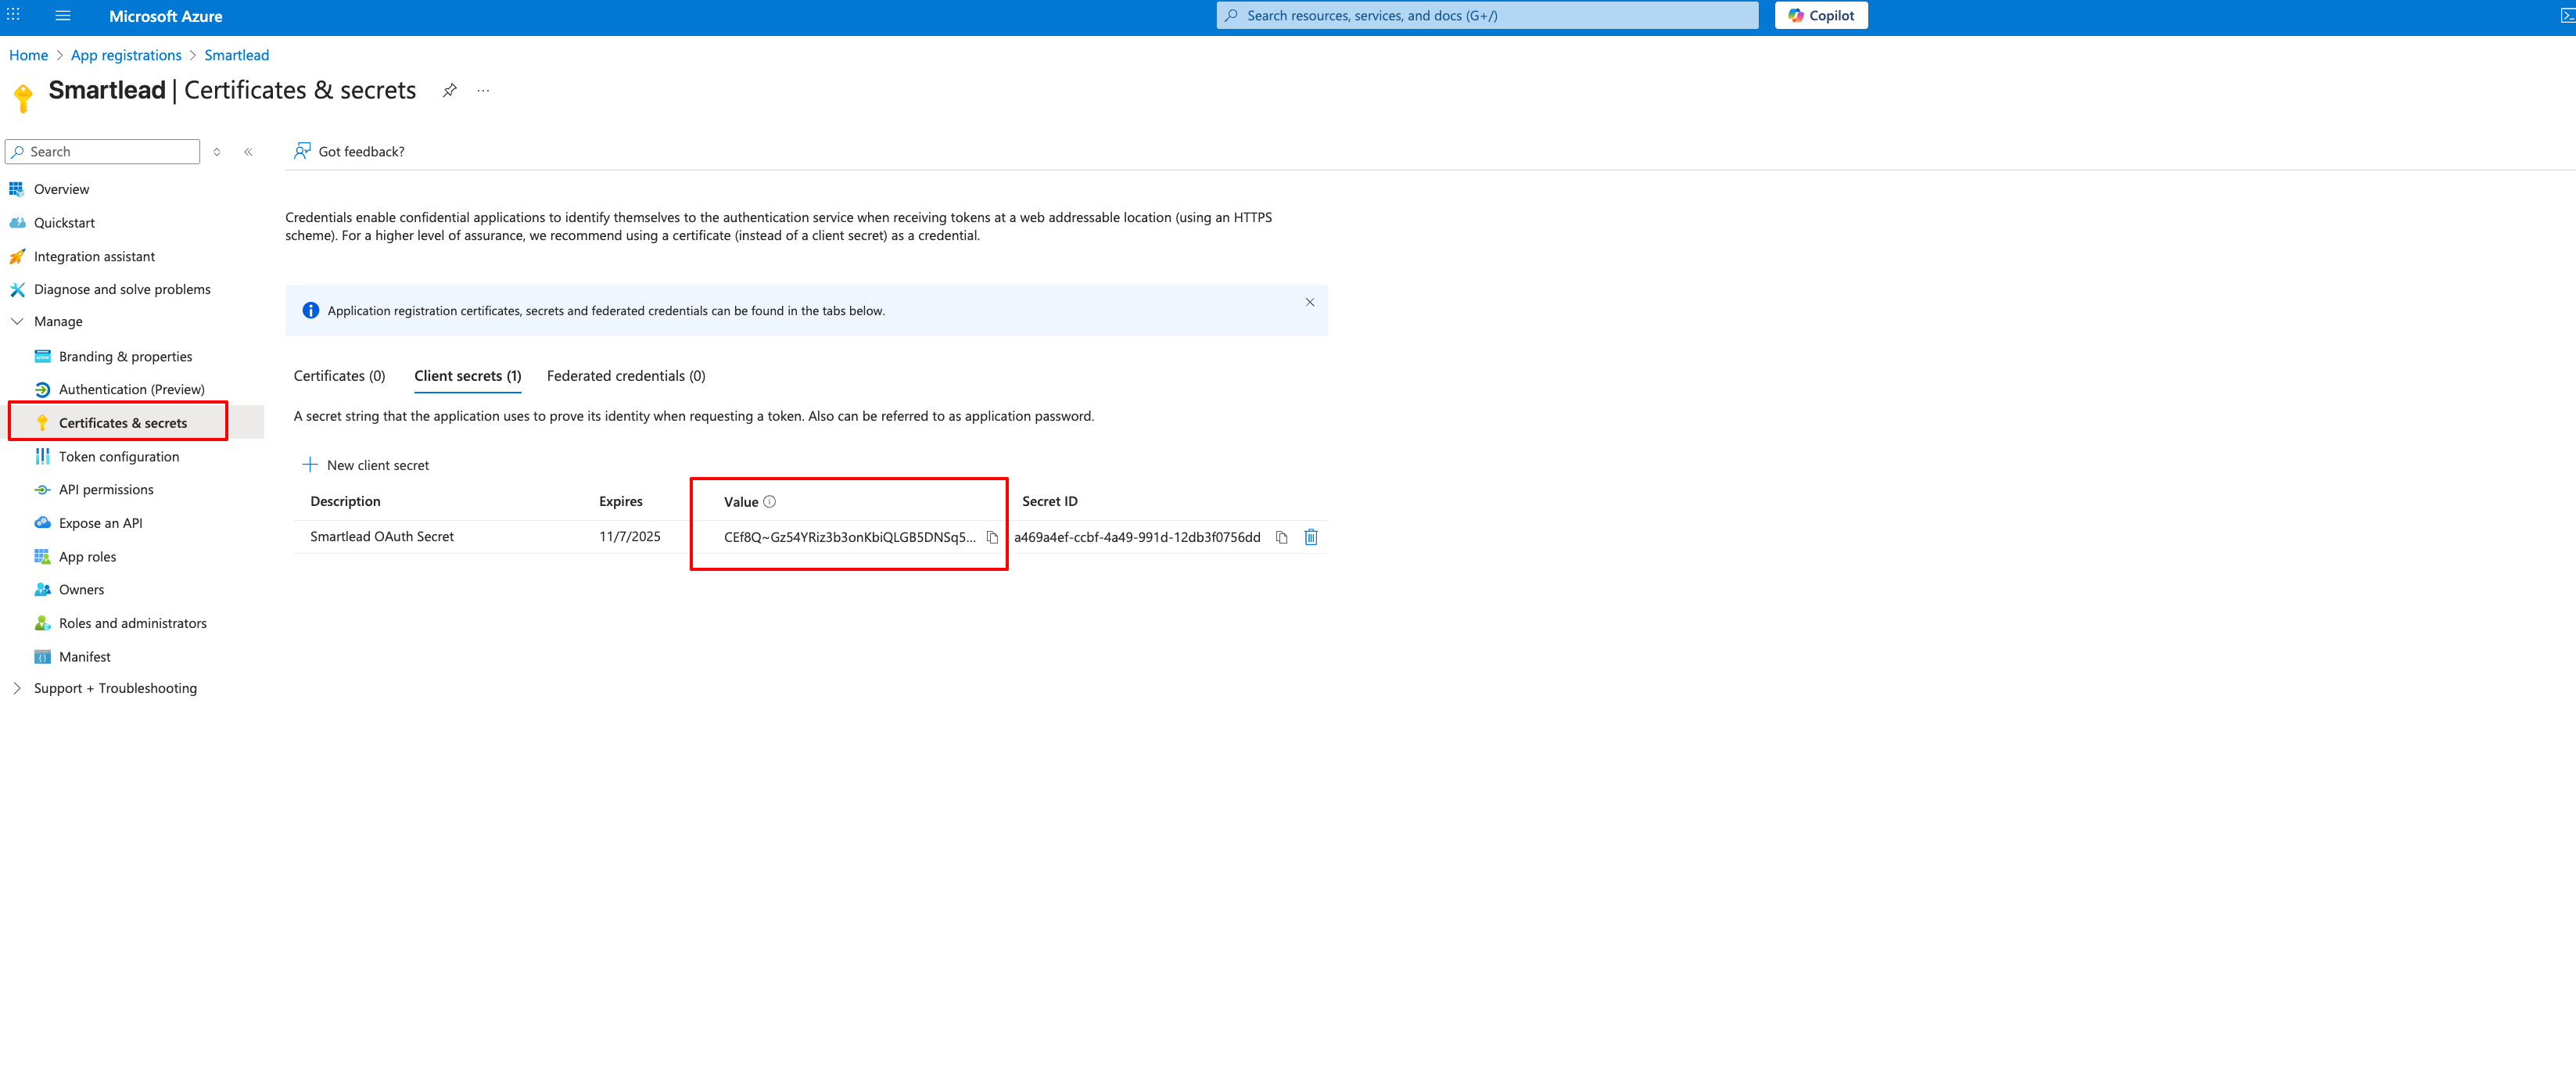
You should now have:
Application (client) ID:
Client secret:
Log in to your Smartlead admin account
Go to Profile → Settings → OAuth Configuration
Select Outlook
Paste your:
Application Client ID
Client Secret value:
Click Activate
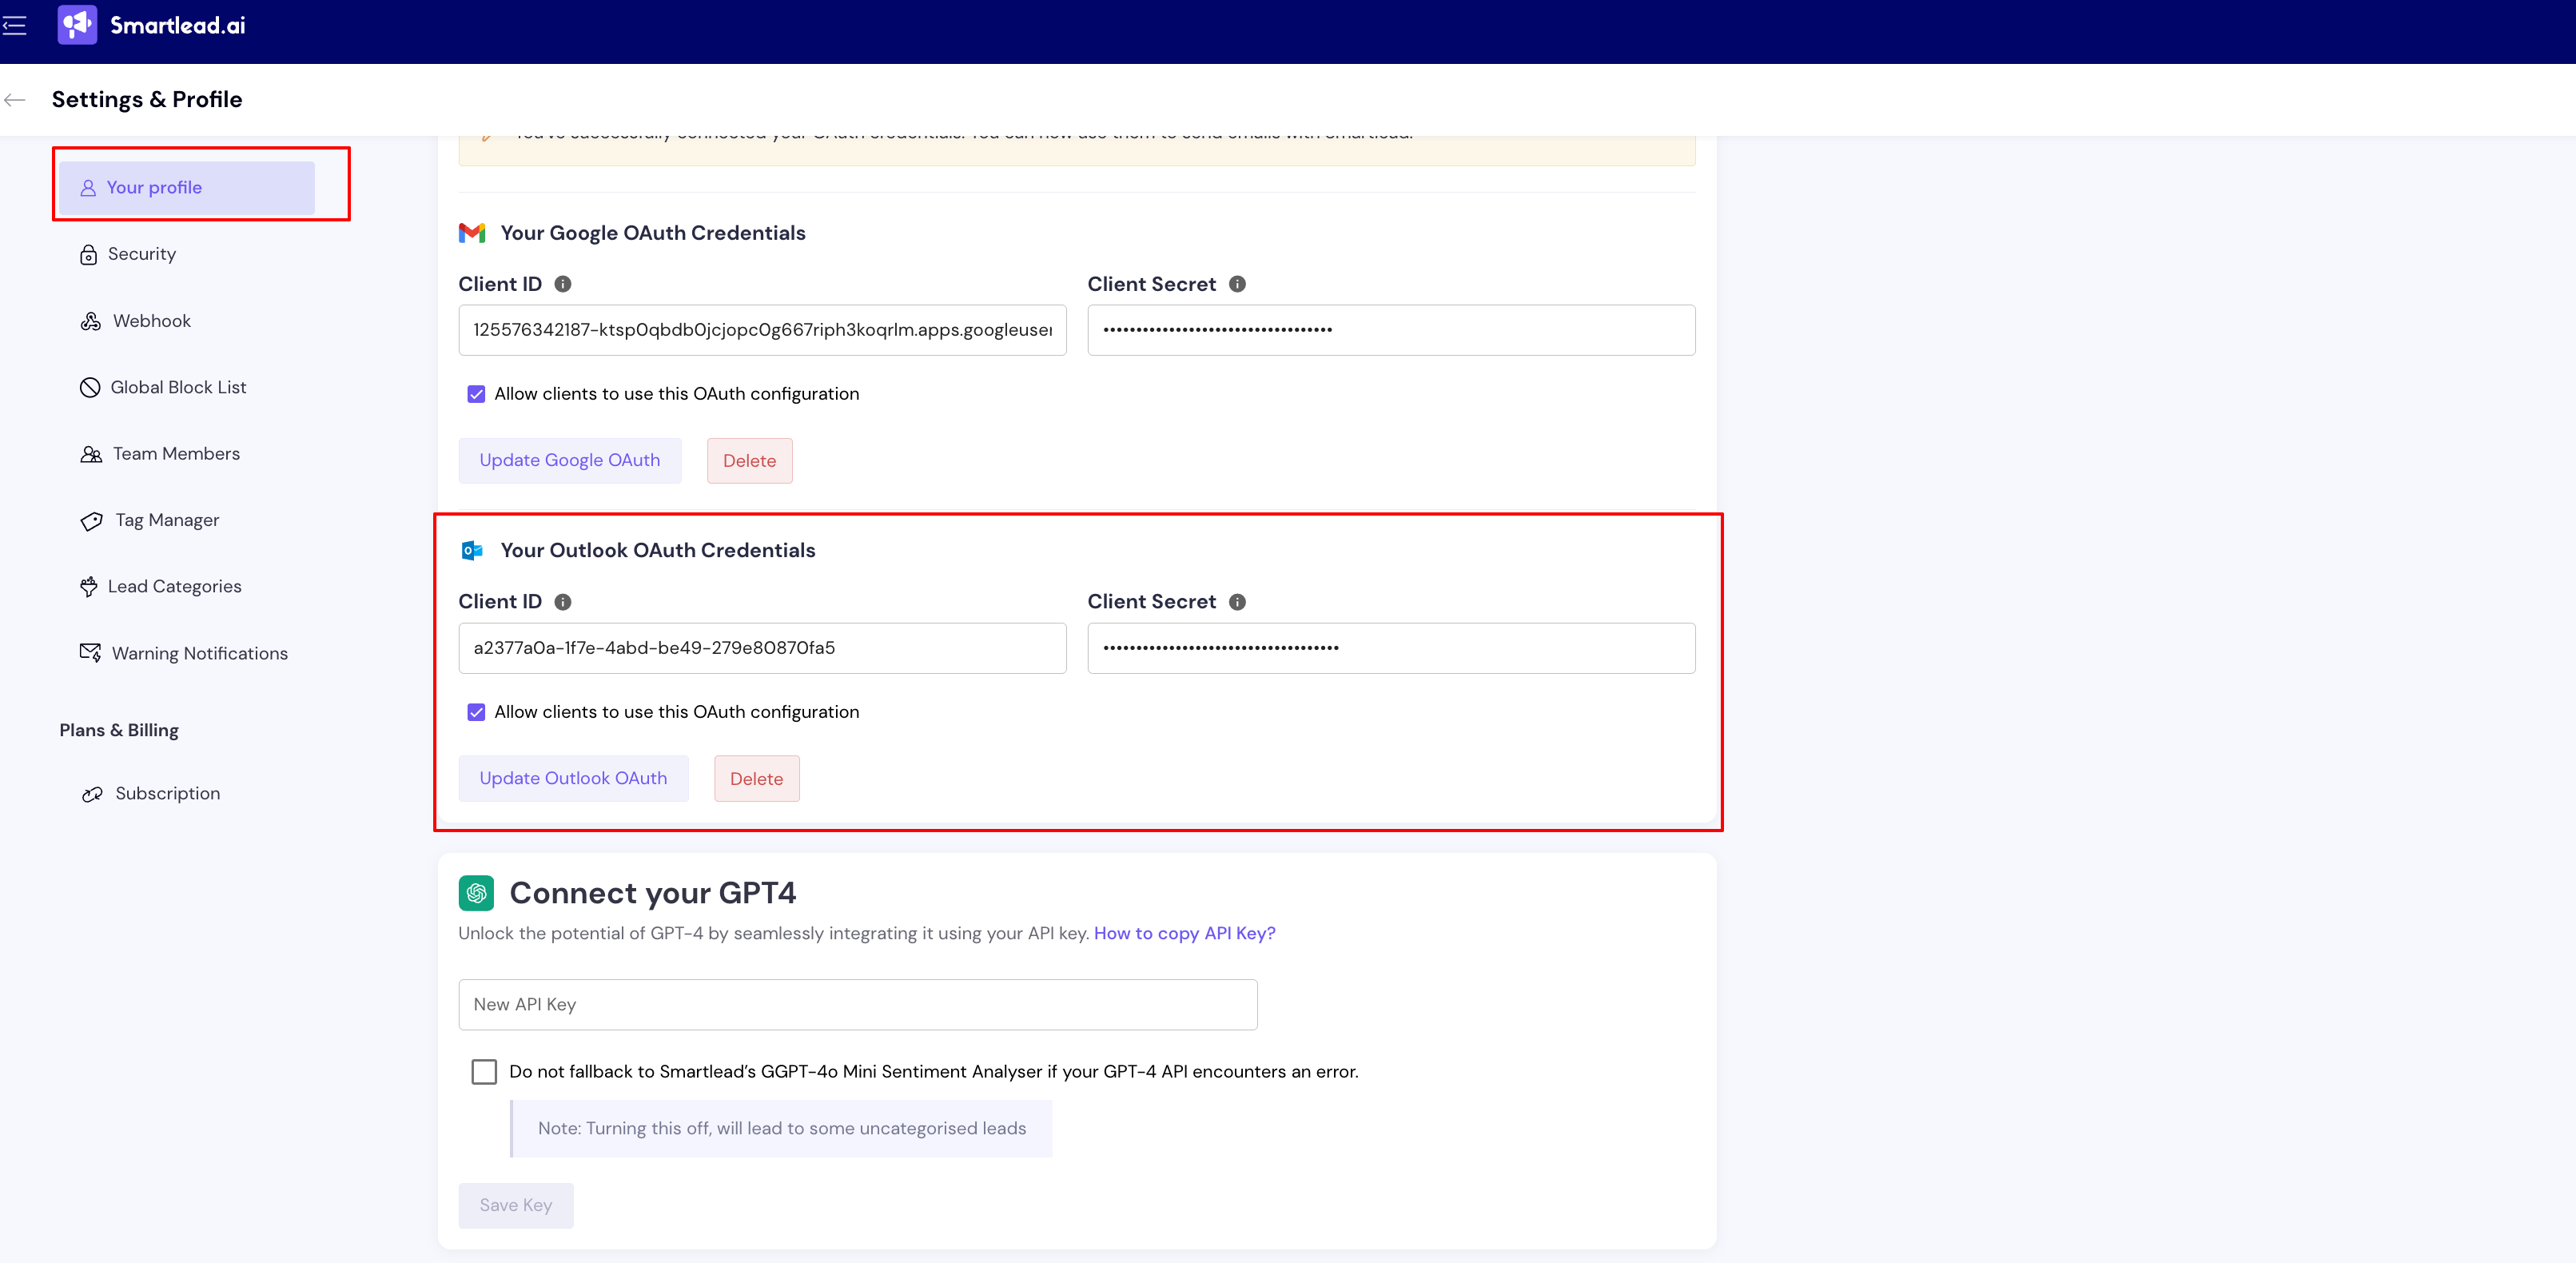
If this feature is not visible, please contact the Smartlead team to enable Outlook OAuth configuration for your account.
You can choose to allow your clients to connect their Outlook accounts using your email network
Toggle Allow clients to use this and click Update
Once enabled, clients will see the Outlook option in their email account connection flow, fully branded with your application details—no mention of Smartlead.
Go to Senders Accounts » Email Accounts → Add
Choose Your Email Network → Outlook
Authenticate with the branded OAuth flow
If everything is configured correctly, users will connect seamlessly under your domain and setup.
Similar to how you create Outlook OAuth, you can create Google OAuth too for setting up your email network in Smartlead.👇
Set Up Google OAuthQ. Can I switch back to Smartlead’s shared OAuth?
Yes - delete your custom provider in OAuth Configuration and reconnect mailboxes using Smartlead OAuth.
Q. Does Smartlead store my client secret?
Only momentarily for validation; it is never stored long‑term.