Follow these simple steps to connect your Gmail account securely with Smartlead using IMAP and SMTP.
Note:
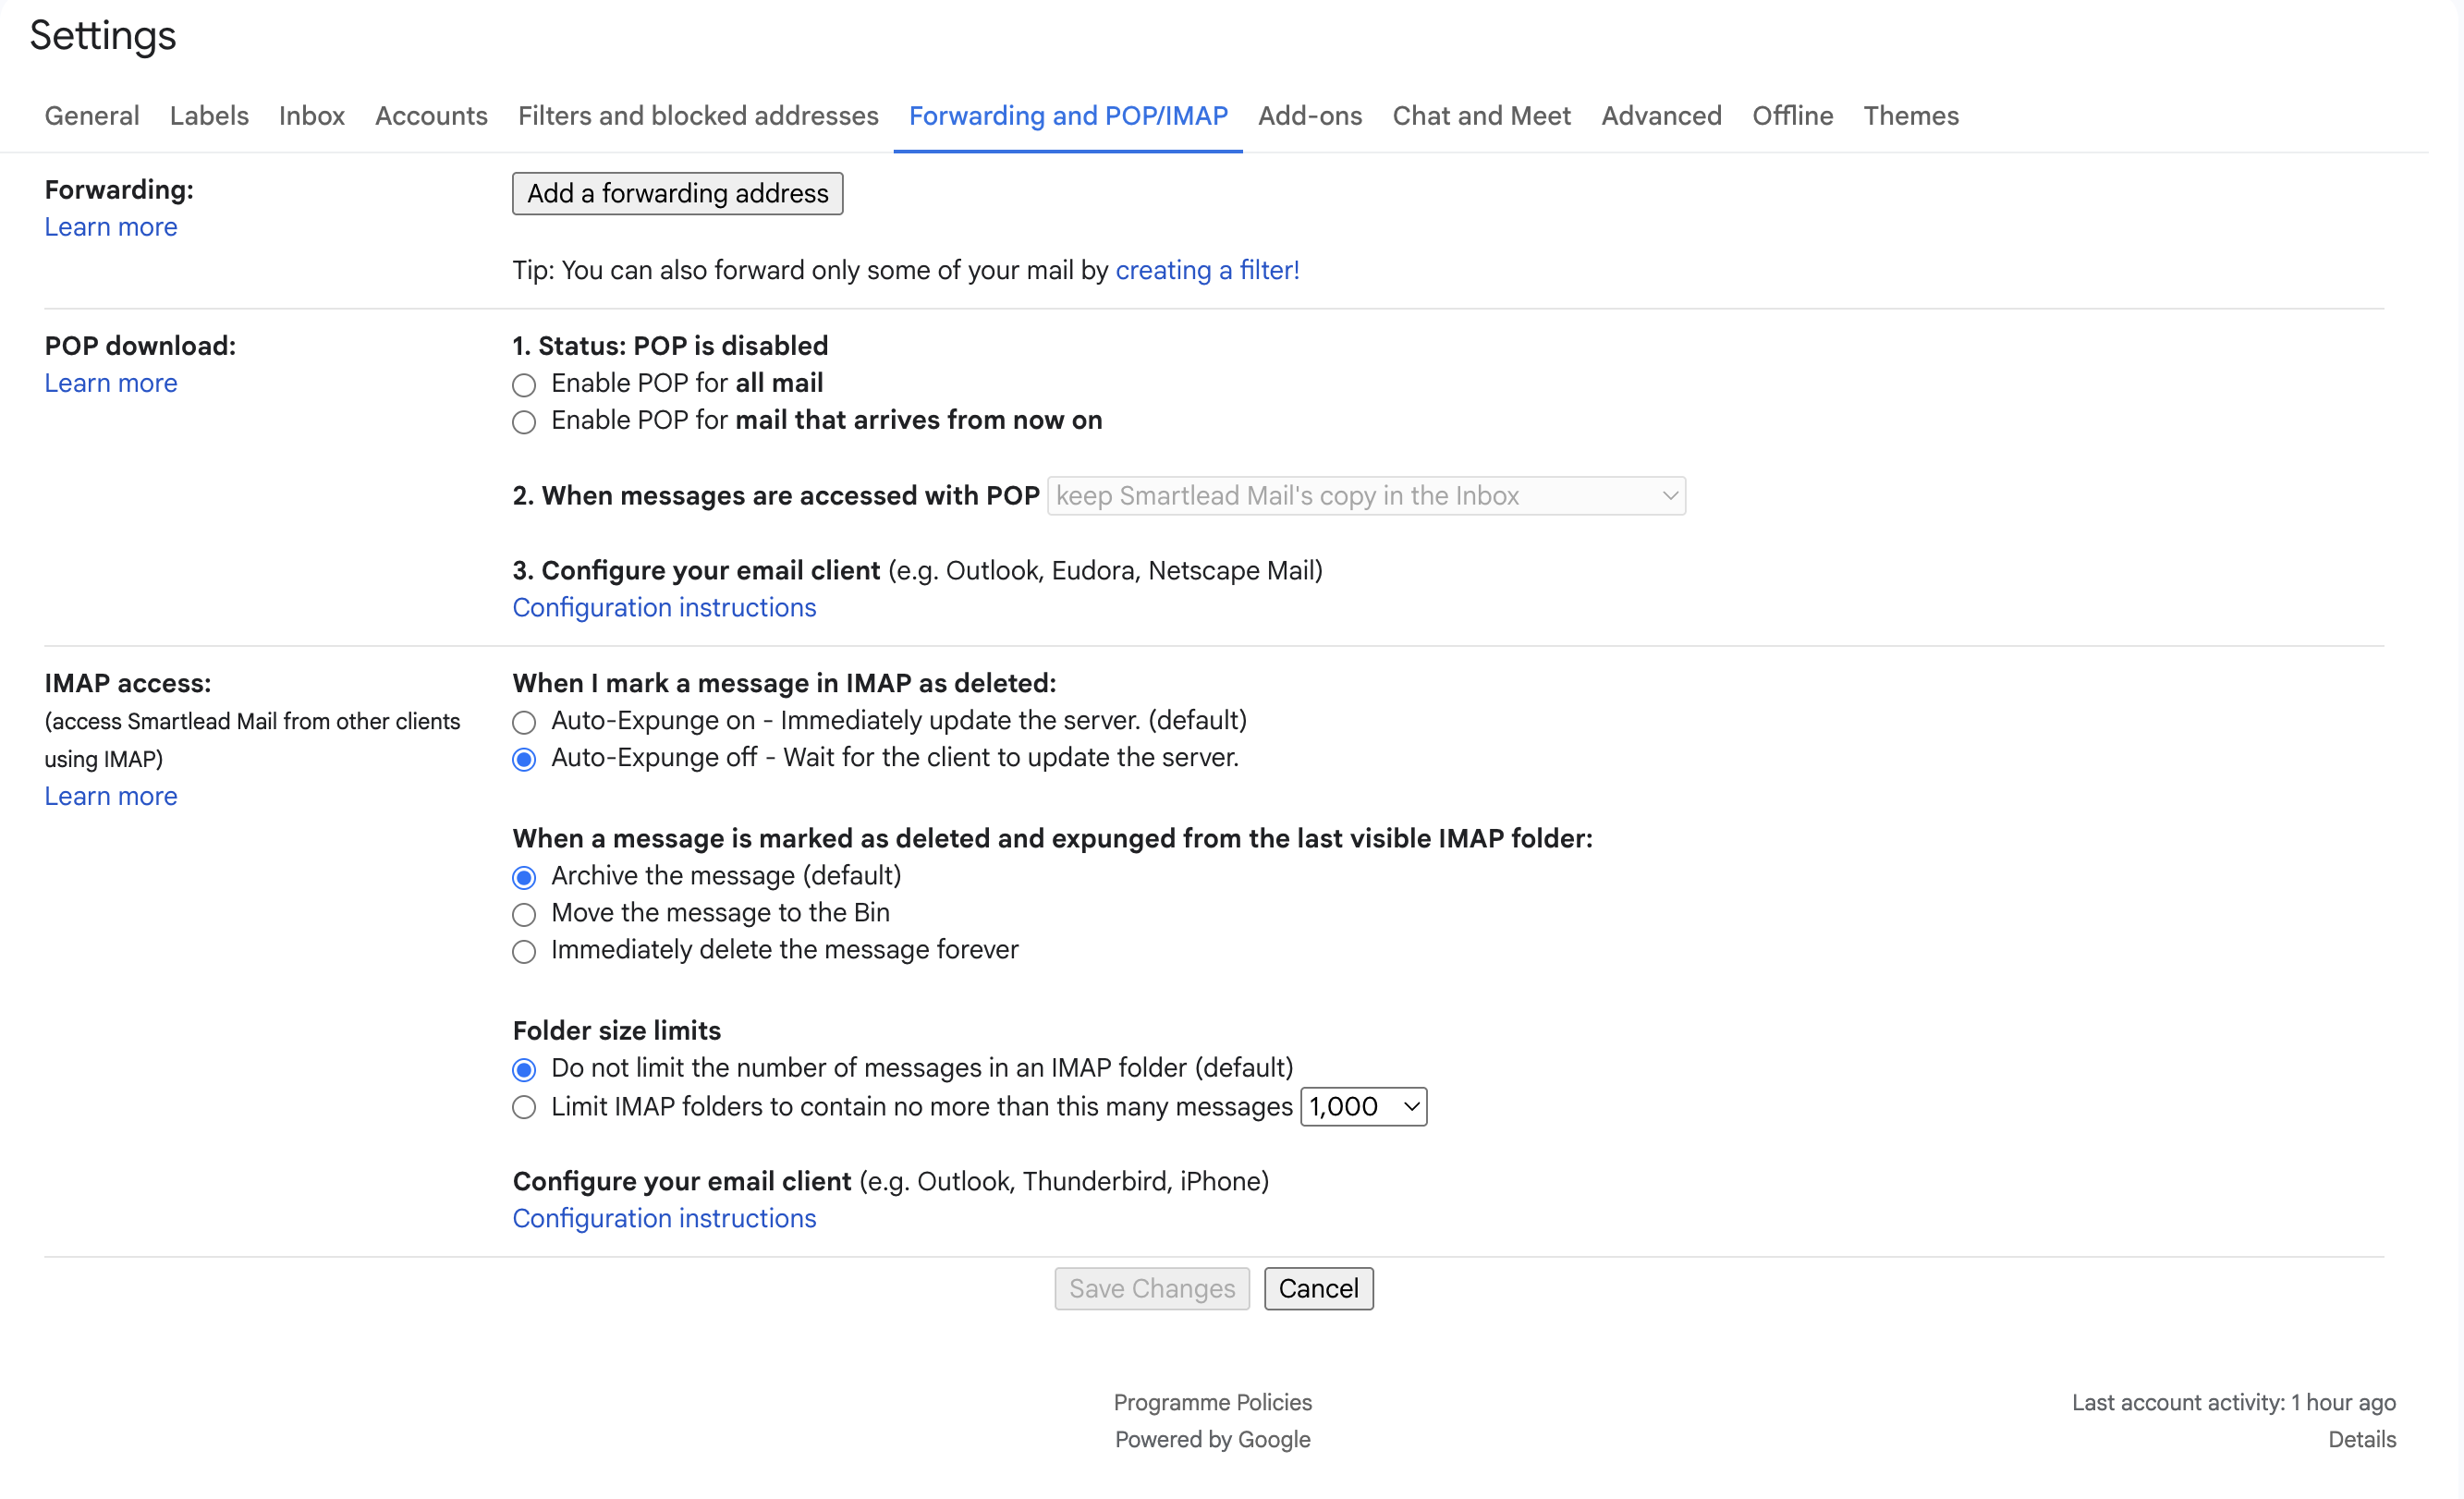
Gmail now enables IMAP by default for personal accounts. The traditional Enable/Disable IMAP buttons may no longer appear in the Gmail interface. Instead, you'll see a message like:
"Access Gmail from other clients using IMAP"
If you see this, IMAP is already active and no further action is needed.
In some cases, especially in corporate or school accounts, IMAP might be disabled by your admin. If that’s the case:
Ask your Google Workspace Admin to go to admin.google.com
Navigate to:
Apps > Google Workspace > Gmail > End User Access
Ensure IMAP Access is enabled for your organizational unit
Once enabled, you can proceed with the steps below.
See screenshot:
Open your Google Account at myaccount.google.com.
Click on the Security tab in the left menu.
Scroll to “Signing in to Google” and click 2-Step Verification.
If it’s not enabled, click Get Started.
Enter your Google account password when prompted.
Add your phone number and verify using the OTP sent to you.
Click Turn On to complete the process.
You’ll now see a checkmark next to 2-Step Verification in your Security tab.
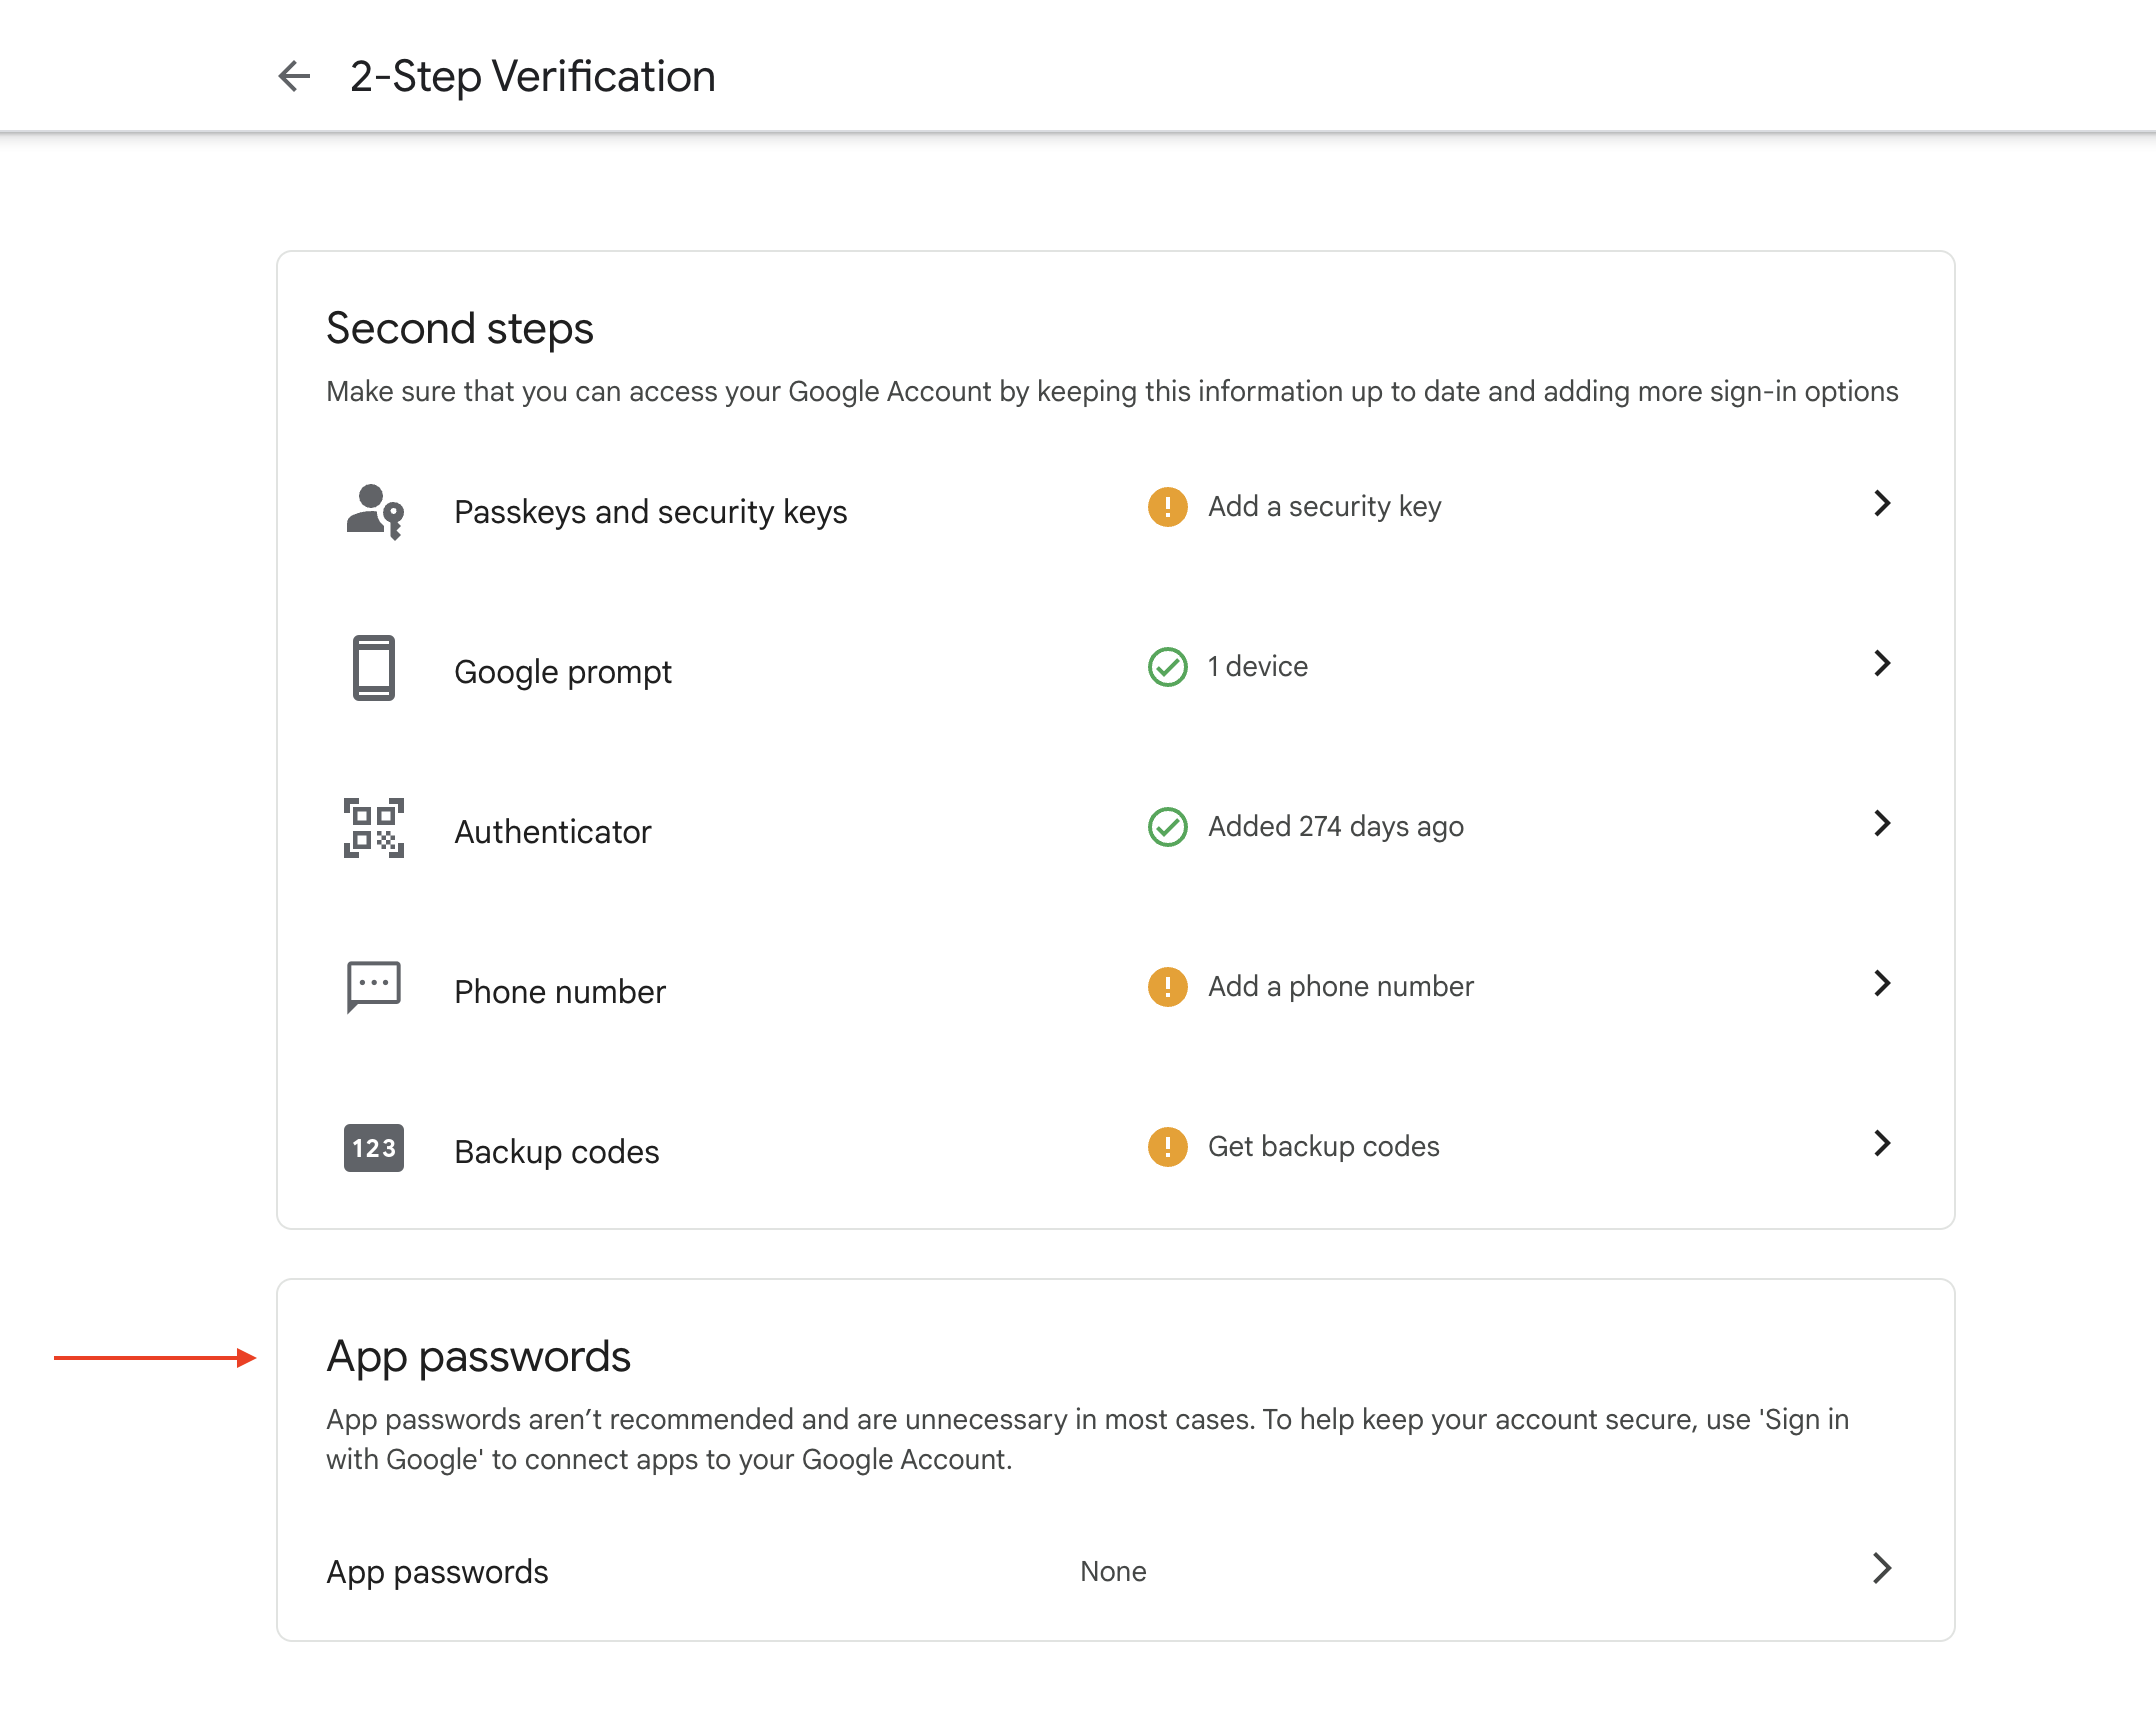
In your Google Account’s Security tab, go to 2-Step Verification.
Scroll to the bottom and click App passwords.
For the app, select Mail.
For the device, choose Other (Custom name) and enter a label like “Smartlead”.
Click Generate.
Copy the generated 16-character password.
Go to app.smartlead.ai and log in.
Navigate to the Email Accounts tab.
Click Add Account.
Enter your Gmail address and app password (not your regular Gmail password).
Use the following server settings:
SMTP Host: smtp.gmail.com
SMTP Port: 465
SSL: True
IMAP Host: imap.gmail.com
IMAP Port: 993
SSL: True
Click Test Connection.
You’ll receive a test email on your Gmail account.
If successful, you’ll see a confirmation message.
While connecting via IMAP and App Password works, Google OAuth is the more secure and reliable method. It doesn’t require storing passwords and reduces the risk of disconnection due to security policy changes.
To set up OAuth instead, follow Smartlead’s official guide to Google OAuth setup.
