When you upload a CSV of leads to a campaign, you match each column in the file to a Smartlead field. Mapped columns become lead fields and custom fields you can use as variables in your emails.
Your CSV needs a column of email addresses. Every lead needs an email address, so you can't import until one column is mapped to Email.
In the left menu, click Email Campaigns and open your campaign.
Open the Leads tab.
Click Upload New CSV. If the campaign has no leads yet, click Add Leads.


Select Upload CSV File and choose your CSV.
Click Continue.
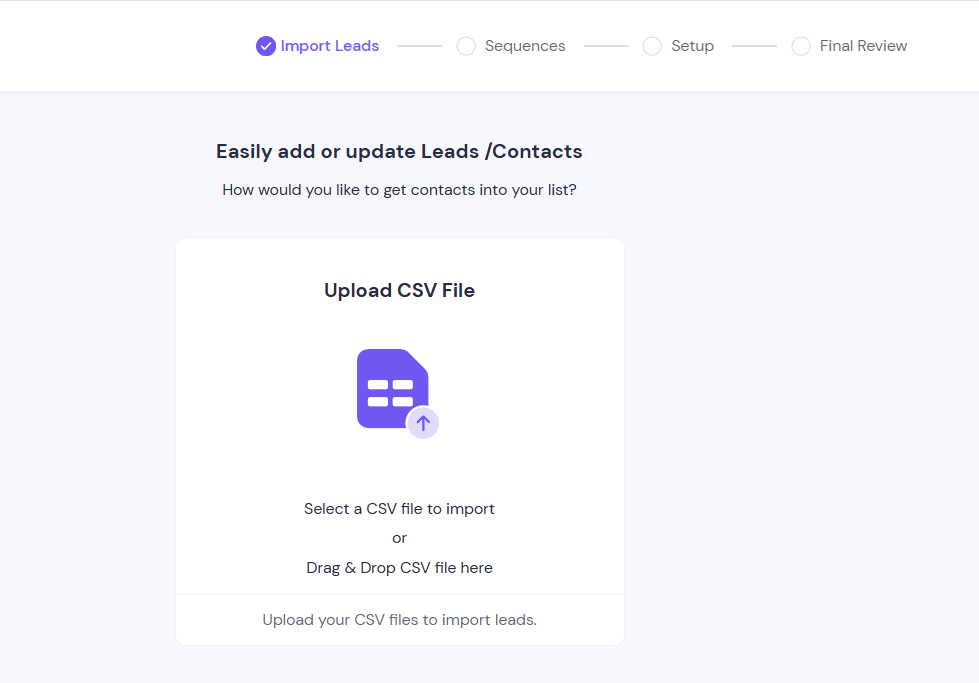
On Upload Settings, each toggle, when on, lets a group of leads through that would otherwise be skipped:
Global Block List: leads on your block list are still imported. Keep it off.
Unsubscribe List: leads who unsubscribed are still imported. Keep it off.
Community Bounce List: leads that bounced for any Smartlead user are still imported.
Existing Campaign Leads: when on, leads that are already in other campaigns are not imported.
Community Bounce List is on by default. We recommend turning it off to reduce bounce rates.
Click Continue when you're done.
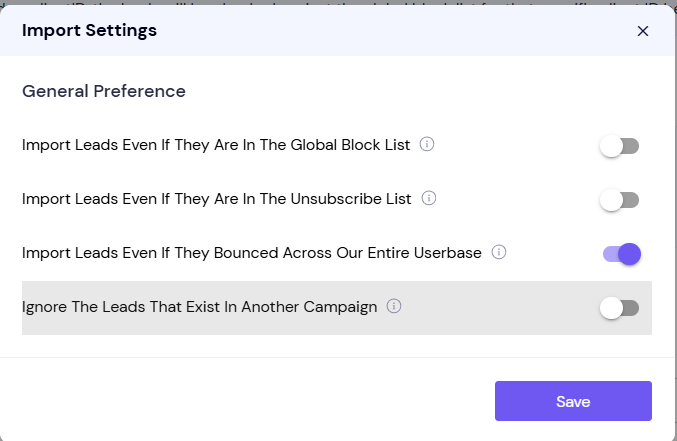
On Map Your Fields, each CSV column has a dropdown. Smartlead pre-fills the columns it recognises.
Check the columns that were matched automatically.
Map your email column to Email.
Map other columns to a standard field, or choose Custom Field to keep them as custom variables. The column header becomes the field name.
Leave columns you don't need as Ignore Field.
Click Import Leads.
When the upload finishes, you see a summary of the import.
Custom fields belong to the lead, not the campaign. A lead has one record across your account.
Uploading a lead that already exists updates its saved fields, even if the row is skipped as a duplicate.
An empty cell in a mapped column blanks that field on an existing lead. Set columns you don't want to change to Ignore Field.
A variable in your email must match the field name exactly, including case and underscores.
Import Leads is greyed out: no column is mapped to Email. Map your email column to Email.
A variable shows up blank in an email: the lead's cell was empty, or the variable name doesn't match the column header exactly. Fix the CSV or the variable, then upload again.
Still stuck? Contact support from the chat in your Smartlead dashboard.