SmartDialer lets you call your leads directly from Smartlead - with full email context, automatic call logging, recording, and AI-powered transcripts.
This guide walks you through:
Setting up your calling number
Making your first call
Using the dialer during a call
Logging call details
Reviewing recordings and transcripts
Handling common issues
Before you can call leads, you need a dedicated phone number.
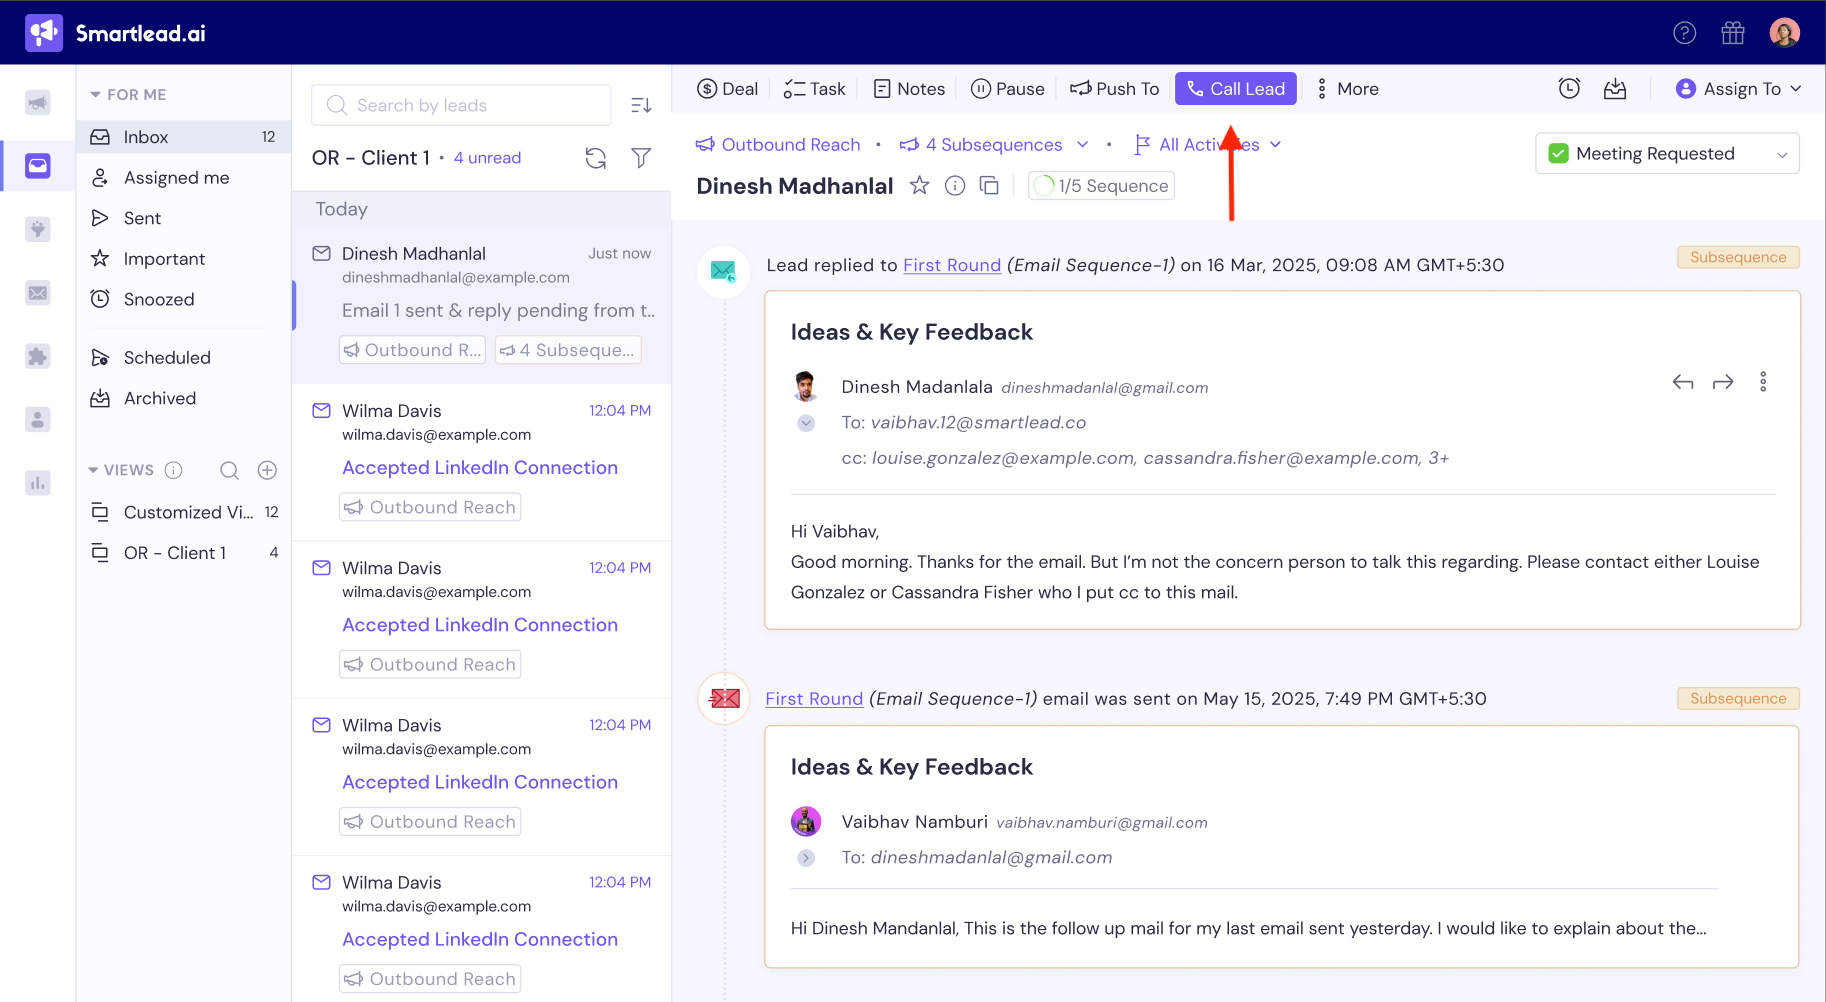
Go to Master Inbox (From left hand navigation >> click on Master Inbox tab)
Open any lead conversation
Click Call Lead
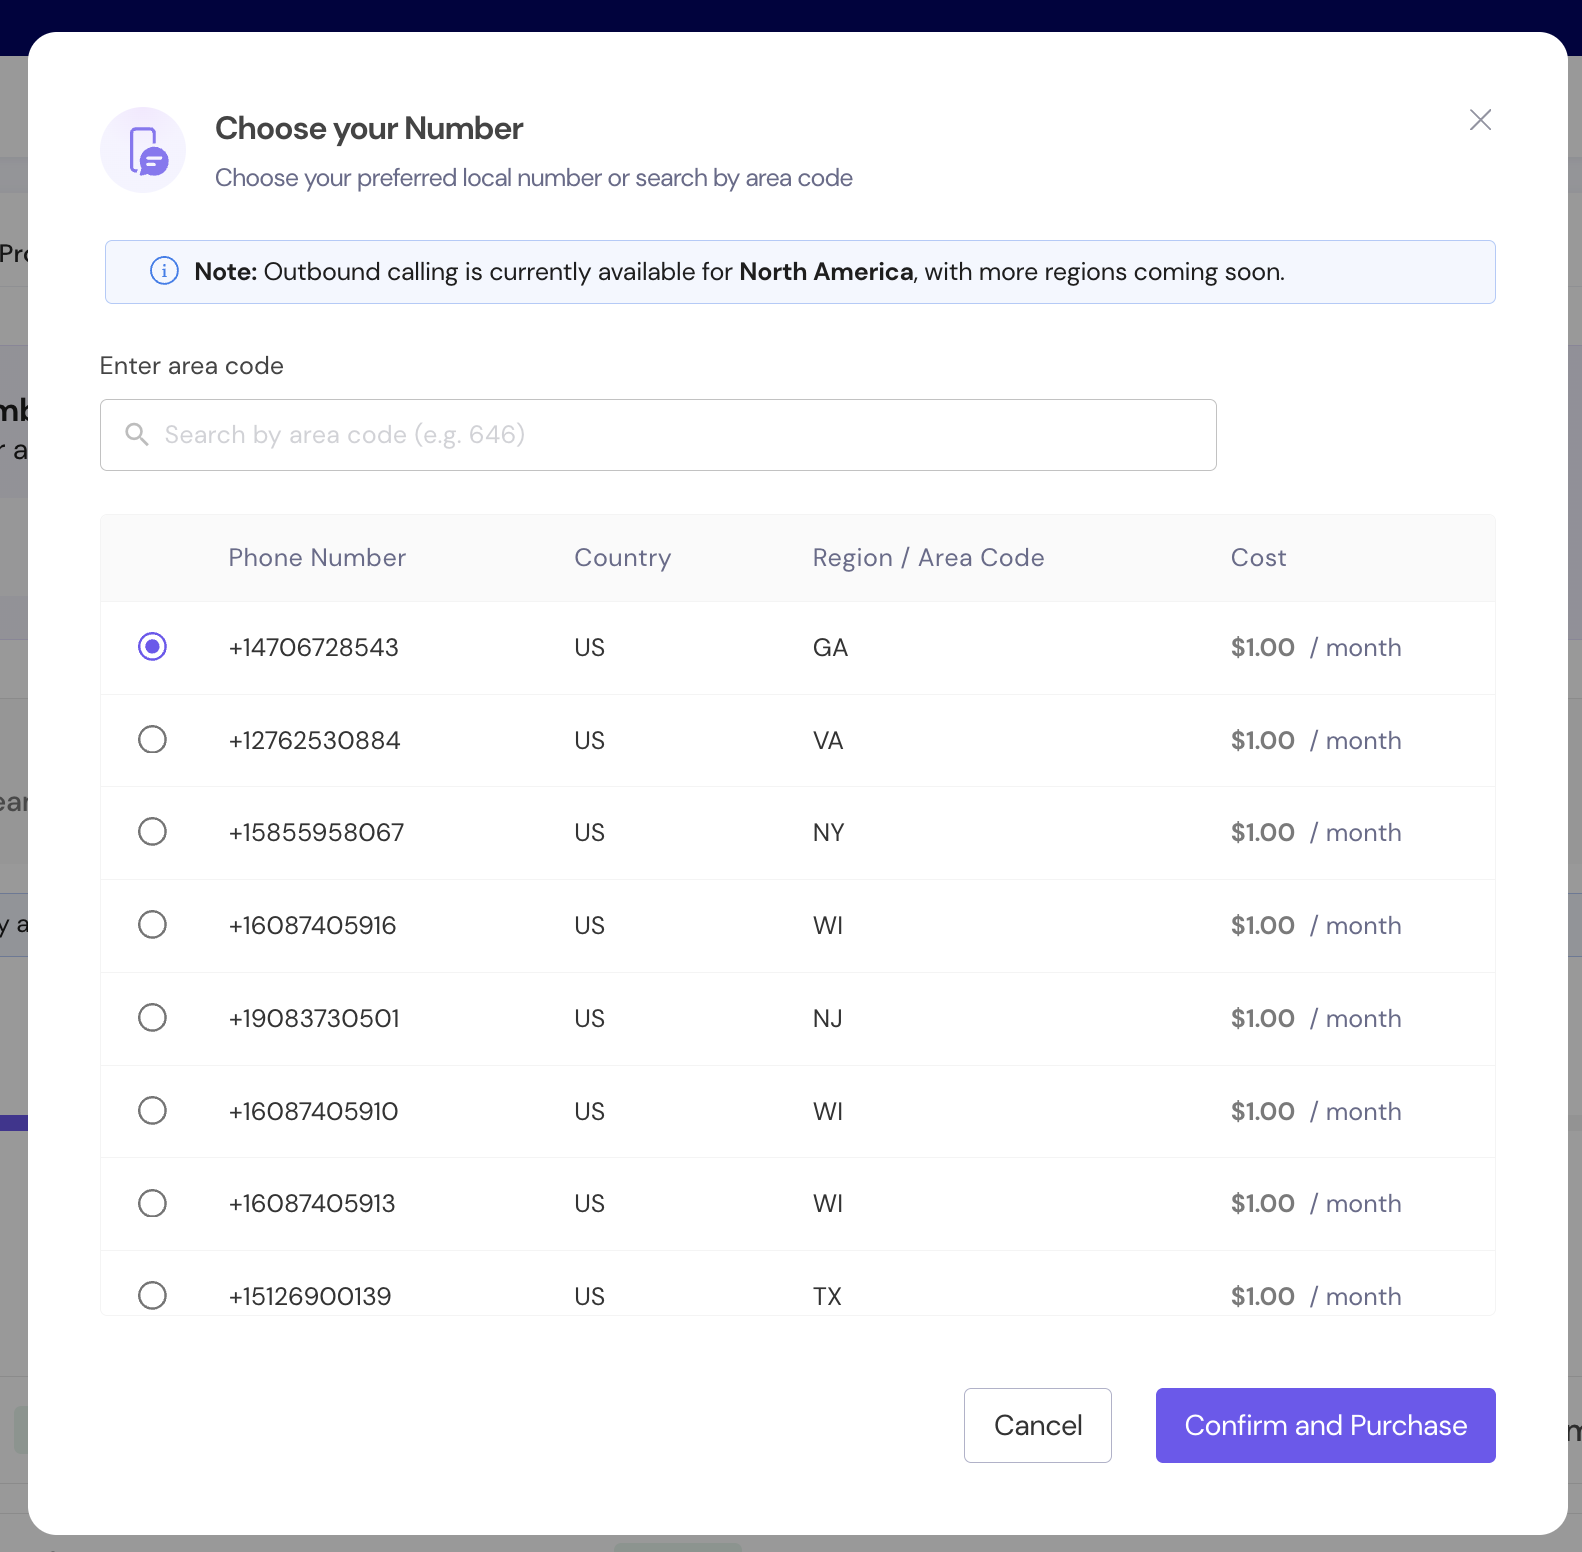
If you don’t have a number yet, you’ll see:
“You don’t have a calling number yet.”

Click Buy a Number.
You can:
Search by area code (e.g., 415, 212)
Choose from available US local or toll-free numbers
Each number shows:
Phone number
Country
Region / Area code
Monthly cost
Select your preferred number and click Confirm and Purchase.
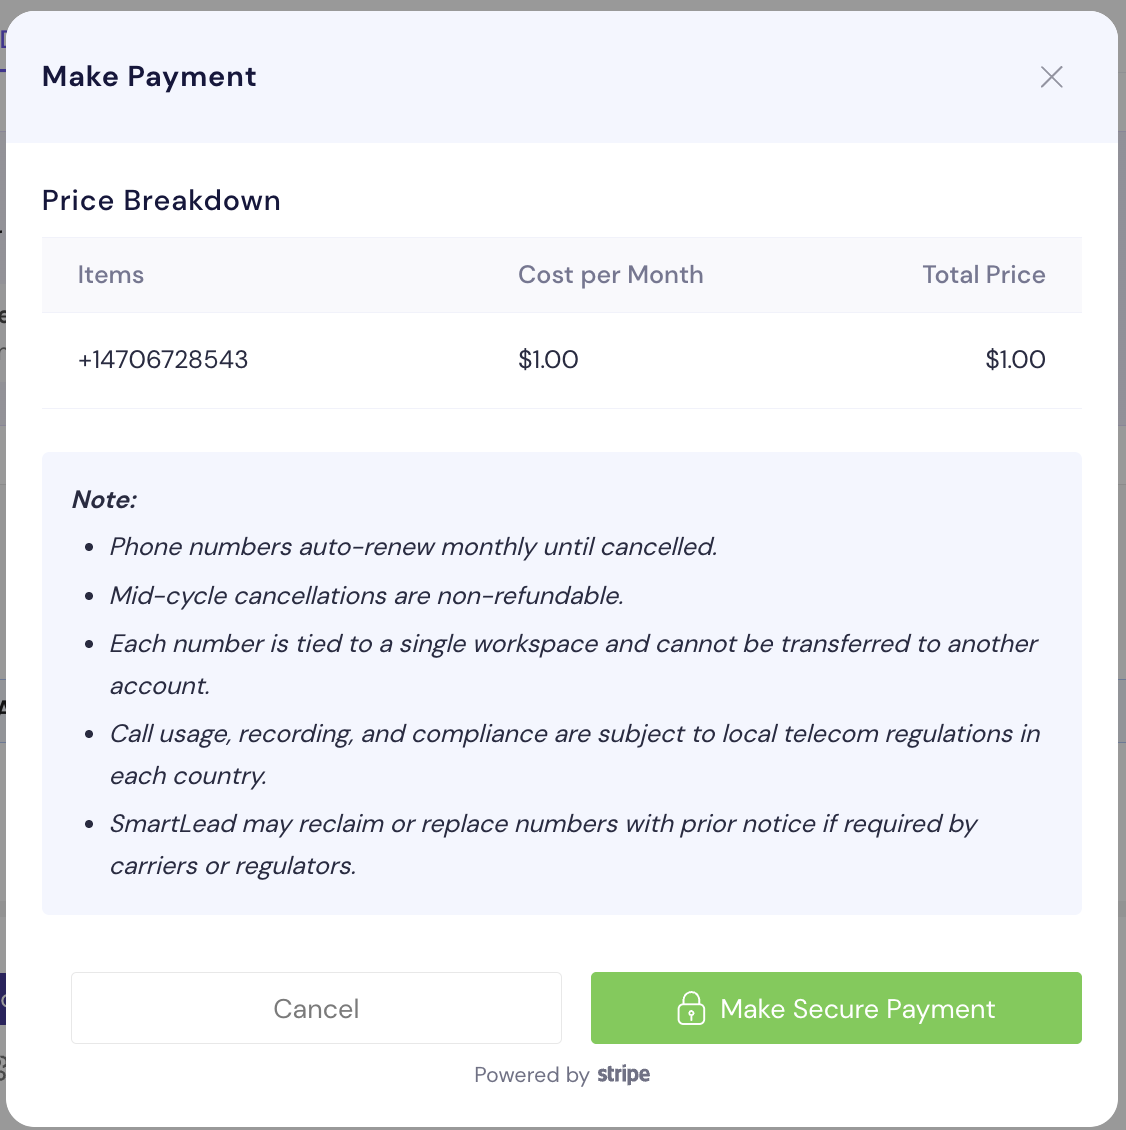
You’ll see:
Monthly cost breakdown
Notes on auto-renewal and compliance
Key details:
Numbers auto-renew monthly
Mid-cycle cancellations are non-refundable
Each number is tied to one workspace
Usage and recording comply with telecom regulations
Click Make Secure Payment to complete via Stripe.
Once payment is successful:
Your number is provisioned automatically
You can start calling immediately
No manual setup required
Once your number is active:
Open a lead conversation in Master Inbox
Click Call Lead (refer to the first screenshot)
You’ll see the Start a Call modal (see below screenshot).

Note: Client Number is hidden in the above screenshot.

You can:
Select Your Number (if you own multiple numbers)
Confirm the Client Number
Toggle Record Call (ON by default)
Click Start Call.
The SmartDialer interface appears as a floating panel.
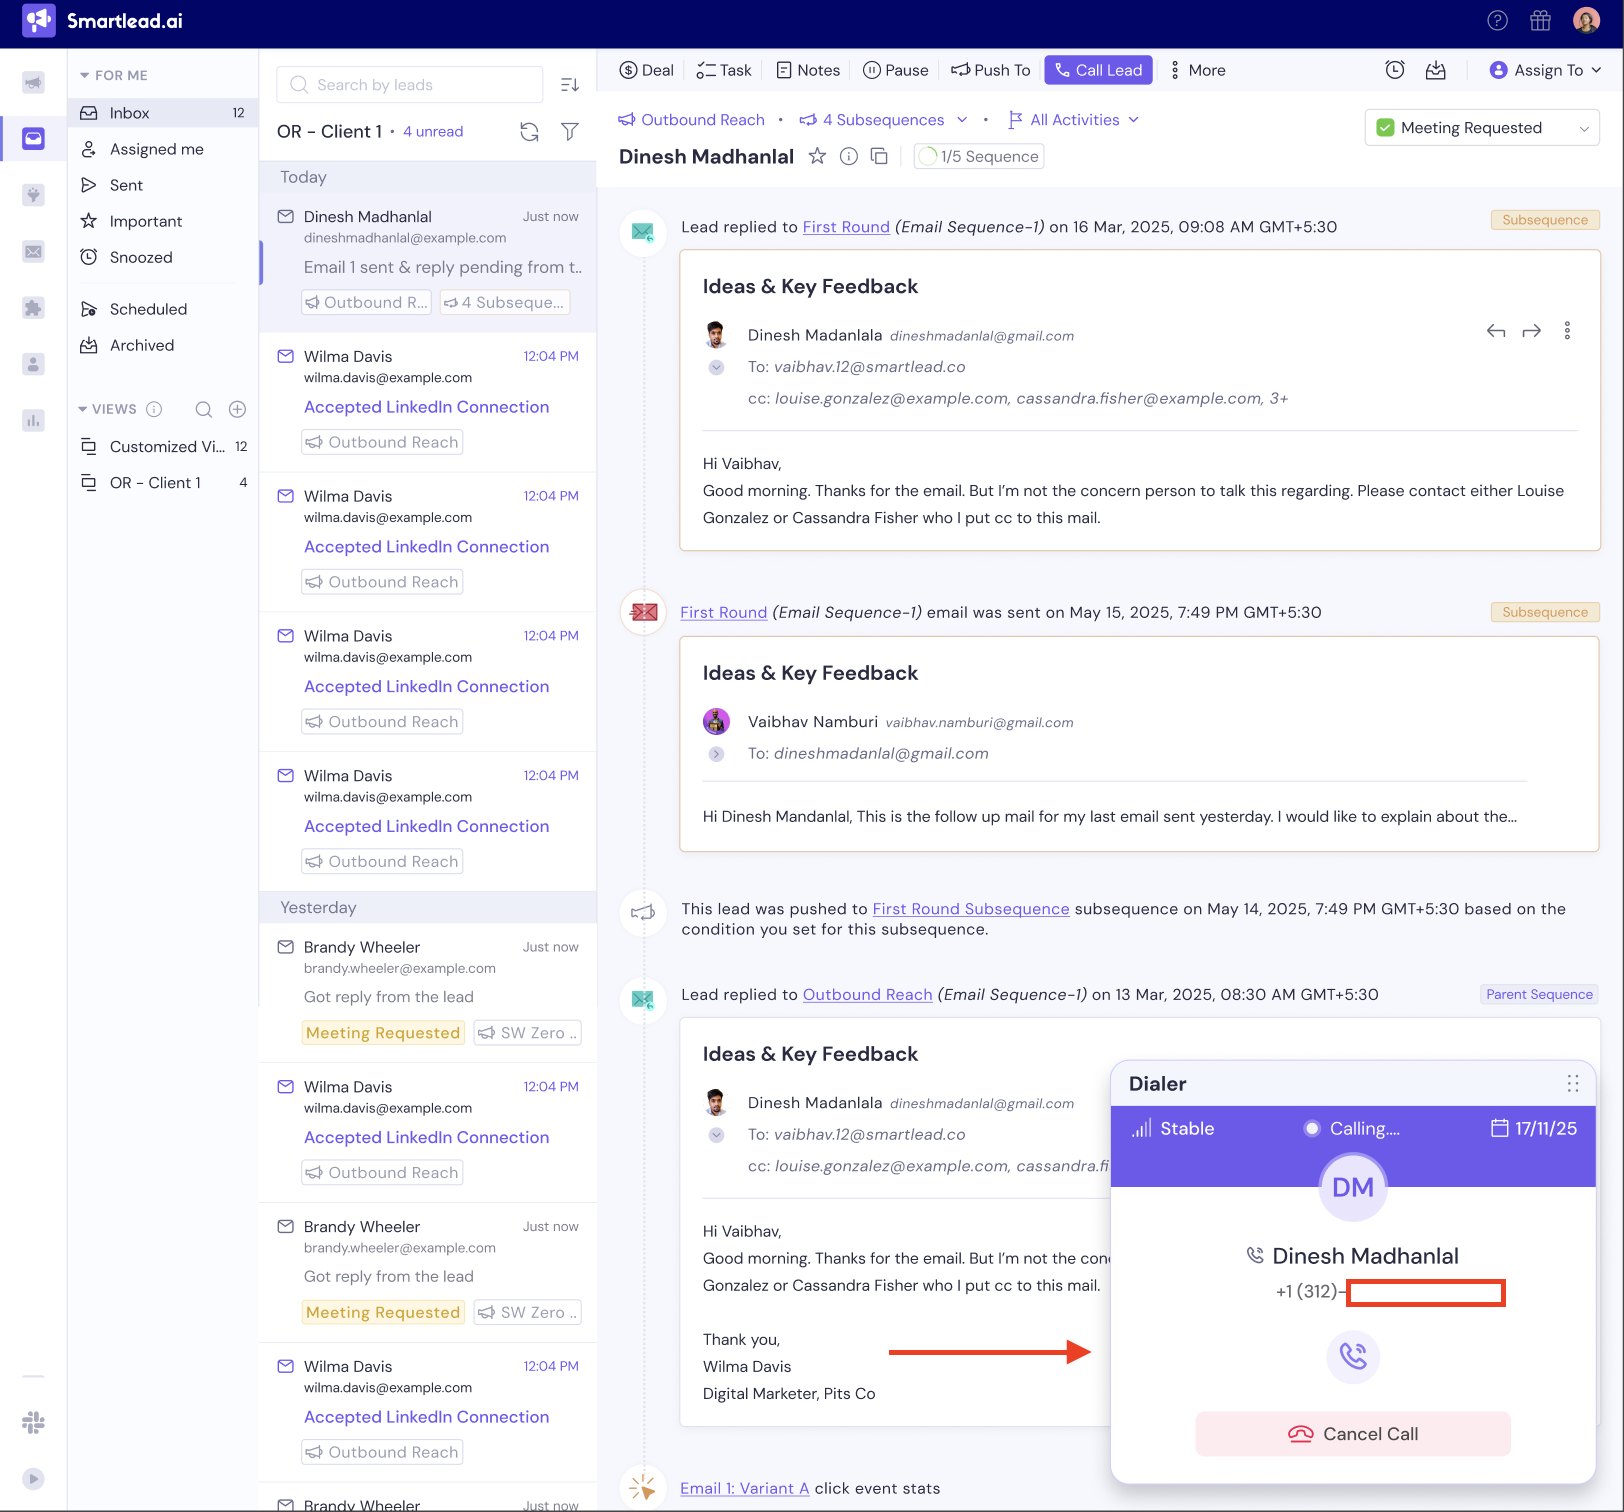
In the call active state, you’ll see:
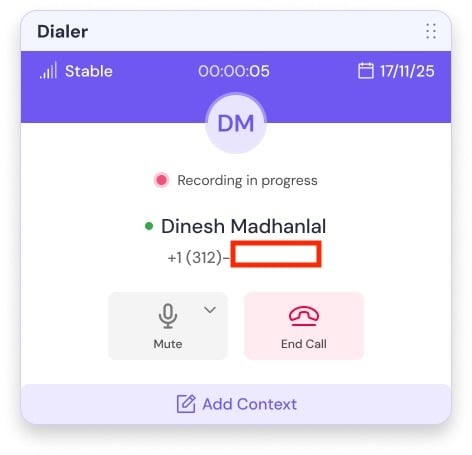
Call timer
Recording indicator
Lead name and phone number
Mute button
End Call button
Add Context option
Important:
Email history remains visible in the background.
You can reference past conversations while speaking.
Recording is enabled by default.
You can turn it off before starting the call.
A recording indicator shows when recording is active.
When you end the call, SmartDialer prompts you to log call details.

You can add:
Purpose (e.g., Qualification Call)
Tags
Notes (up to 500 characters)
Click Submit to save.
If you skip logging:
The call will still be saved
But it won’t include purpose, tags, or notes
You can choose:
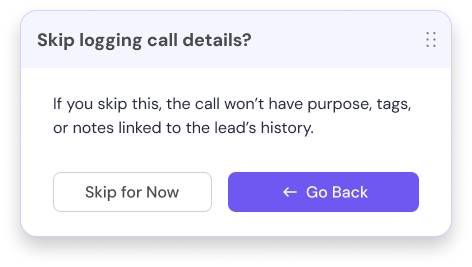
Skip for Now
Or go back and complete logging
When the call is ended, if transcript generation is complete, you’ll see:
“Call recording and transcript are now ready for review.”
Click View Transcript to open it.

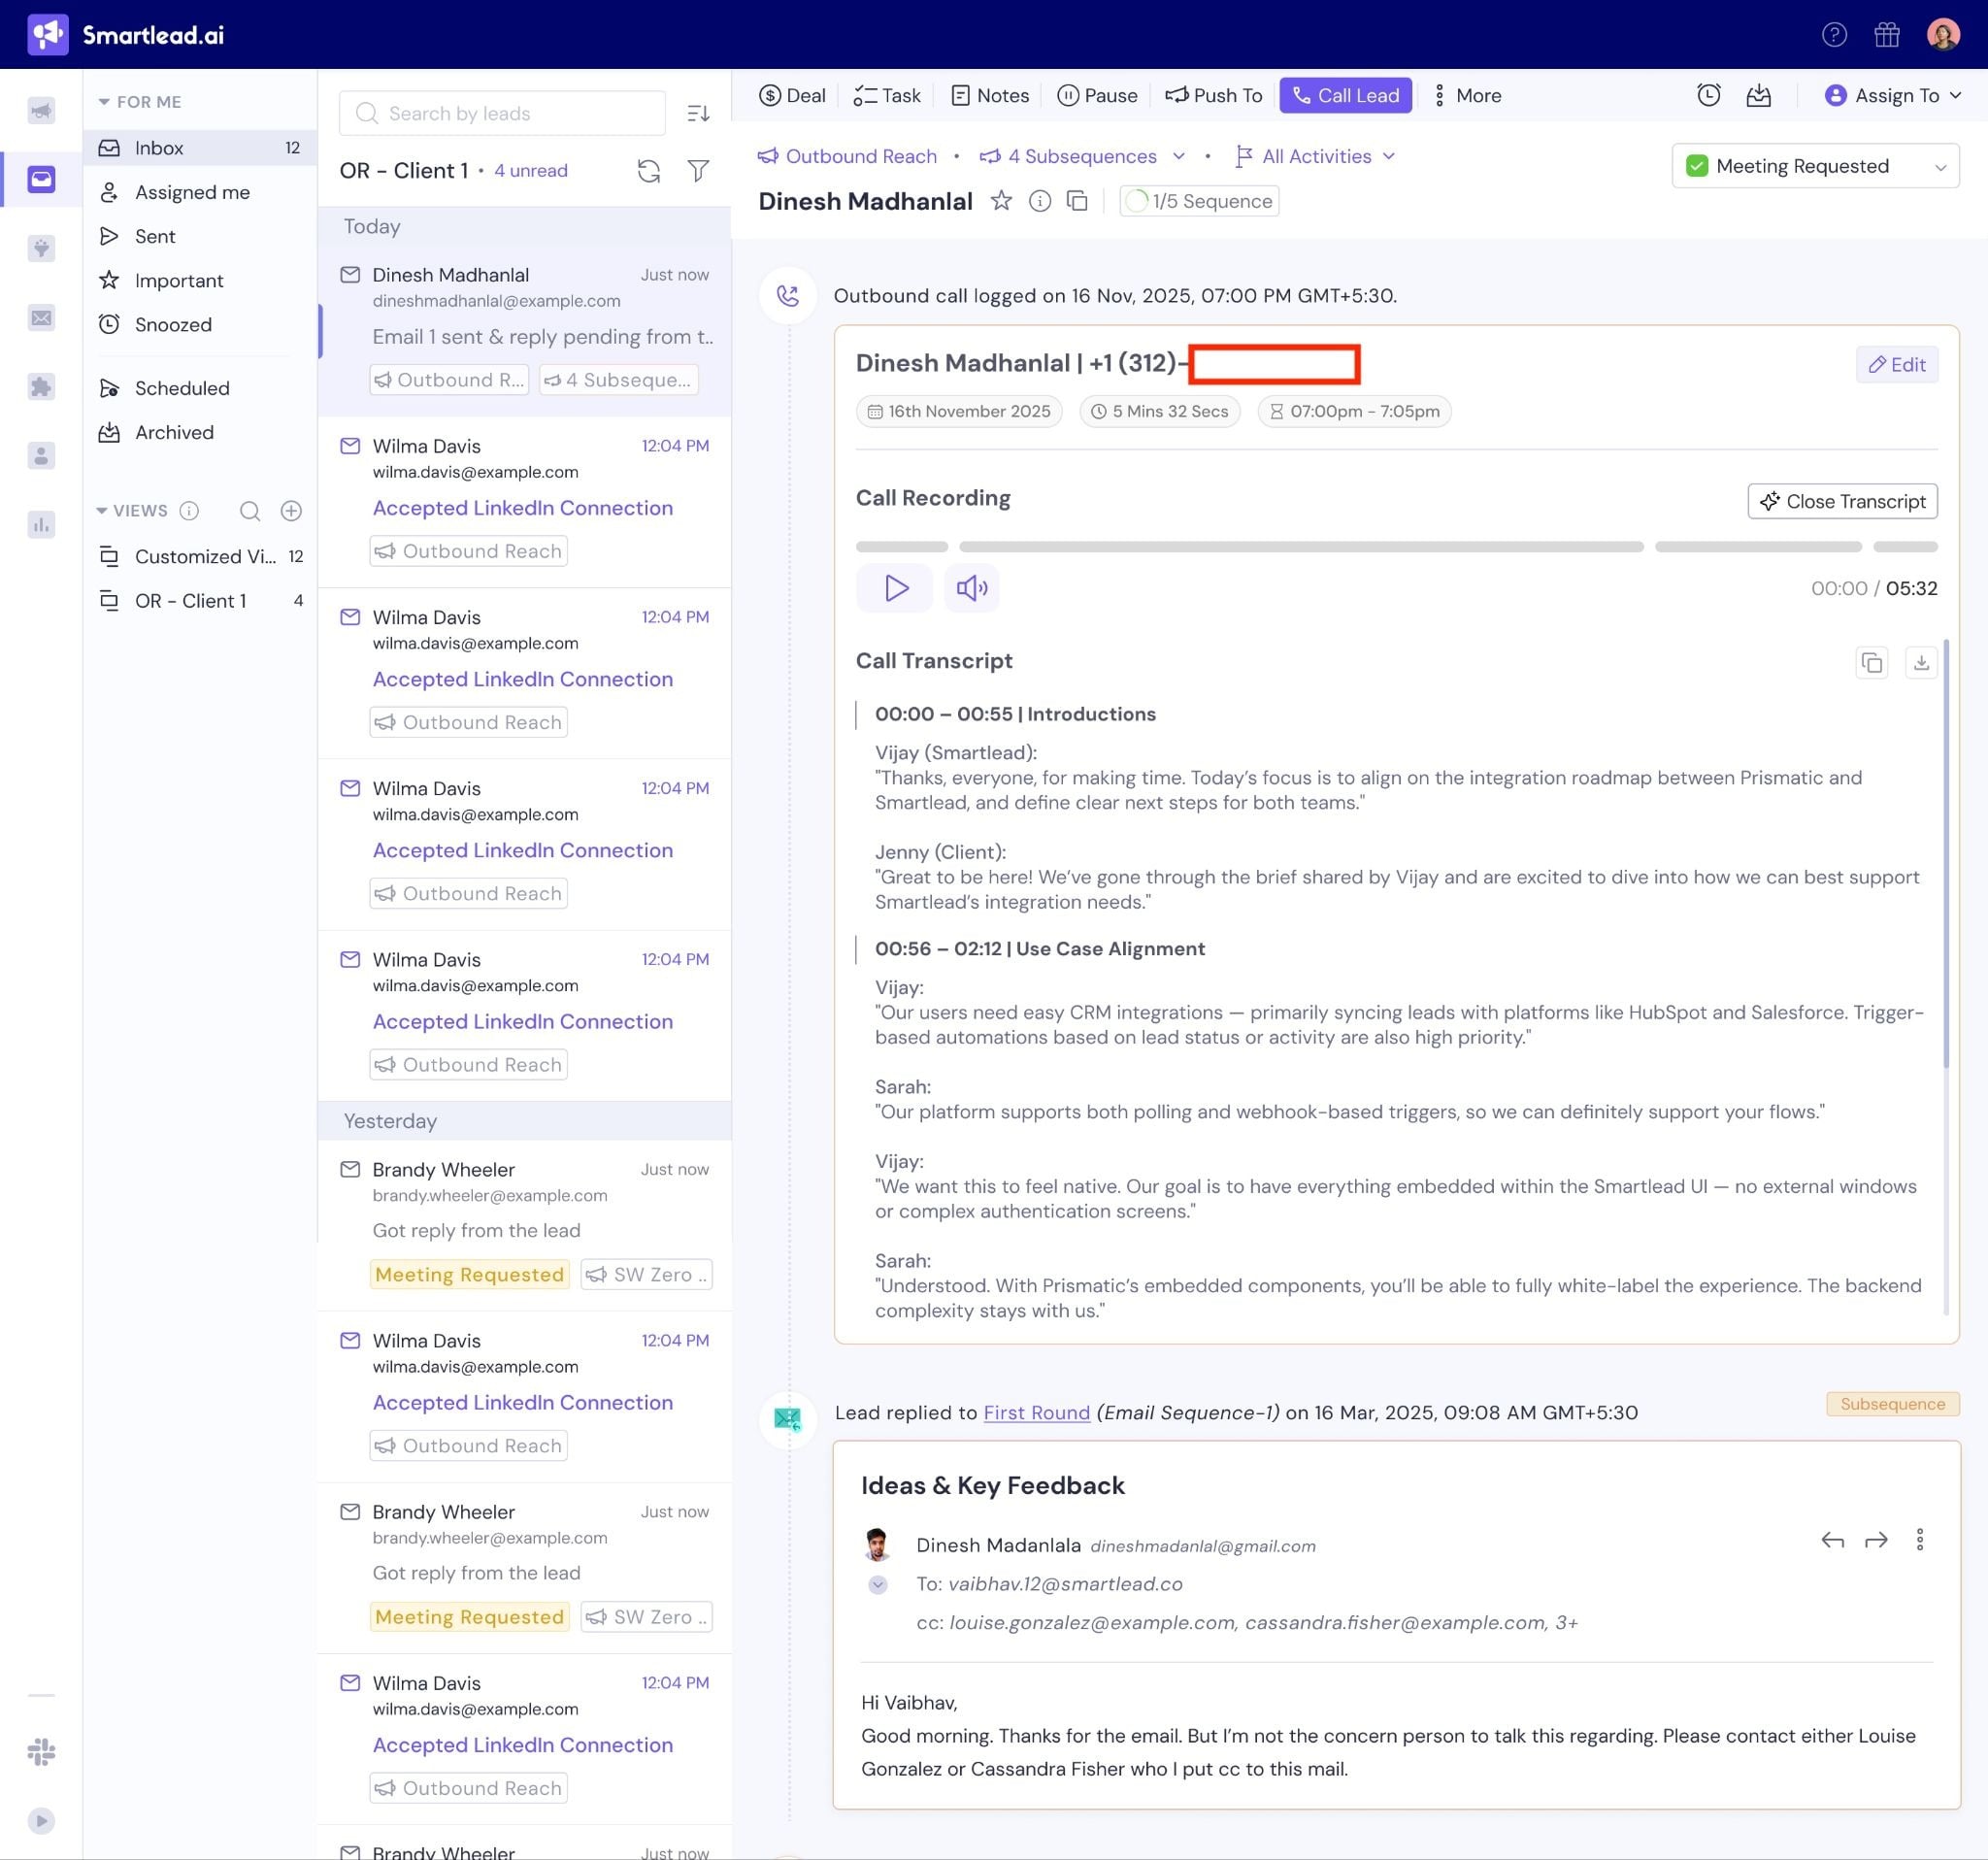
Every call is automatically logged inside the lead’s Master Inbox timeline.
You’ll see:
Call date
Duration
Time range
Recording section
Transcript section
Edit option
This ensures:
Calls are linked to the correct lead
Call activity sits alongside emails and subsequences
Sales history remains centralized
Transcripts are generated automatically after the call ends.
Features:
Timestamped sections
Speaker separation
Scrollable transcript view
You no longer have to wait for a reply to pick up the phone - you can build a manual call directly into your outreach sequence, right alongside your email steps.
Go to Email Campaigns and Create a New Campaign (Learn More)
Click the Sequence tab
Below your existing step(s), click + Add Sequence
Three step types appear:
Email - Automated email
Call - Add to queue
Manual - Send manually
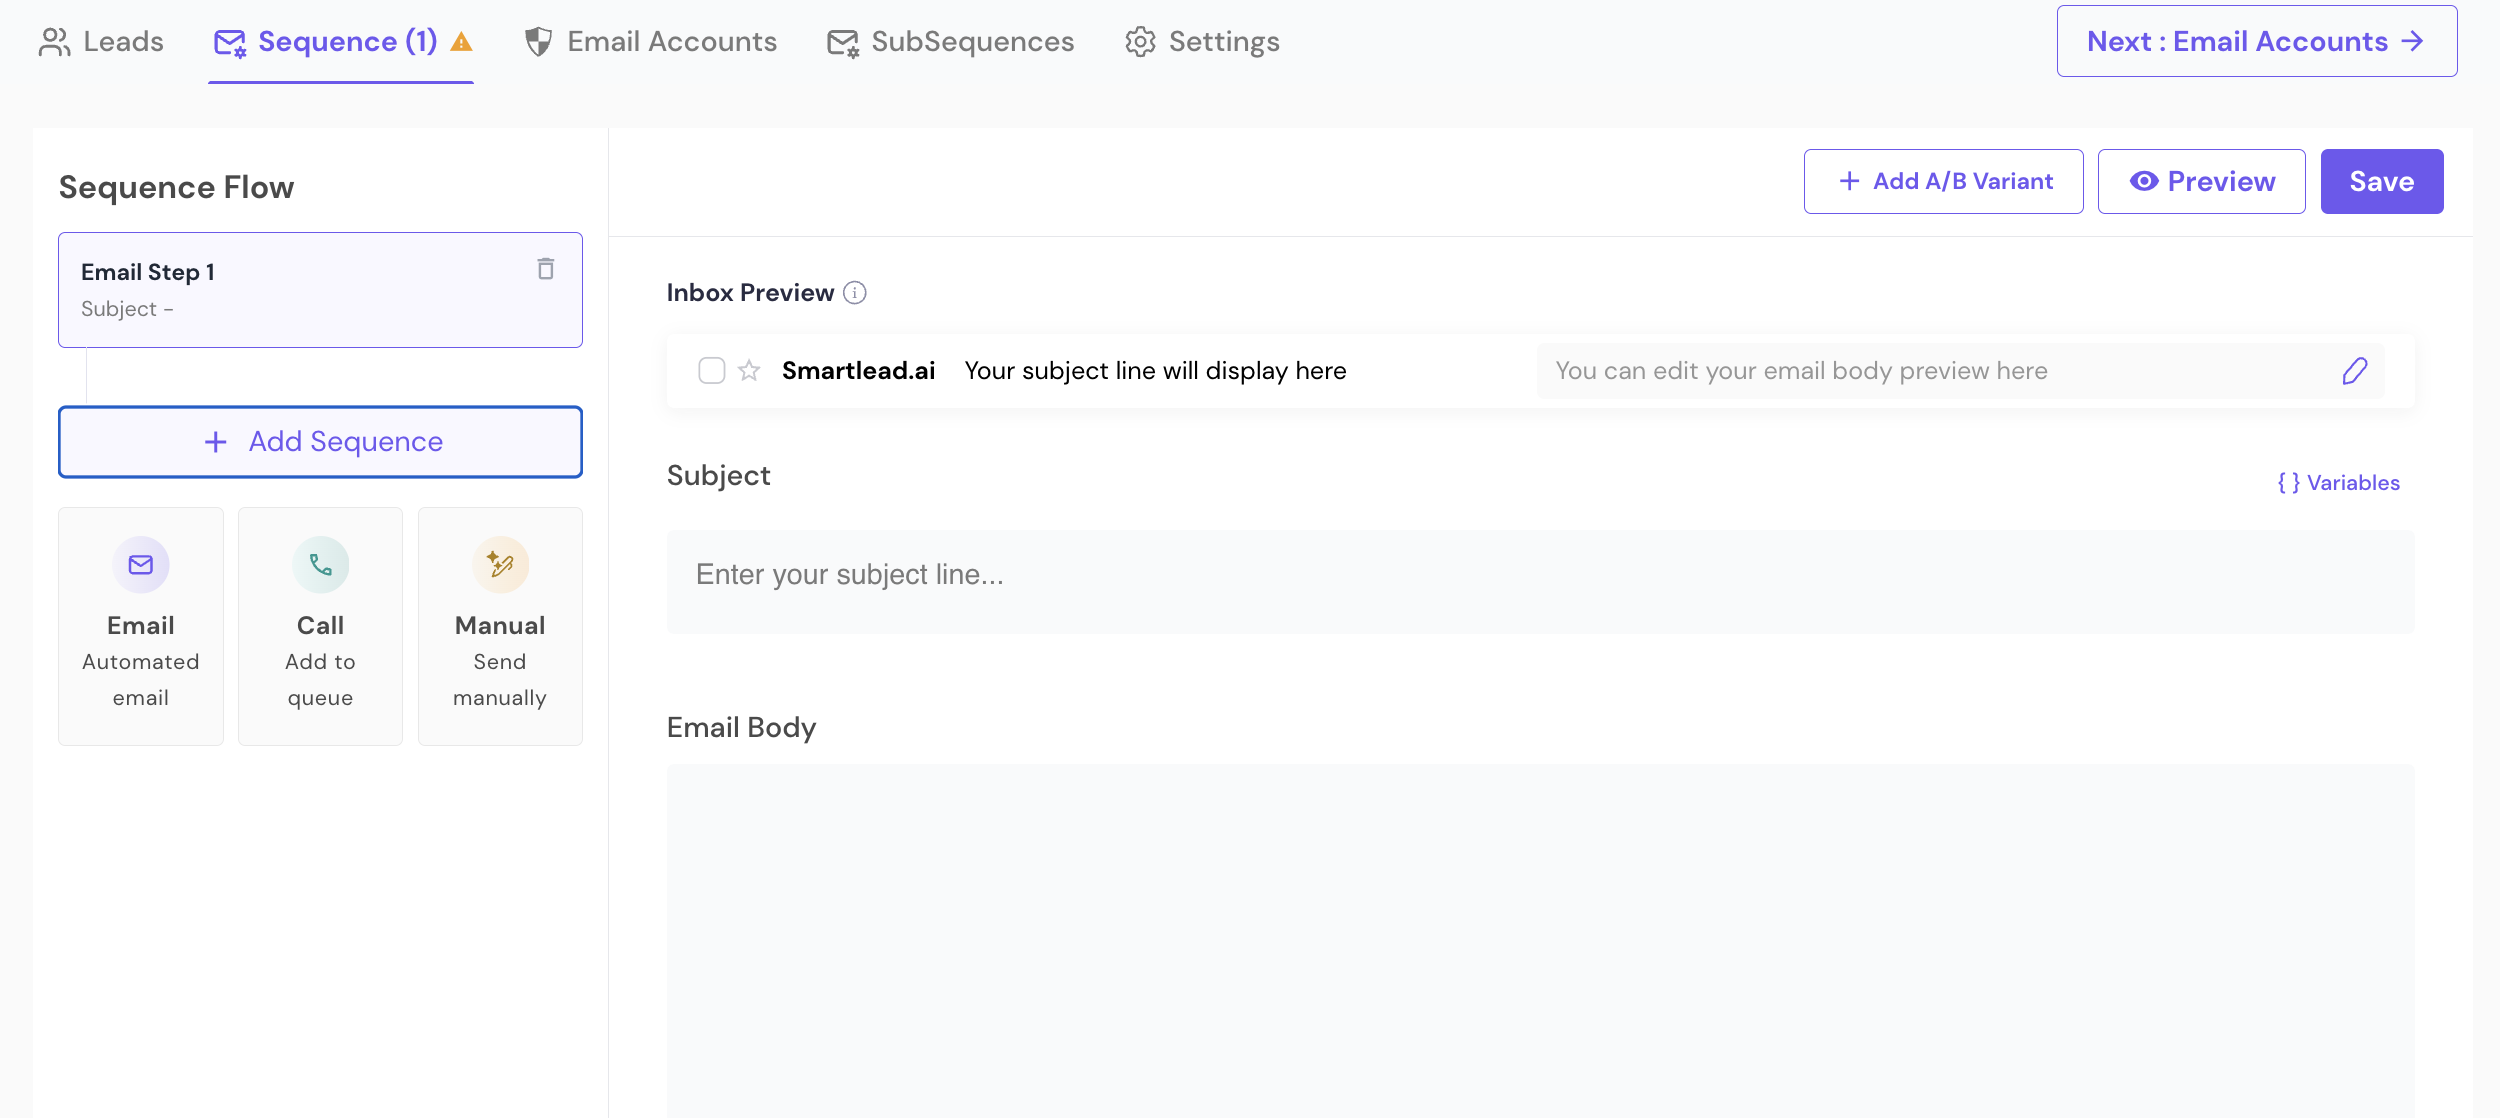
Select Call
Set Wait for [X] days to control how long after the previous step the call step should trigger (e.g., "Wait for 2 days" after Email Step 1)
The new step appears in the Sequence Flow as Call Step [N] - Manual phone call to lead
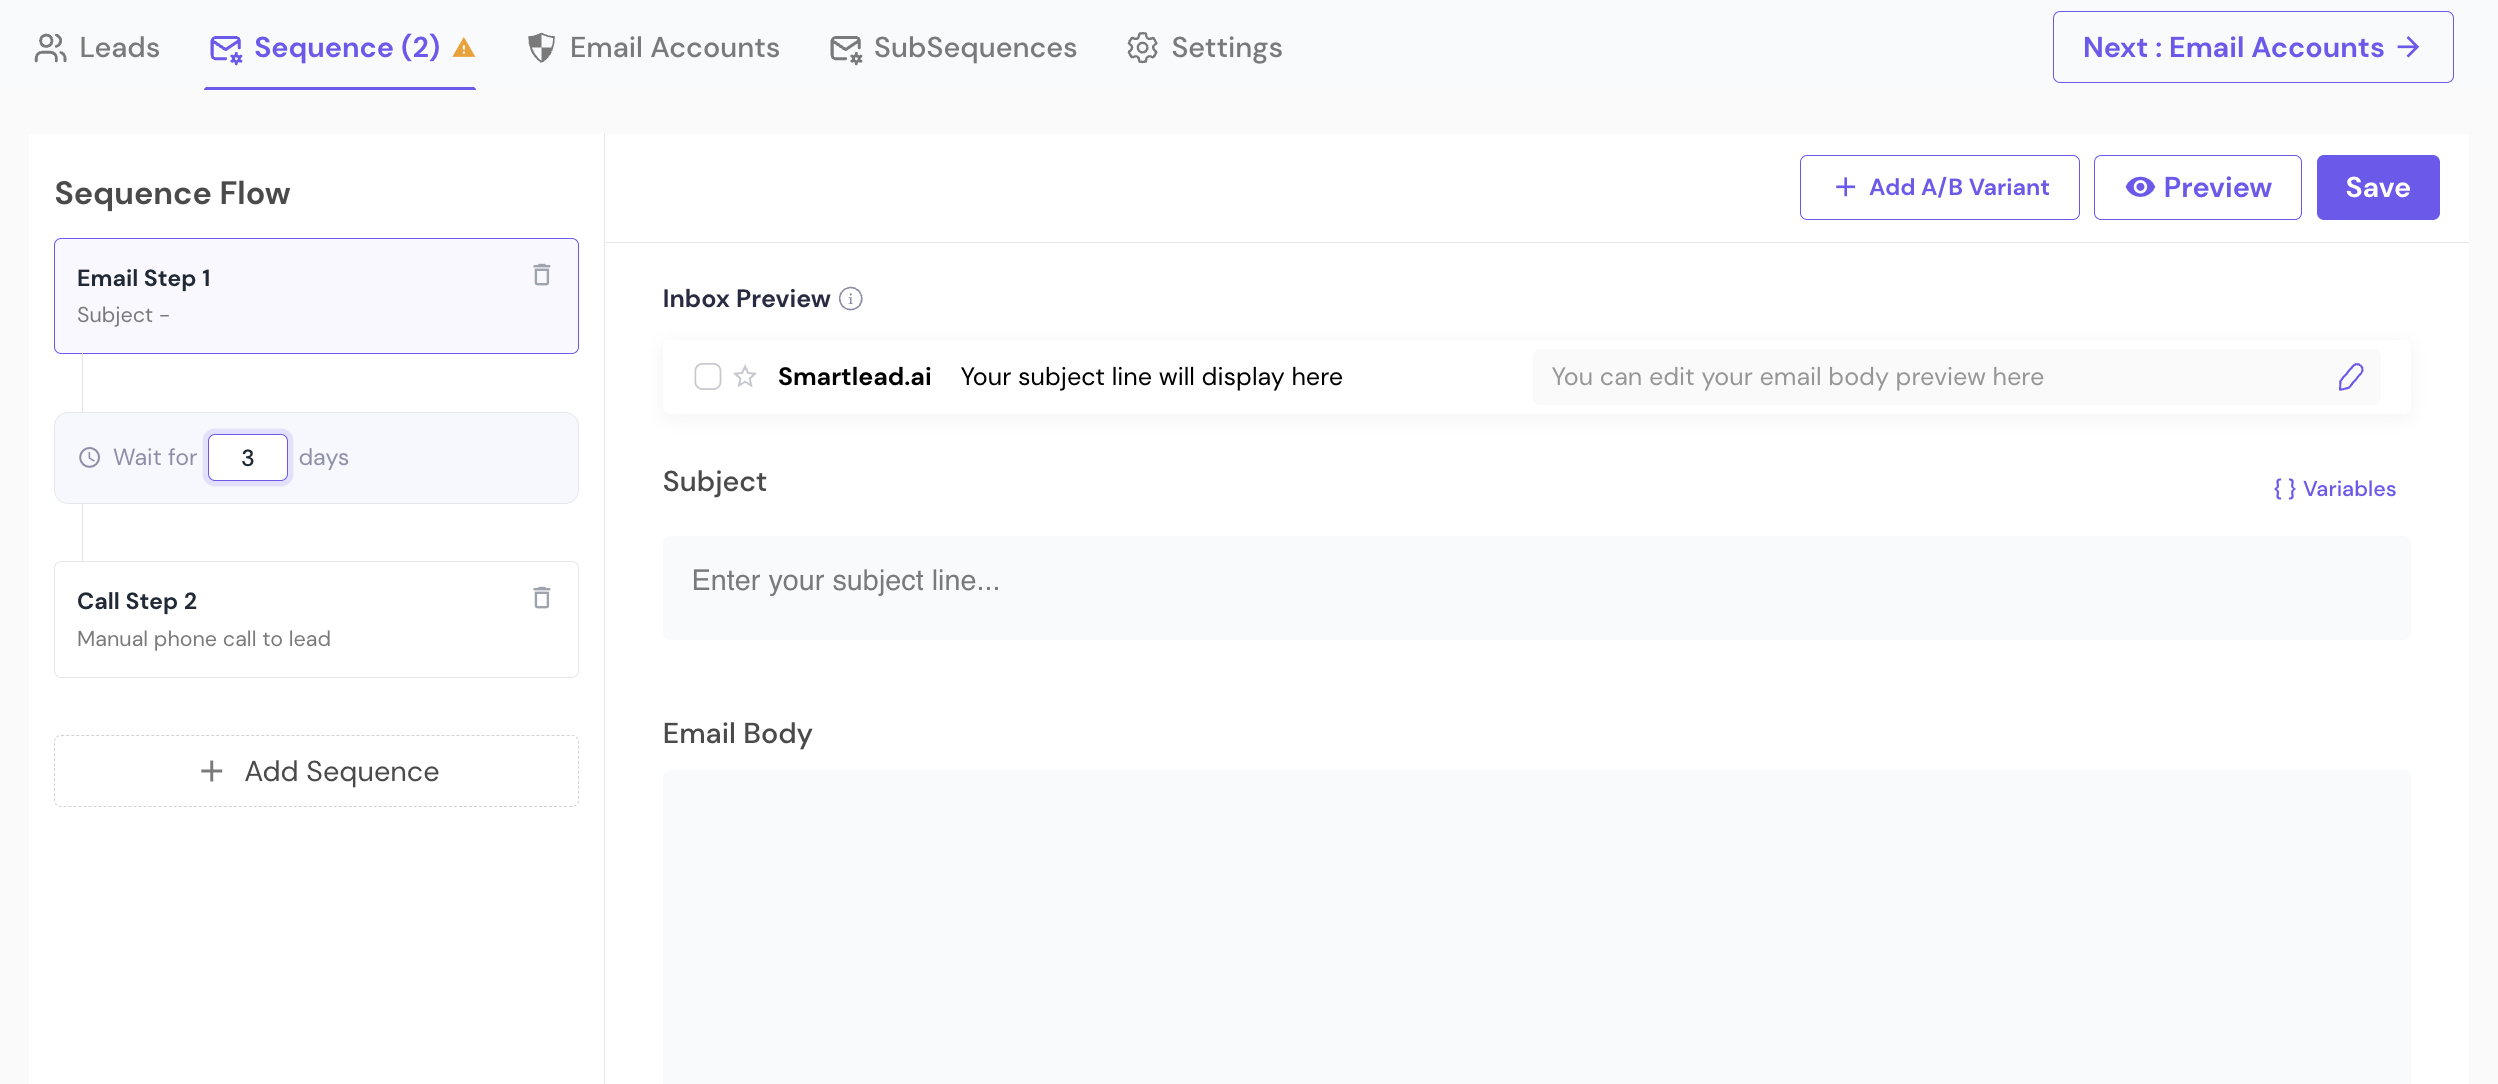
Click Save, or continue to Next: Email Accounts
Your changes auto-save as you build the sequence
A Call step is a manual dial - it queues the lead for your team to call, it does not place an automated call.
Once a lead reaches a Call step in the sequence:
They're automatically added to the Sequence Leads queue inside the dedicated SmartDialer section (not Master Inbox)
Leads are shown with their local time, so you can call during their business hours
Leads waiting more than 7 days surface a reminder banner so none get missed
For the full workflow on working this queue, dialing, reviewing call logs, and managing your numbers from the dedicated SmartDialer section, see: SmartDialer Section: Call Queue, Logs & Numbers.
Always confirm phone number before calling
Keep recording enabled for transcript benefits
Add purpose and tags immediately after call
Use transcript timestamps to review objections
Call while referencing email history for contextual follow-ups
Use a Call sequence step for leads you want to prioritize for a live conversation partway through your outreach
SmartDialer plans start from $9/month and go up to $699/month, depending on the number of minutes and users selected.
Calls are billed per minute
Call recording & transcription are billed at a higher per-minute rate
Higher plans offer more minutes and lower per-minute costs
Some tiers include unlimited minutes
US local and toll-free numbers start at $1 per number / month.
You can view available plans, pricing tiers, and estimated minutes inside your account:
Profile → Settings → Subscription → SmartDialer
Pricing updates dynamically based on your selected plan.
