When importing leads into Smartlead using a CSV file, you can map your CSV columns to campaign variables. This enables powerful personalization for your email sequences, allowing you to use custom fields like {{company}}, {{job_title}}, or any data point from your CSV.
Smartlead automatically maps standard fields such as Name, Email, and Location, while giving you full control to map additional columns manually as custom variables (up to 40 per lead).
Go to Engage » Campaigns
Edit Campaign
Select the campaign where you want to import leads and click Edit.

Import Leads Section
In the Import Leads section of the campaign editor, click Import CSV.
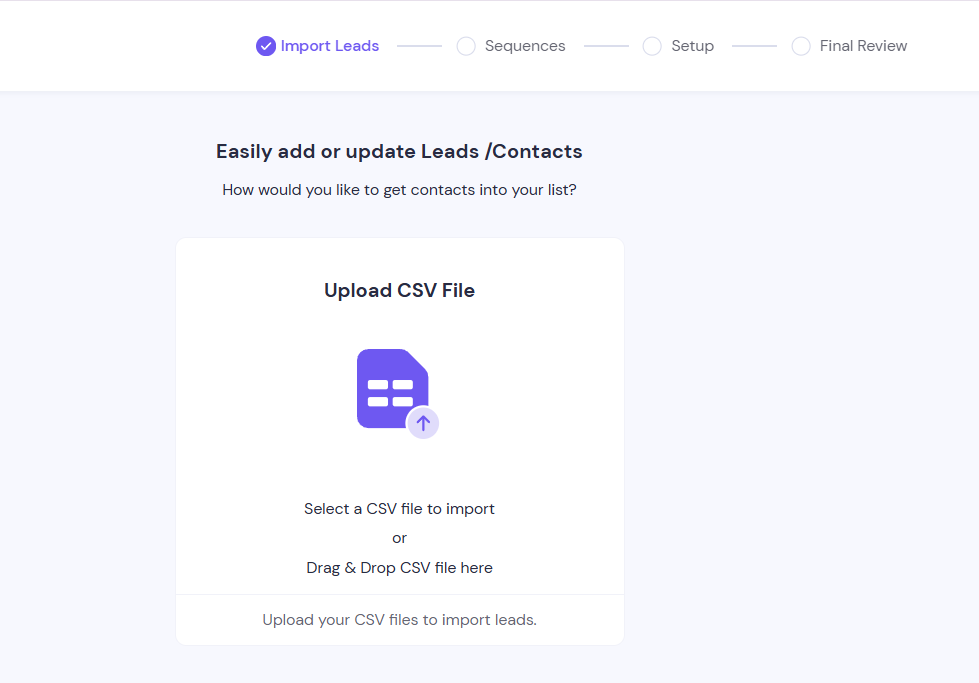
Choose Your CSV File
Select your properly formatted CSV file from your local storage. Ensure the CSV is correctly formatted to avoid errors.
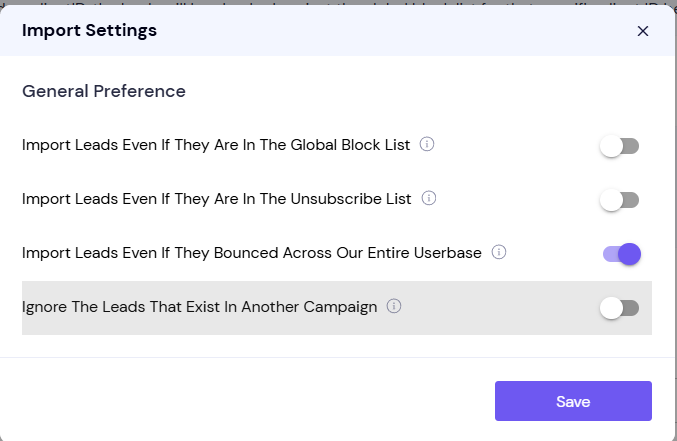
Configure Import Settings
Choose from the following options:
Import leads even if they are in the Global Block List.
Import leads who are on the unsubscribe list.
Import leads that have bounced across the entire userbase.
Recommended: Keep this option enabled to avoid missing any leads.
Skip leads that are already in another campaign.
After selecting your preferred options, click Save.
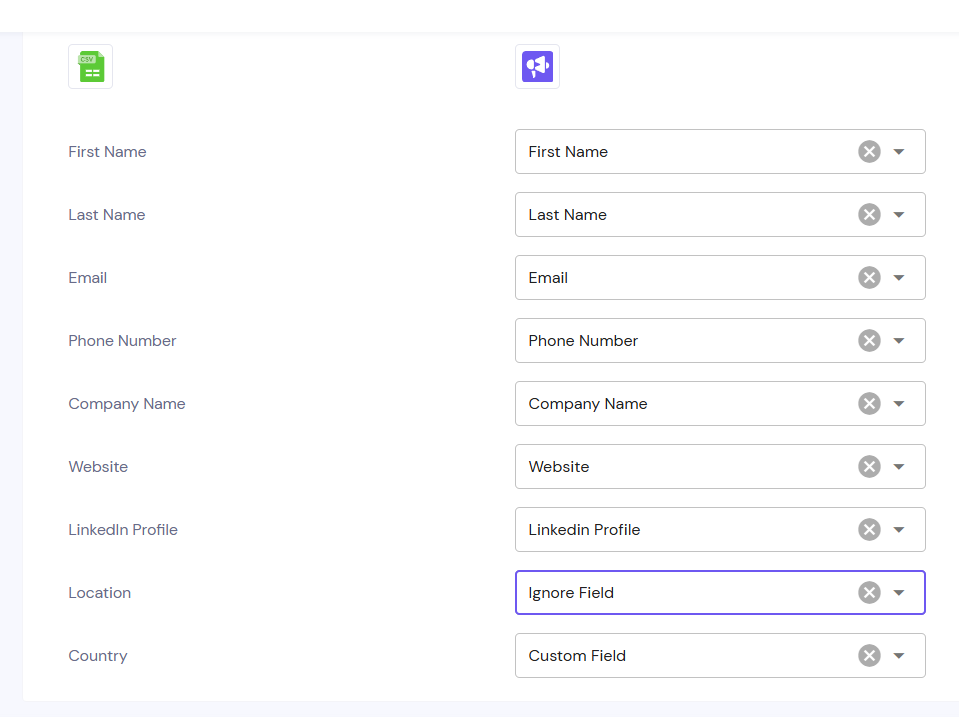
Map Columns
Default Fields: Smartlead auto-maps standard fields like Name, Email, and Location. You can change them manually if needed.
Custom Variables: Map other columns (e.g., Company, Job Title, LinkedIn URL) to custom variables — up to 40 per lead.
Ignore Columns: For any unnecessary column, select Ignore from the dropdown.
Complete the Import
After mapping the columns, finalize the import. Your leads will now be added with the appropriate variable mappings.
You can use up to 40 custom variables per lead.
Make sure variable placeholders (e.g., {{first_name}}) used in your email copy match the variable names mapped during import.
If a CSV row has a blank cell for a variable, that value will not populate in the email.
Q: I mapped the variable but cannot see the data in the email copy when used in the email. What should I do?
A: If the variable is not displaying data in the email copy, check your CSV file to ensure it contains the data for the corresponding lead email address. If the CSV does not have data for a specific lead, the variable will not reflect in the email copy.
Q: The campaign shows a "Drop a CSV" error message while importing the file. What should I do?
A: Please check the CSV file format to ensure it is properly formatted. Additionally, try using Chrome or Safari browser for the import, as these browsers typically work best for uploading CSV files.